WizMote Control
A WizMote gives you physical control over playback on your CAST-1. The Apollo CAST-1 WizMote blueprint maps each of the nine buttons to a playback action, a light toggle, or any Home Assistant action you want, all set up without leaving Home Assistant.
Every button ships with a sensible default, so your WizMote works the moment you import the blueprint. Open any button's dropdown to change it, or set one to Send HA Event to run a custom action like playing a Music Assistant playlist.
| Button | Default action |
|---|---|
| On | Play |
| Off | Pause |
| Night | Toggle Light |
| Brightness Up | Volume Up |
| Brightness Down | Volume Down |
| Button 1 | Previous Track |
| Button 2 | Next Track |
| Button 3 | Send HA Event |
| Button 4 | Send HA Event |
Each dropdown offers the same choices: Nothing, Play, Pause, Play / Pause, Next Track, Previous Track, Volume Up, Volume Down, Toggle Light, or Send HA Event.
Pair Your WizMote
Before the blueprint can control anything, pair your WizMote with the CAST-1.
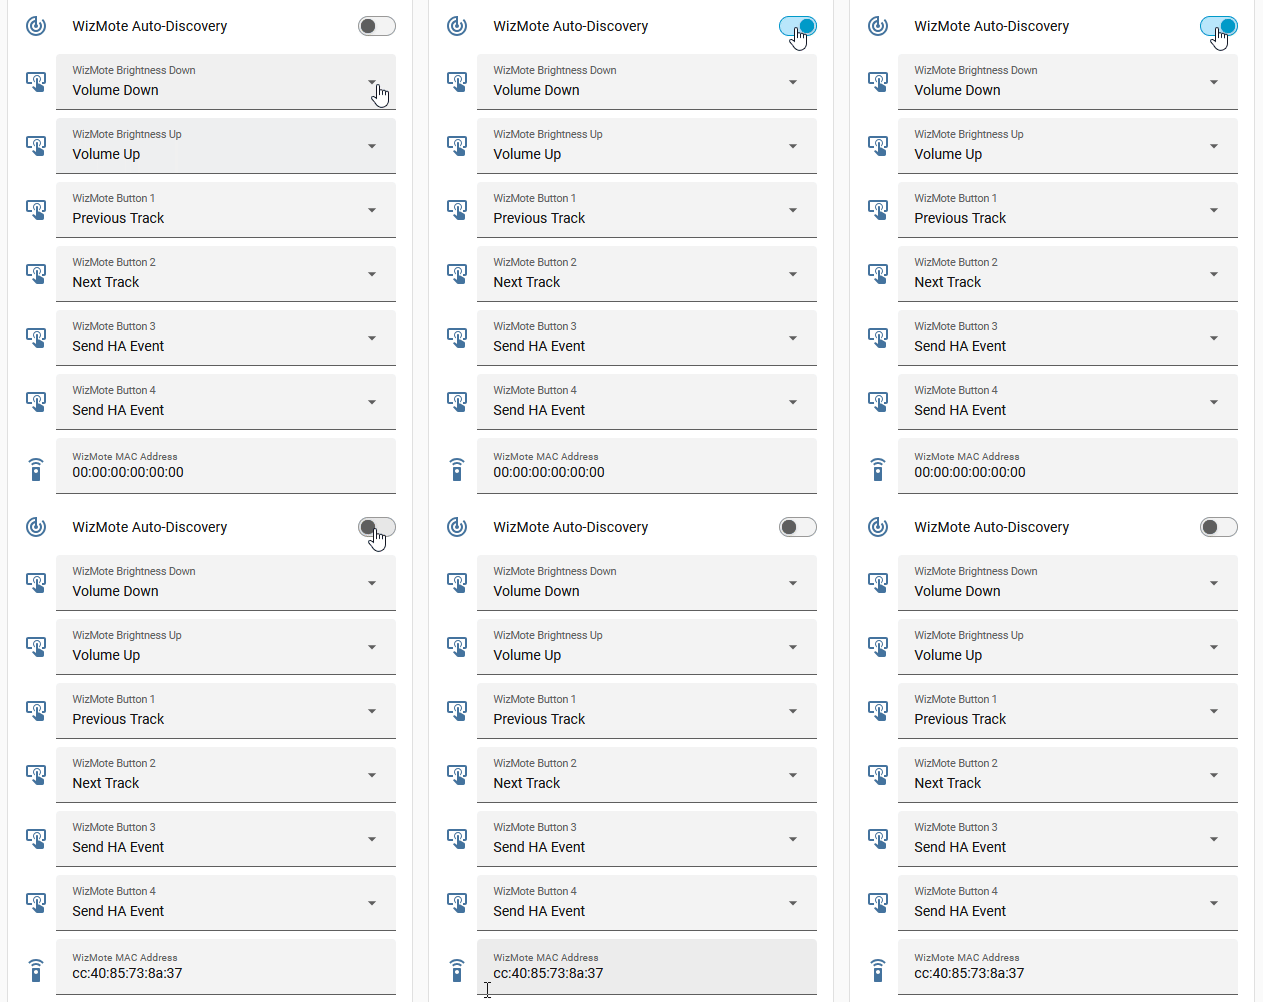
1. Open the ESPHome integration, then click through to your Apollo CAST-1 to open its device page.

2. Turn on WizMote Auto-Discovery.
3. Press any button on your WizMote. The CAST-1 pairs with it and WizMote Status updates to show the paired remote. (1)
- Pairing a different WizMote later? Use Clear WizMote Pairing on the device to unpair, then turn WizMote Auto-Discovery back on and press a button on the new remote.
Pairing takes longer on a CAST-1 running Ethernet only
A CAST-1 that's on Ethernet and not joined to any Wi-Fi network has no channel to follow, so it hops through radio channels 1 through 13 hunting for the WizMote, moving on every couple of seconds until it hears one. Keep pressing a button and it should pair within a minute.
Import the Blueprint
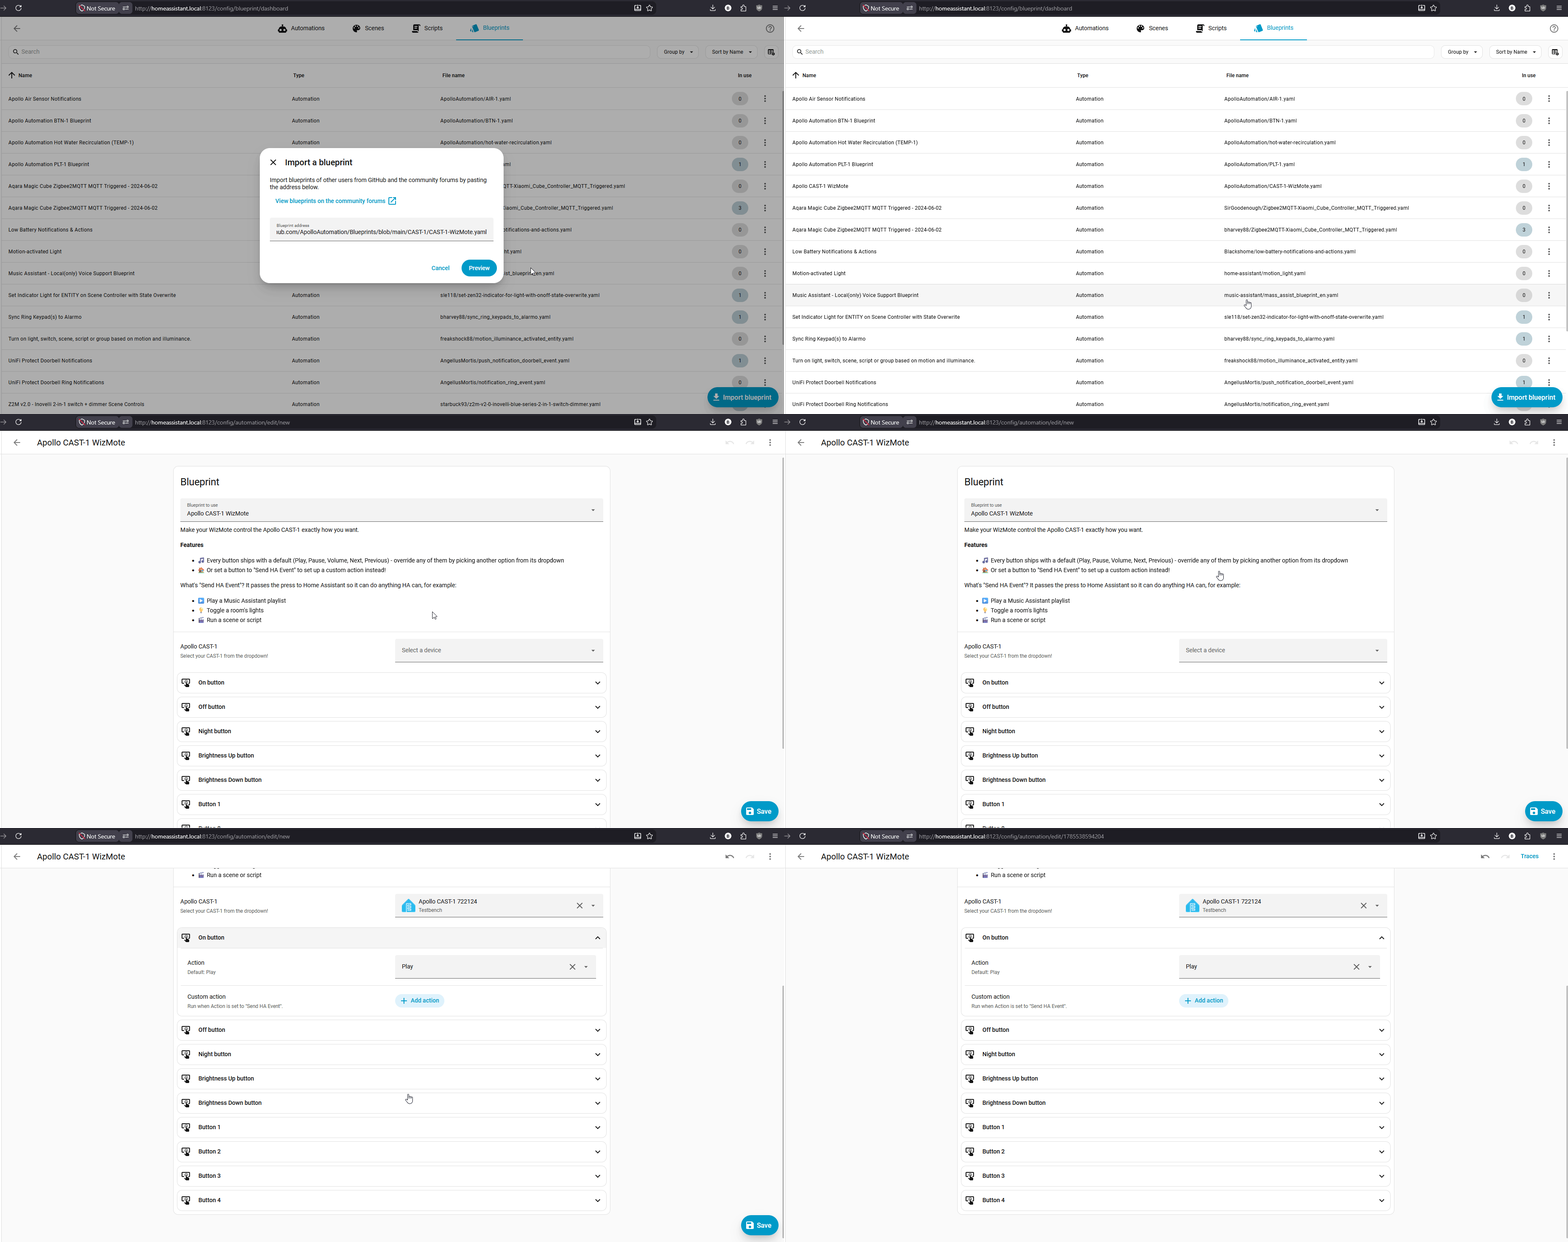
1. Click the Import Blueprint button below then click Open link.

2. Click Preview then click Import Blueprint.
3. Click on Apollo CAST-1 WizMote, then click Select a device and choose your Apollo CAST-1 from the dropdown.
4. Every button already has a default, so your WizMote works right away. To change one, open its dropdown and pick a different action.
5. For any button set to Send HA Event (Buttons 3 and 4 by default), click Add Action below it and choose what it should do, like playing a Music Assistant playlist or toggling a light.
6. Name your automation something like Apollo CAST-1 WizMote and click Save. Your WizMote now controls your CAST-1!