Motion-Activated Room Lights
This is where the kit stops being a learning toy and starts earning its keep. Your Starter Kit's motion sensor reports into Home Assistant, so it can switch on the actual lights in a room, a smart bulb, a wall switch, a lamp on a plug, then switch them back off once the room goes quiet.
This automation lives in Home Assistant and controls other lights in your home, not the kit's own LED. (1)
- Don't confuse it with the on-device Turn On a Light with Motion automation, which runs on the kit itself and only controls the kit's RGB LED. Use that one to learn ESPHome, use this one to actually light up a room.
Before you start
- Your kit is added to Home Assistant. If it isn't yet, work through Connect to Home Assistant first.
- The Motion module is connected, so the kit reports a Motion Module sensor that reads
onwhen it sees movement. - You have at least one light Home Assistant can already control, and you know its name.
Place the sensor first
The automation is only as good as what the sensor can see, so aim it before you build anything. The kit's MH-SR602 sensor has about a 100° cone and picks up movement out to roughly 5 meters (16 feet), and it's most reliable inside 3.5 meters (11 feet).
- Point it across the path people walk, like a doorway or hallway, not straight at a couch where they sit still. A PIR sensor fires on movement crossing its cone, so foot traffic trips it far more reliably than someone barely moving.
- Set it about 1.5 to 2 meters (5 to 6.5 feet) off the floor and tilt it slightly downward so the cone covers the room rather than the far wall.
- Keep it away from sunny windows, heating vents, and radiators. A fast change in heat can trip a PIR sensor on its own and leave your lights flicking on with no one there.
Pick one path below, or do both. Level 1 uses Home Assistant's built-in blueprint and takes about two minutes. Level 2 builds the same behavior by hand so you can see how it works and grow it later.
Level 1: Use the built-in blueprint
Difficulty: Level 1
A blueprint is a fill-in-the-blanks automation. Home Assistant ships one called Motion-activated Light that does exactly this job: light on when a sensor sees motion, off after a set quiet period.
-
Open Settings → Automations & scenes → Blueprints and look for Motion-activated Light. If it's there, skip to step 3. (1)
-
If it's missing, click Import Blueprint in the bottom right, paste the URL below, then click Preview and Import Blueprint.
-
Click Create Automation on the blueprint, then fill in the three fields:
- Motion Sensor → your kit's Motion Module sensor.
- Light Target → the light you want to control.
- Wait time → seconds to leave the light on after the last movement. 120 is a sensible start. (2)
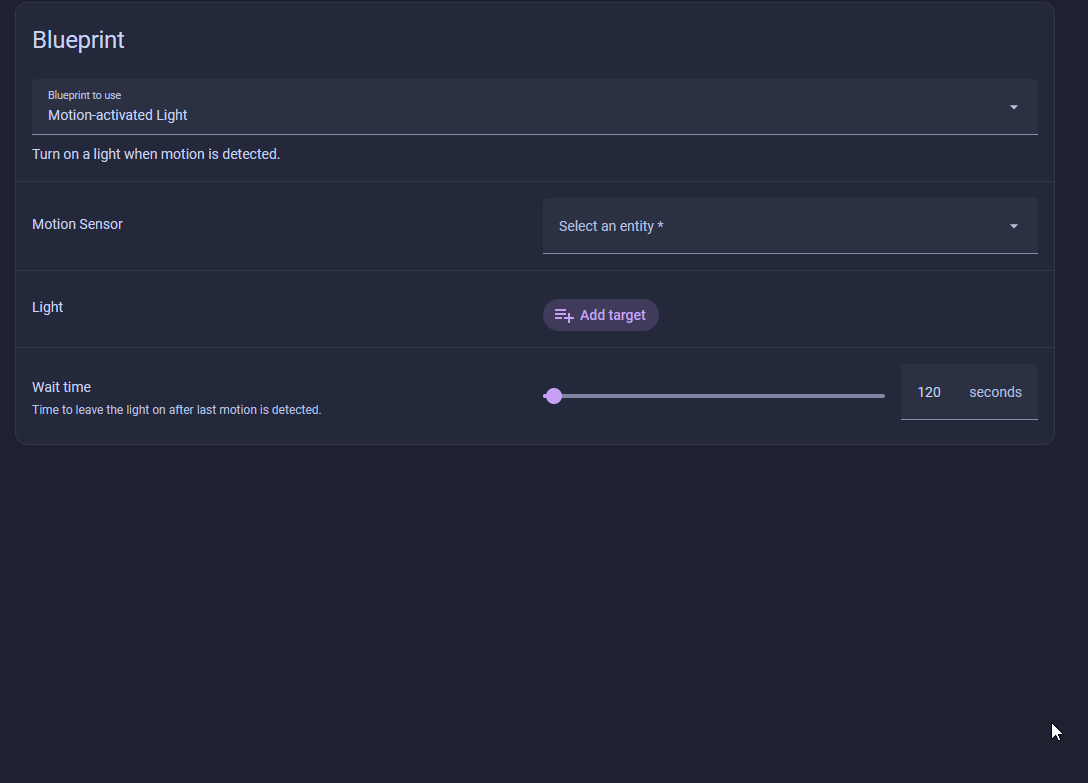
- Home Assistant lets you delete the default blueprints, so it's common for this one to be missing. The import in step 2 puts it back.
- Reopen the automation and change this any time the light drops too soon or stays on too long.
Click Save, give the automation a name like Motion Activated Lights, and if you like, add a label such as Lighting to group it with your other light automations. Click Save to finish.
Walk into the room and the light comes on. Stand still past the wait time and it goes back off.
Level 2: Build it by hand
Difficulty: Level 2
The blueprint hides the moving parts. Building the automation yourself shows you the trigger-and-action pattern behind every Home Assistant automation, and it leaves you room to add more behavior later.
You could make two automations, one to turn the light on and one to turn it off. Instead you'll keep both in a single automation using trigger IDs, a label on each trigger, feeding a Choose action that runs a different branch depending on which trigger fired.
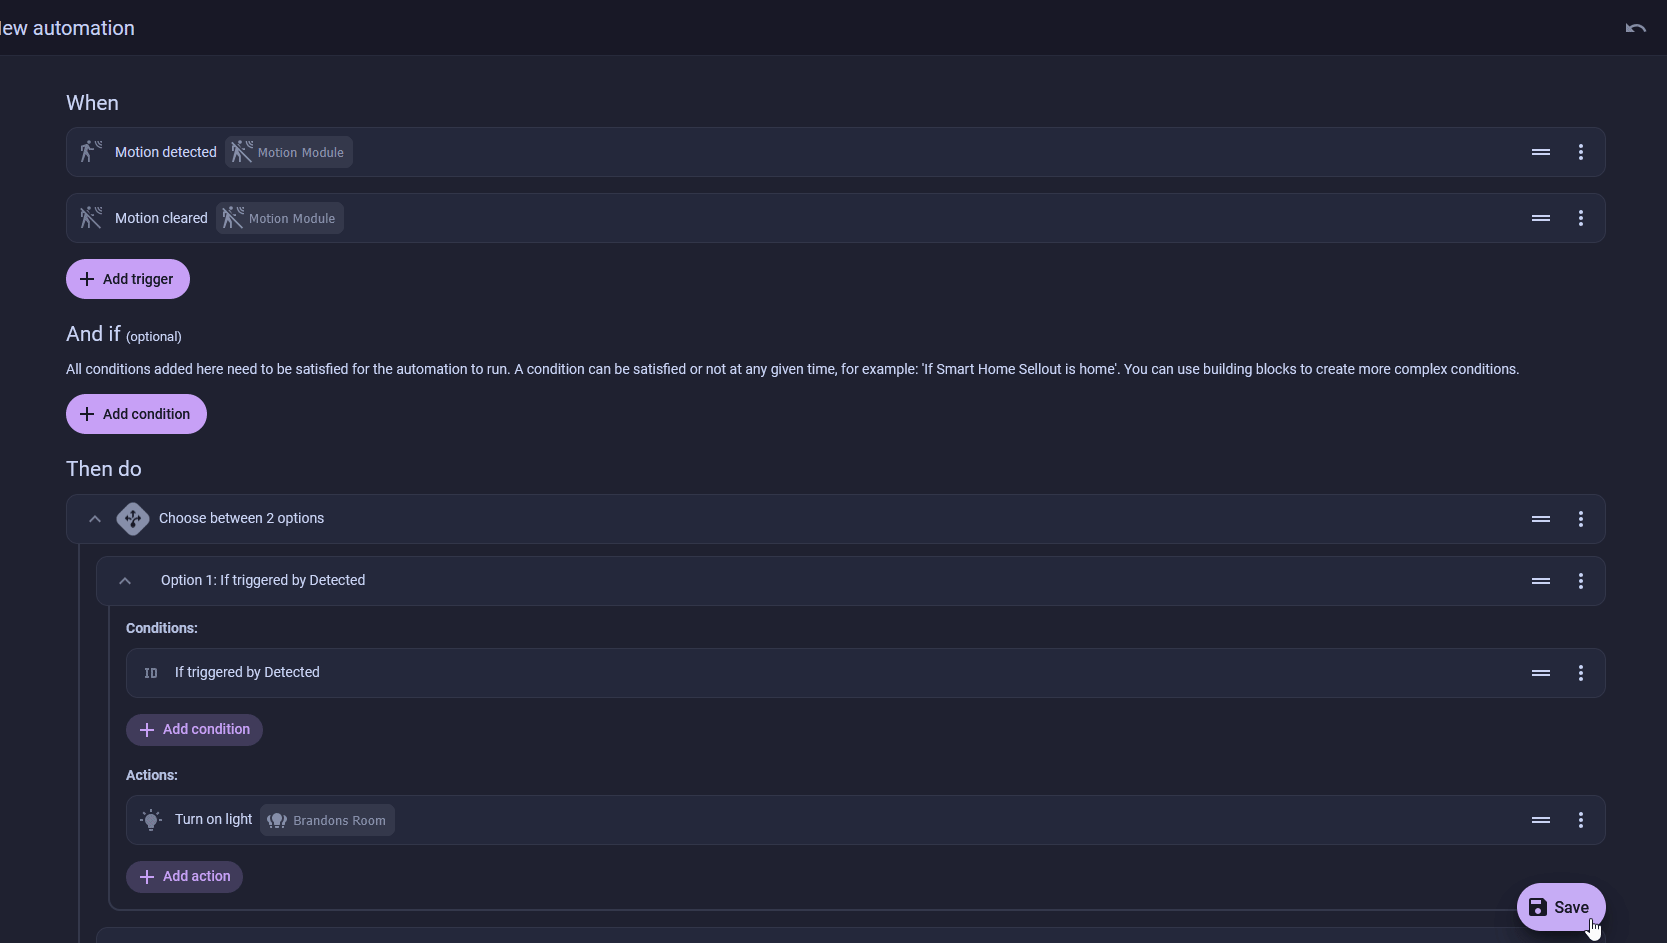
- Open Settings → Automations & scenes, click Create Automation, then Create new automation.
-
Click Add Trigger, search motion, and click Motion detected. Set its target to your Motion Module sensor. Open the trigger's menu (the three dots), choose Rename, and set the Trigger ID to
Detected. (1)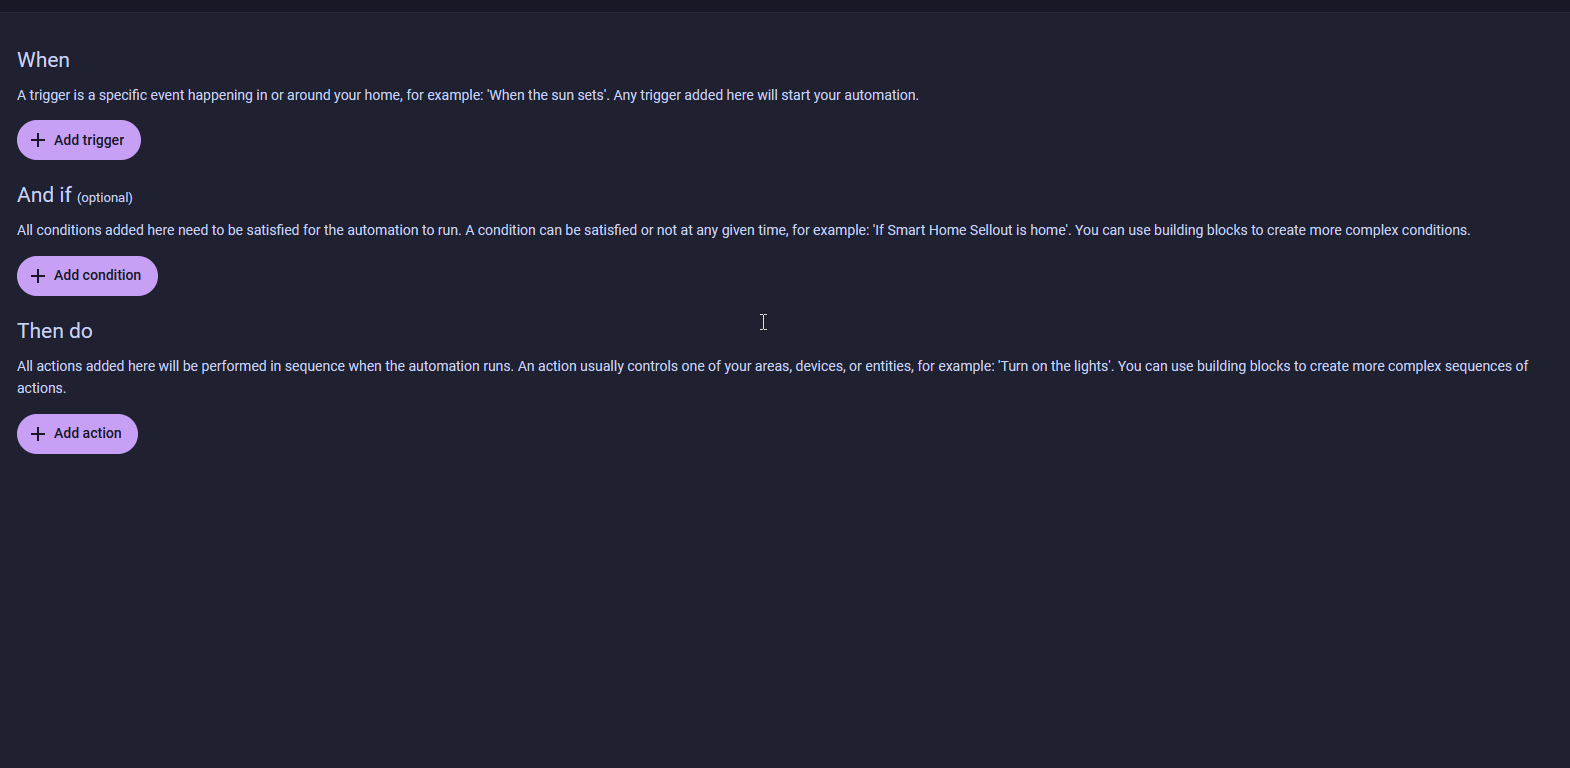
-
Add another trigger the same way, this time Motion cleared on the same Motion Module, with For → 2 minutes. Set its Trigger ID to
Clear. (2)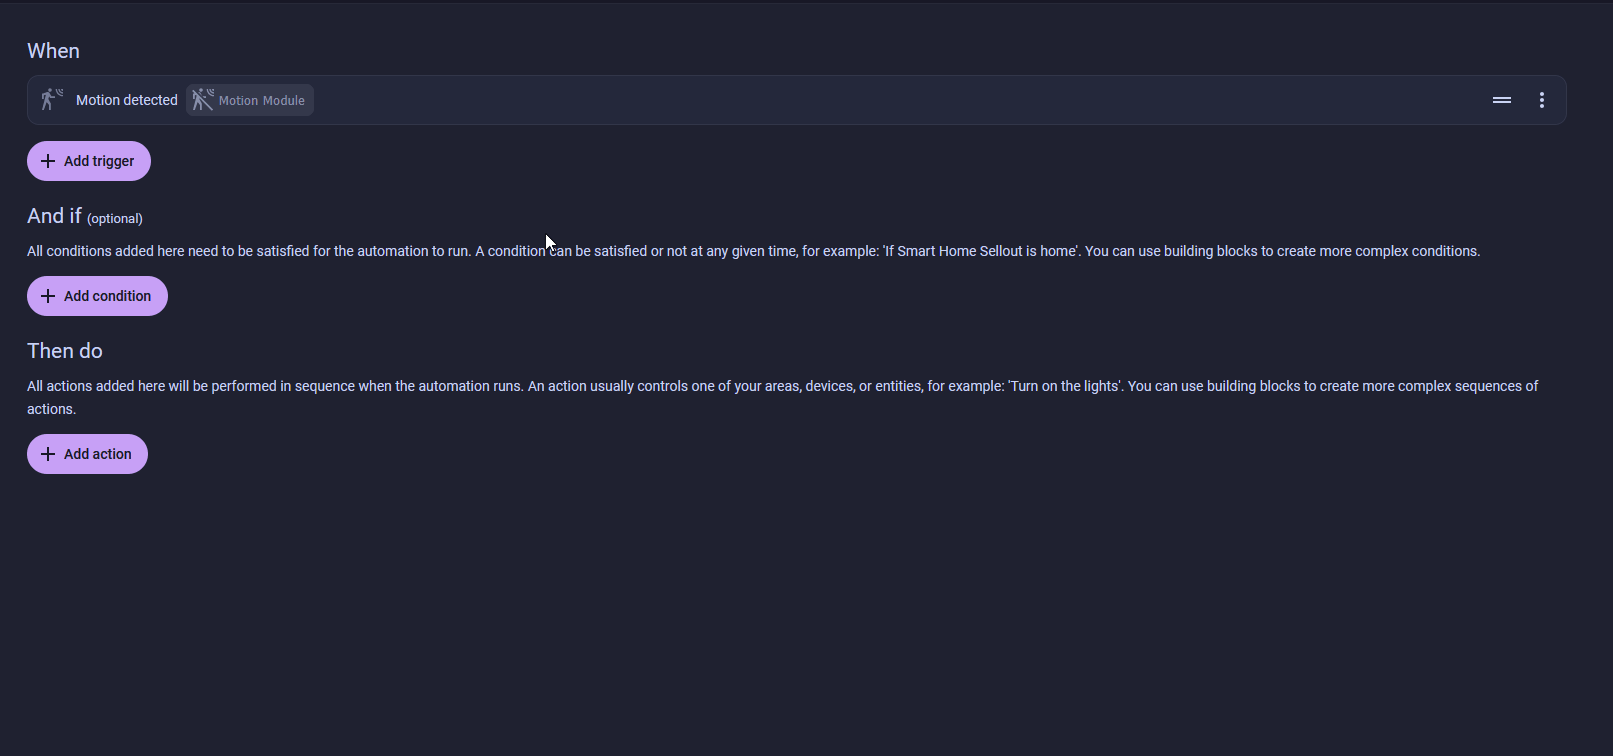
-
Under Then do, add Building Blocks → Choose.
-
In Option 1, add a Triggered by condition set to
Detected, then an action of Light → Turn on targeting your room light.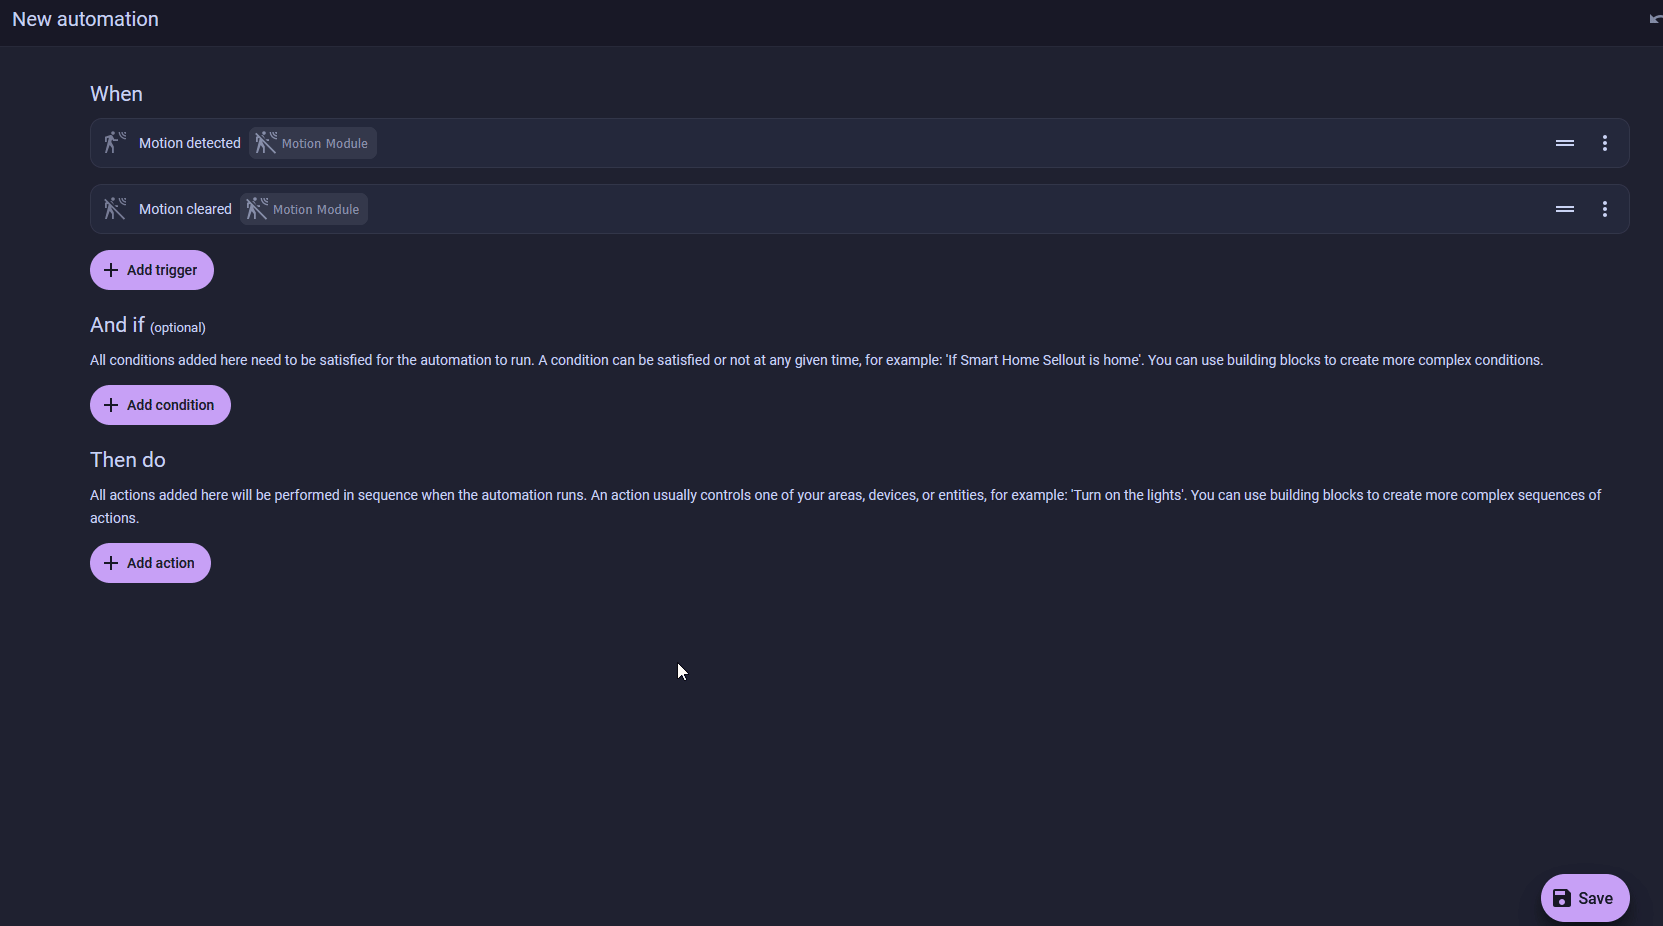
-
Add Option 2 with a Triggered by condition of
Clearand a Light → Turn off action on the same light.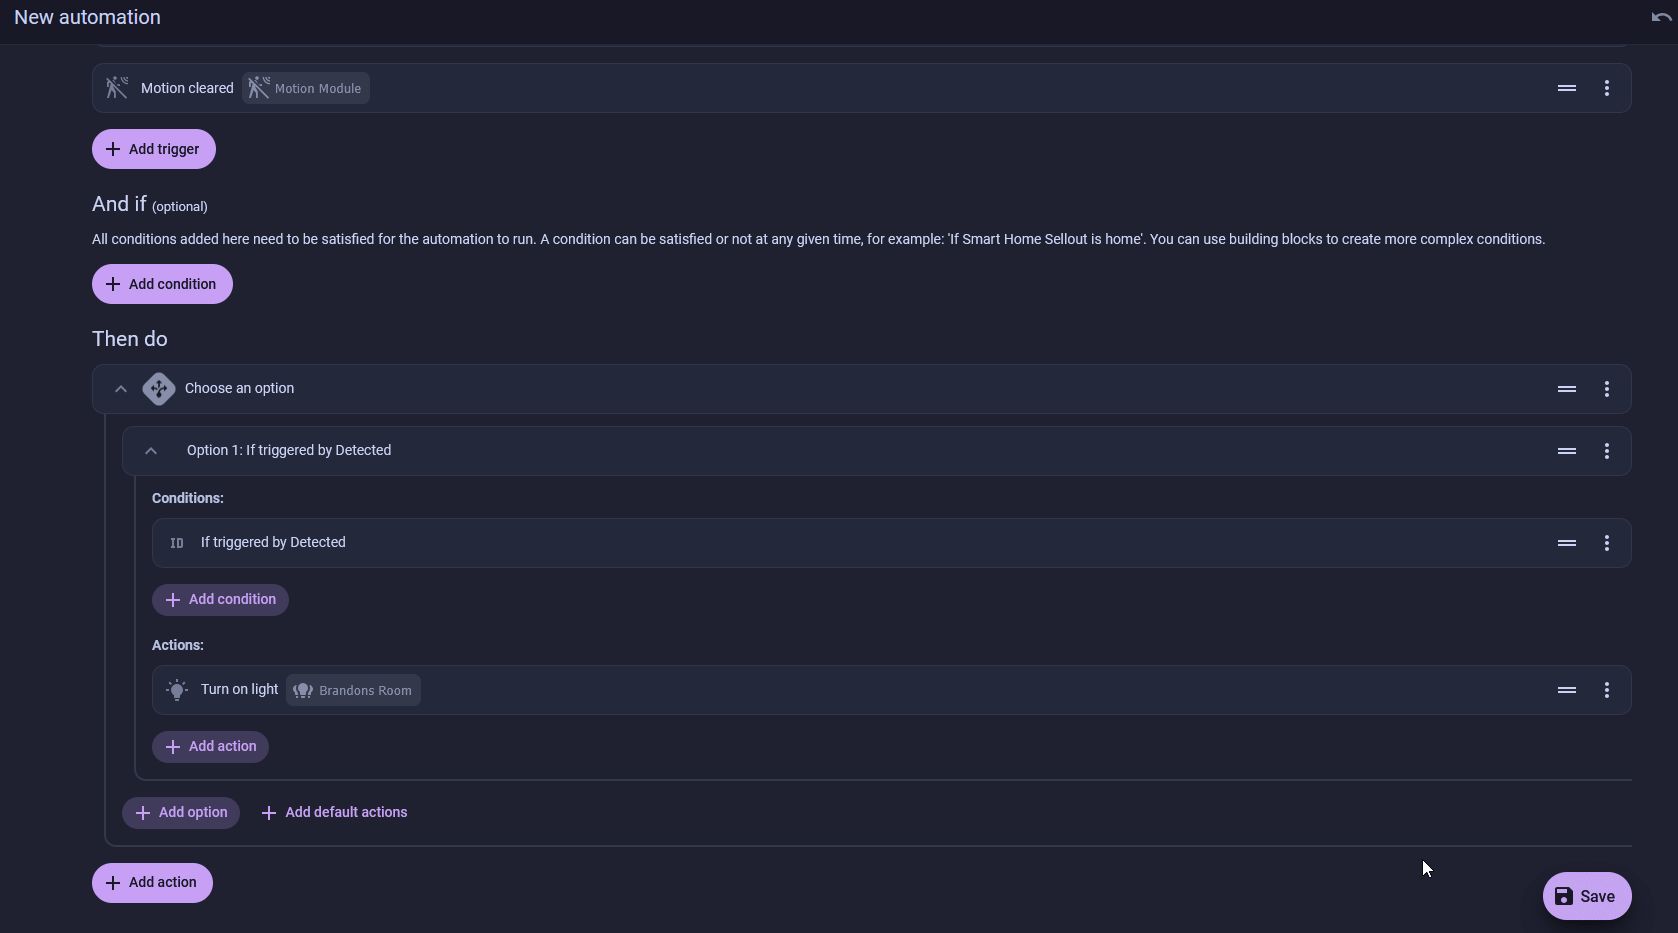
-
Click the three dots in the top right, choose Change mode, select Restart, then click Change mode to confirm. (3)
- The trigger ID is just a name. The Choose action reads it to decide which branch to run.
- The For delay means Clear only fires after the room has been still for two full minutes, so the light doesn't drop the moment you hold still.
restartmakes fresh motion reset the off-timer. The defaultsinglemode would ignore movement until the run finished.
The finished automation in YAML
Paste this into Edit in YAML and swap in your own entity names.
alias: Motion Activated Lights
description: ""
triggers:
  - trigger: motion.detected
    target:
      entity_id: binary_sensor.esphome_starter_kit_motion_module # (1)!
    options:
      for: "00:00:00"
    id: Detected
  - trigger: motion.cleared
    target:
      entity_id: binary_sensor.esphome_starter_kit_motion_module
    options:
      for:
        hours: 0
        minutes: 2
        seconds: 0
    id: Clear
conditions: []
actions:
  - choose:
      - conditions:
          - condition: trigger
            id:
              - Detected
        sequence:
          - action: light.turn_on
            metadata: {}
            target:
              entity_id: light.brandons_room # (2)!
            data: {}
      - conditions:
          - condition: trigger
            id:
              - Clear
        sequence:
          - action: light.turn_off
            metadata: {}
            target:
              entity_id: light.brandons_room
            data: {}
mode: restart
- Your sensor's entity ID may differ. Start typing in the editor and pick it from the list. It usually follows
binary_sensor.<device-name>_motion_module. - Swap
light.brandons_roomfor your own light in both branches.
Click Save, give the automation a name like Motion Activated Lights, and if you like, add a label such as Lighting to group it with your other light automations. Click Save to finish.
Now walk in. The light comes on, the room goes still, and after the quiet period it turns off. From here you can add a condition so it only runs after sunset, or point the Detected branch at a whole scene.
New to ESPHome? We're here to help.
Stuck on a step or want to show off what you built? Ask questions and share projects with the Apollo community.