Add Light Effects to Your RGB Module
Out of the box, your RGB module turns on, turns off, and changes color. ESPHome ships a library of built-in light effects (rainbow cycles, color wipes, flickers, and more), and Device Builder can add them from a dropdown. No typing required. This tutorial adds two effects to get you started.
Before you start
Work through these pages first. This tutorial assumes your device is flashed and has an addressable RGB light component already configured (either the Onboard RGB LED or the RGB LEDs from the LED & Buzzer module):
- First Steps to create your starter kit device in ESPHome Device Builder.
- Adding the LED & Buzzer Module if you're using the LED & Buzzer module.
Add the effects
- Open your starter kit device in ESPHome Device Builder and click Edit.
-
In the editor's left pane, scroll to Components and click the RGB light you want to add effects to. (1)
- Both RGB lights are listed under LIGHT as ESP32 RMT LED Strip, with the light's name in smaller text underneath. Onboard RGB LED is the LED on the board itself, and RGB LEDs is the strip on the LED & Buzzer module. Pick whichever one you want the effects on.
-
Turn on Show advanced settings near the bottom of the form. Effects are an advanced option, so the field stays hidden until you do.
- Scroll to Effects and click + Add.
-
Pick Addressable Rainbow from the dropdown. Its own settings unfold underneath: Name, Speed, and Width. Leave them alone for now, the grayed-out values are the defaults ESPHome uses. (1)
- Want something other than rainbow? Everything in the dropdown works on your RGB module, and the full library is documented at esphome.io/components/light. The entries starting with "Addressable" animate each LED separately, which is what makes a rainbow or a wipe travel along the strip. The rest, like Pulse, Strobe, and Flicker, drive the whole strip as one color at a time.
-
Click + Add a second time and pick Addressable Color Wipe.
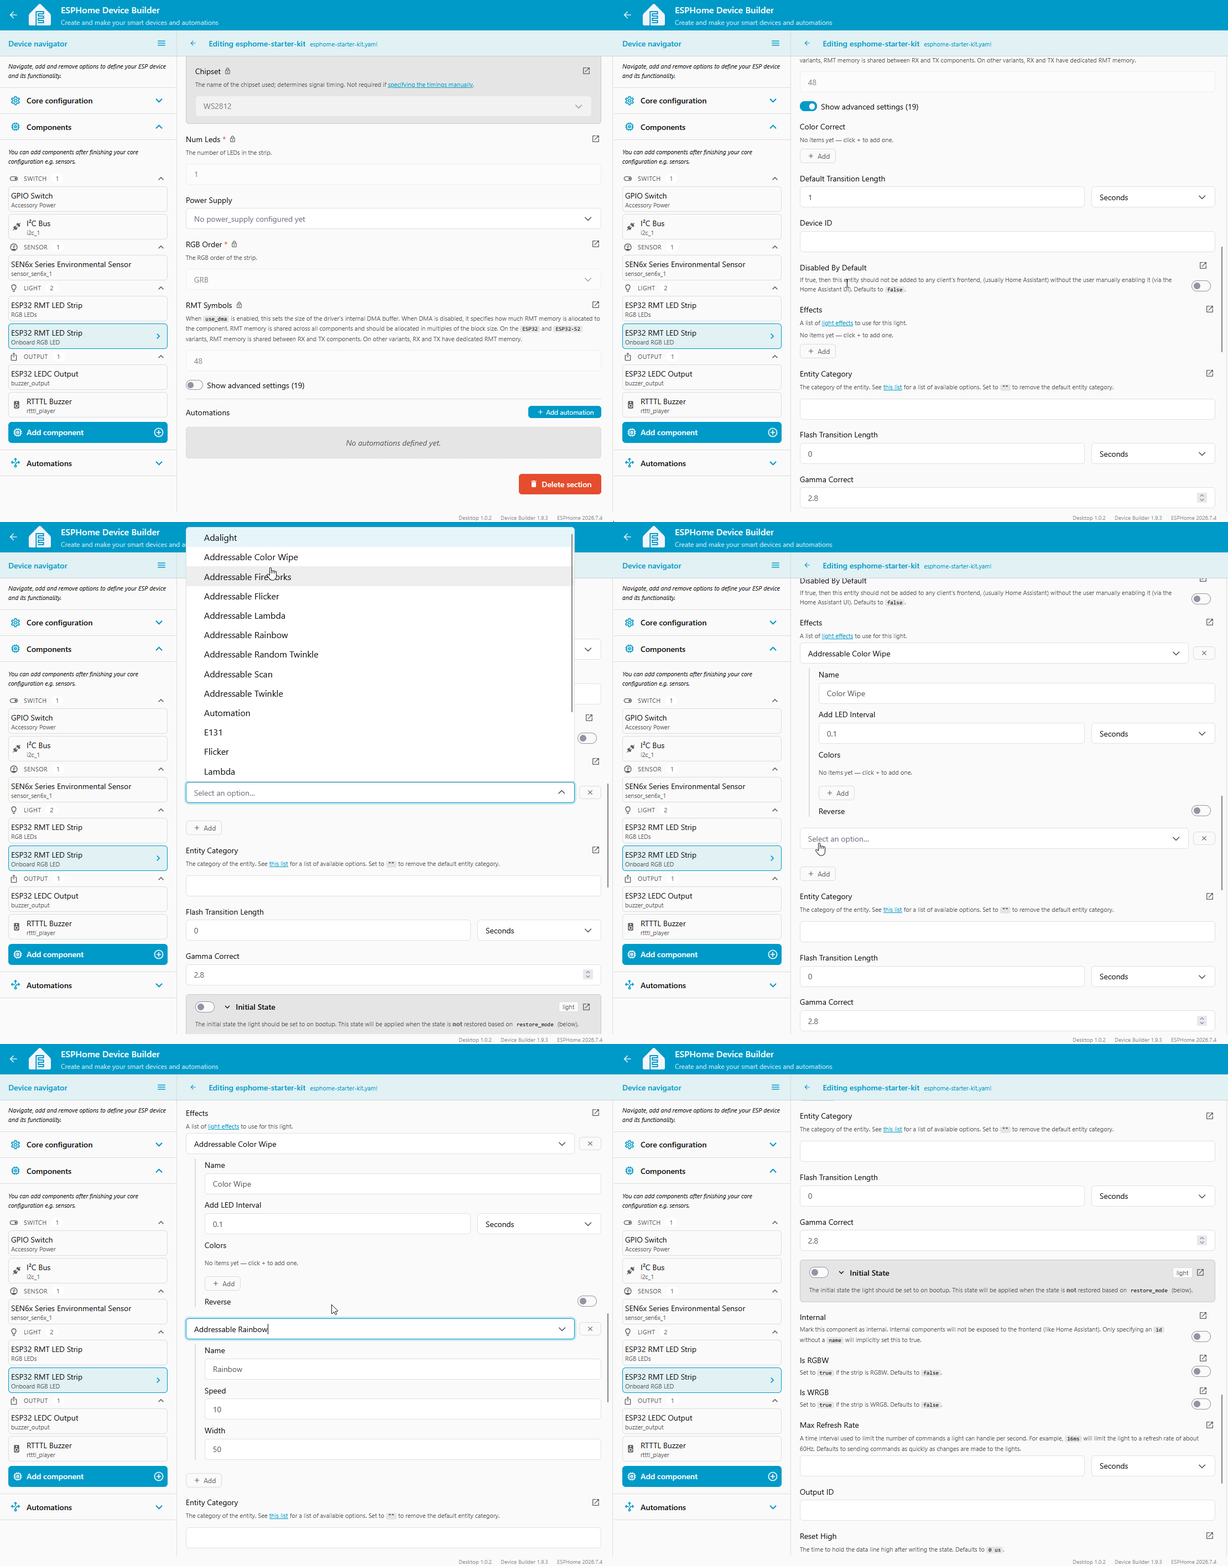
That gives the light two effects: a continuously cycling rainbow and a sweeping color wipe. Add as many as you like the same way, and click the X to the right of an effect's dropdown to drop one.
What the effects YAML does
Watch the YAML pane on the right while you add each effect. Device Builder writes this into the light component:
Two lines, because a field you left at its default never gets written. ESPHome already knows a rainbow runs at speed 10 and answers to the name "Rainbow". Change any of these and the matching line appears:
| Field | YAML | What it does |
|---|---|---|
| Name | name |
What the effect is called in the Effect dropdown, on the device's web page and in Home Assistant. |
| Speed (rainbow) | speed |
How fast the colors cycle. Higher is faster. |
| Width (rainbow) | width |
How many LEDs one full rainbow spans. Lower packs more color into the strip. |
| Add LED Interval (color wipe) | add_led_interval |
How long before the wipe advances one LED. Lower is faster. |
| Colors (color wipe) | colors |
The colors the wipe cycles through. Leave it empty for random colors. |
| Reverse (color wipe) | reverse |
Runs the wipe from the far end of the strip back toward the first LED. |
Install the software
The effects are saved in Device Builder, but the device is still running its old software. Compile and install the new code to push the change.
- Click Save in the bottom right of the editor.
-
Click Install, then pick On the Network to push the new software over Wi-Fi. (1)
- We say software because it's the friendlier word. The technically correct term is firmware: code that runs directly on the chip instead of on a computer. That's the word ESPHome's own docs use.
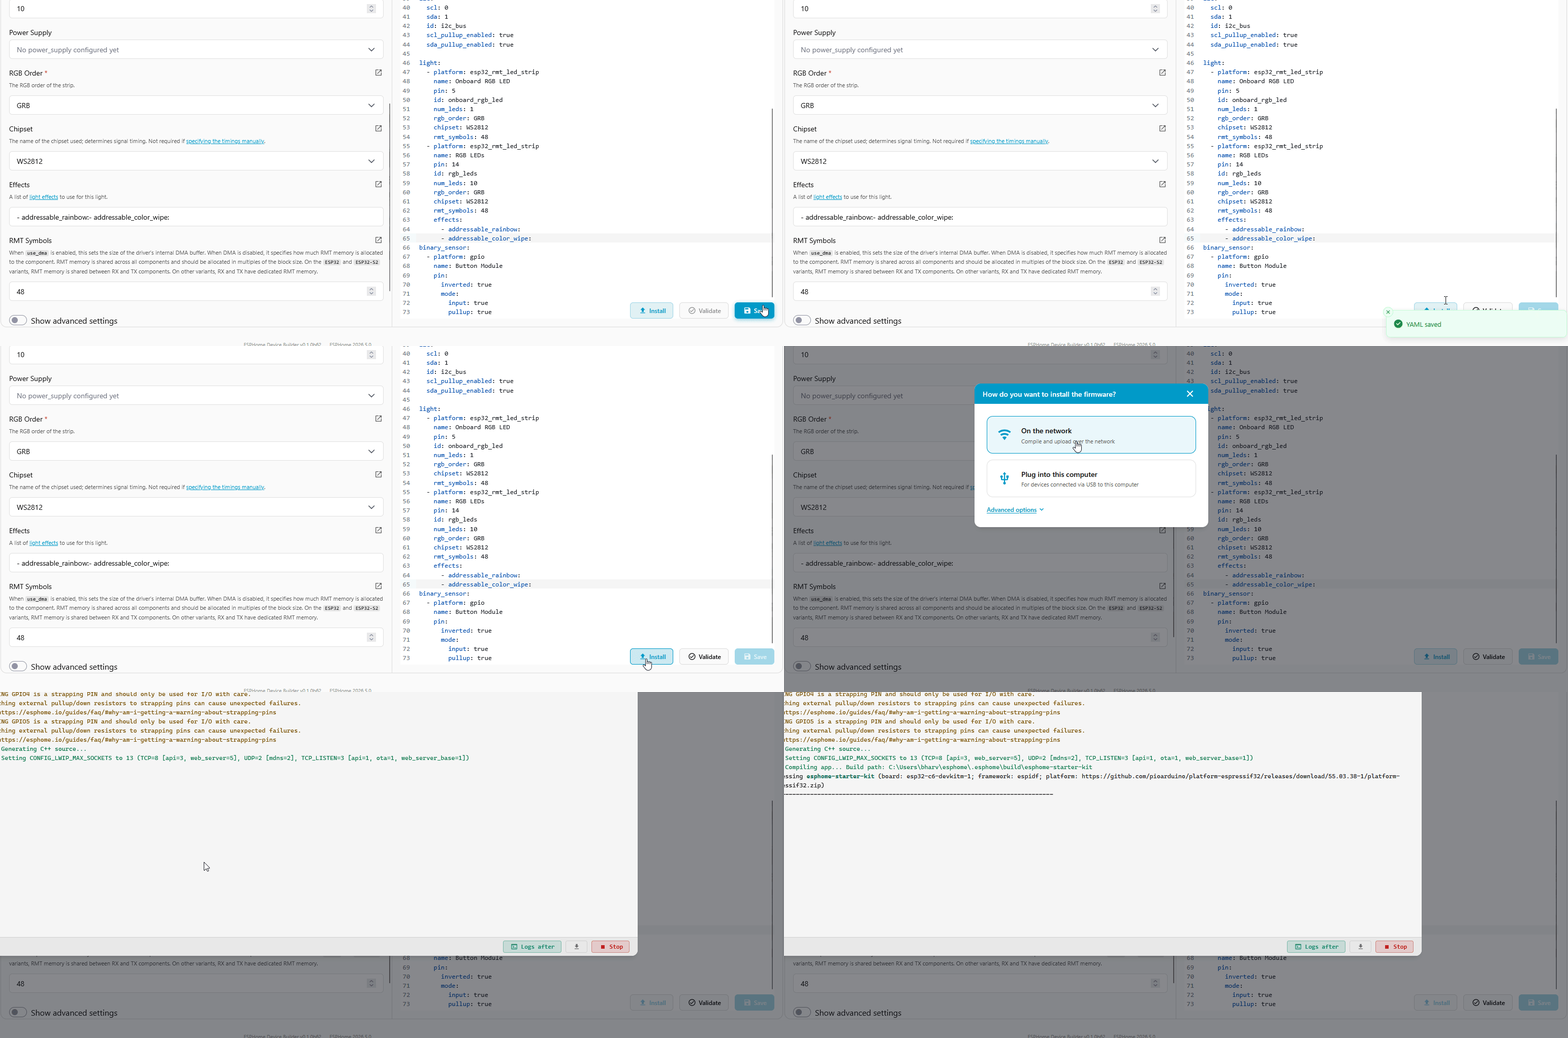
3. Wait for the compile and flash to finish. The device reboots once the install is done.
Try the effects
With the device back online, open the local web page at http://esphome-starter-kit.local/ (or whatever you named your device) in a browser on the same Wi-Fi network. Find the RGB light entity and pick Rainbow or Color Wipe from the Effect dropdown. The LEDs start animating right away.

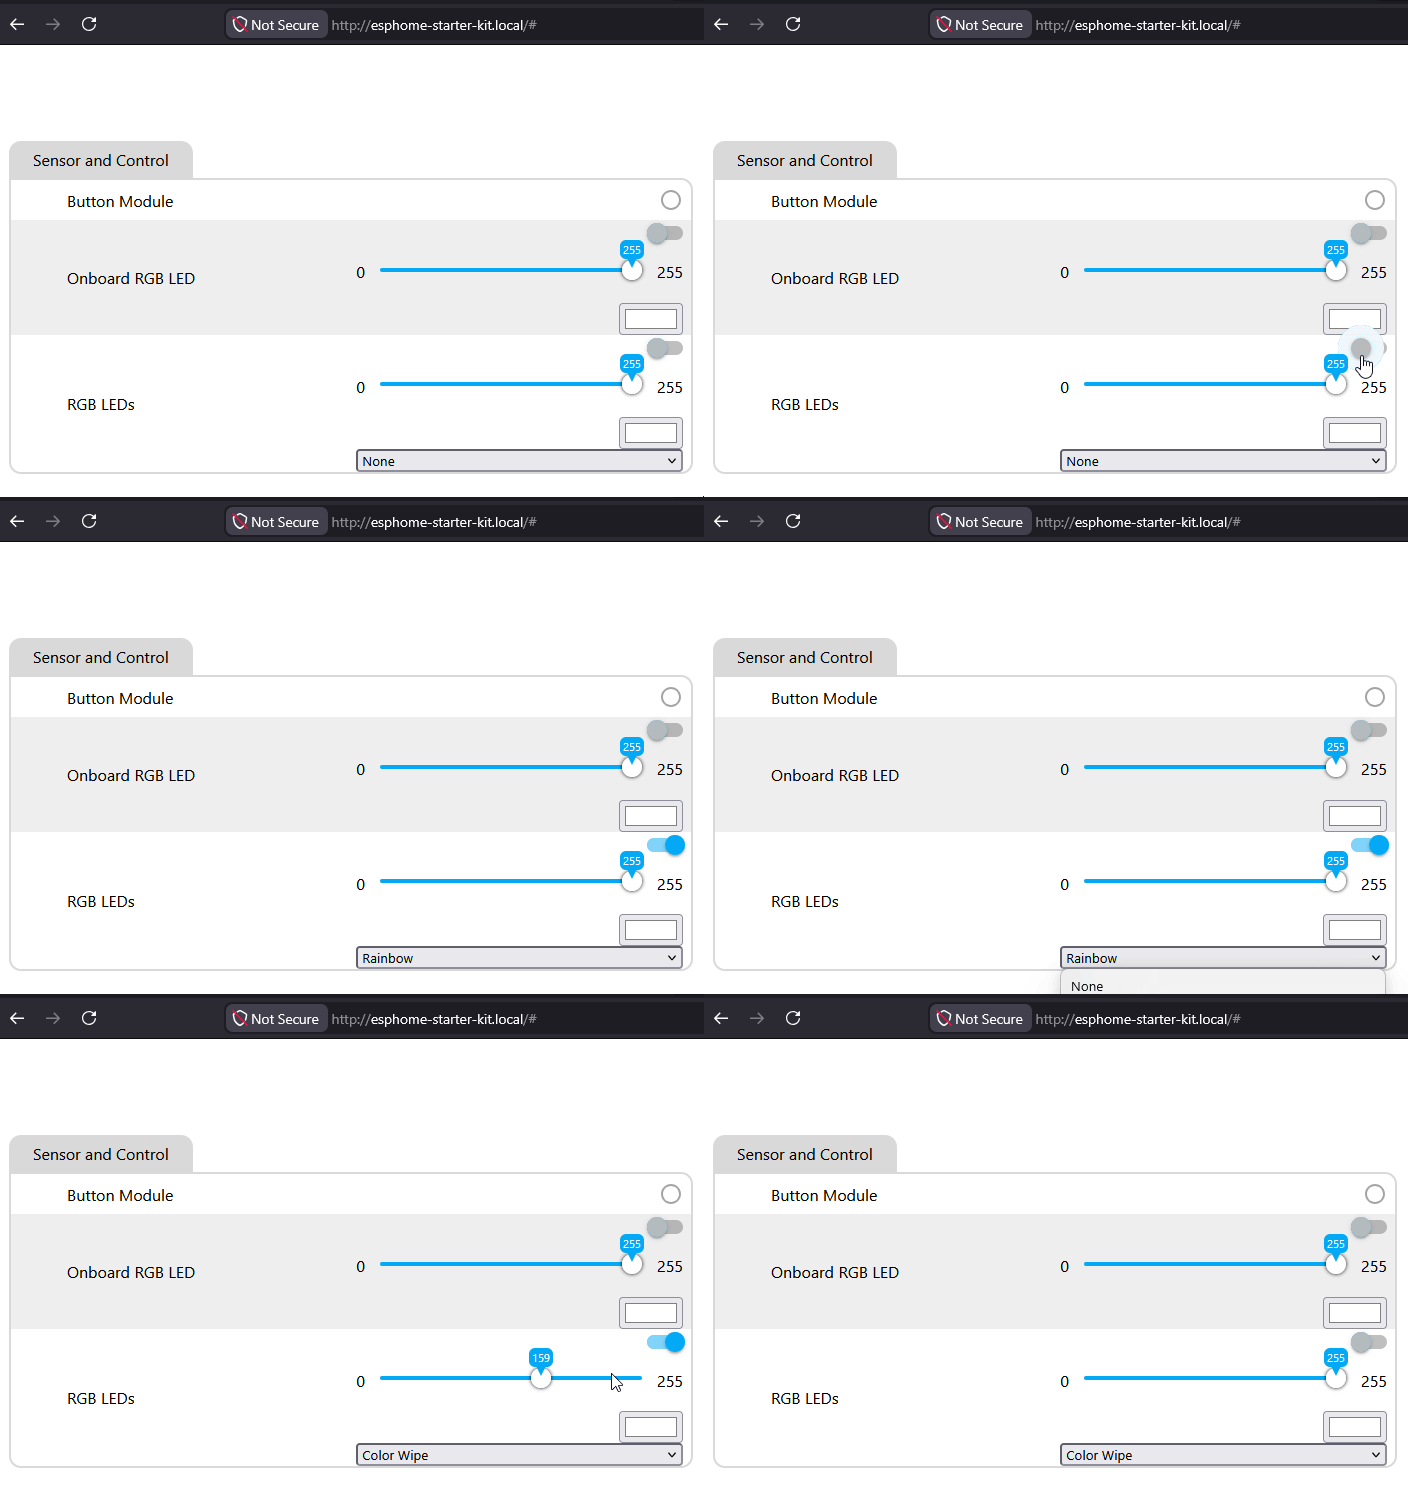
If you've already followed Connect to Home Assistant, the same Effect dropdown shows up on the light entity card in Home Assistant.
New to ESPHome? We're here to help.
Stuck on a step or want to show off what you built? Ask questions and share projects with the Apollo community.