ESPHome Device Builder
Most people don't need this
Your CAST-1 ships ready to use. You only need the ESPHome Device Builder if you want to rename it or make manual edits to its YAML. To just add your CAST-1 to Home Assistant, follow the Getting Started guide.
ESPHome Device Builder is the software that gives you a user interface for editing, compiling, and flashing ESPHome YAML. You'll use it to take control of your CAST-1 and edit its configuration.
Install ESPHome Device Builder
Pick the platform you'll be running ESPHome Device Builder on:
- Open esphome.io/install and click Download installer (.exe) on the Windows tab.
- Open the downloaded
.exefile. If Windows asks whether to allow the app to make changes, choose Yes, then follow the installer prompts. - On the last screen, leave Run ESPHome Device Builder checked and click Finish.
- When Allow network pairing appears, click Allow access. Windows then asks for administrator approval and shows its own firewall prompt for the Python backend. Allow that one too, or other ESPHome dashboards on your network won't be able to reach this computer.
If Windows blocks the installer
If a blue Windows protected your PC warning appears when you open the .exe, click More info → Run anyway to continue.
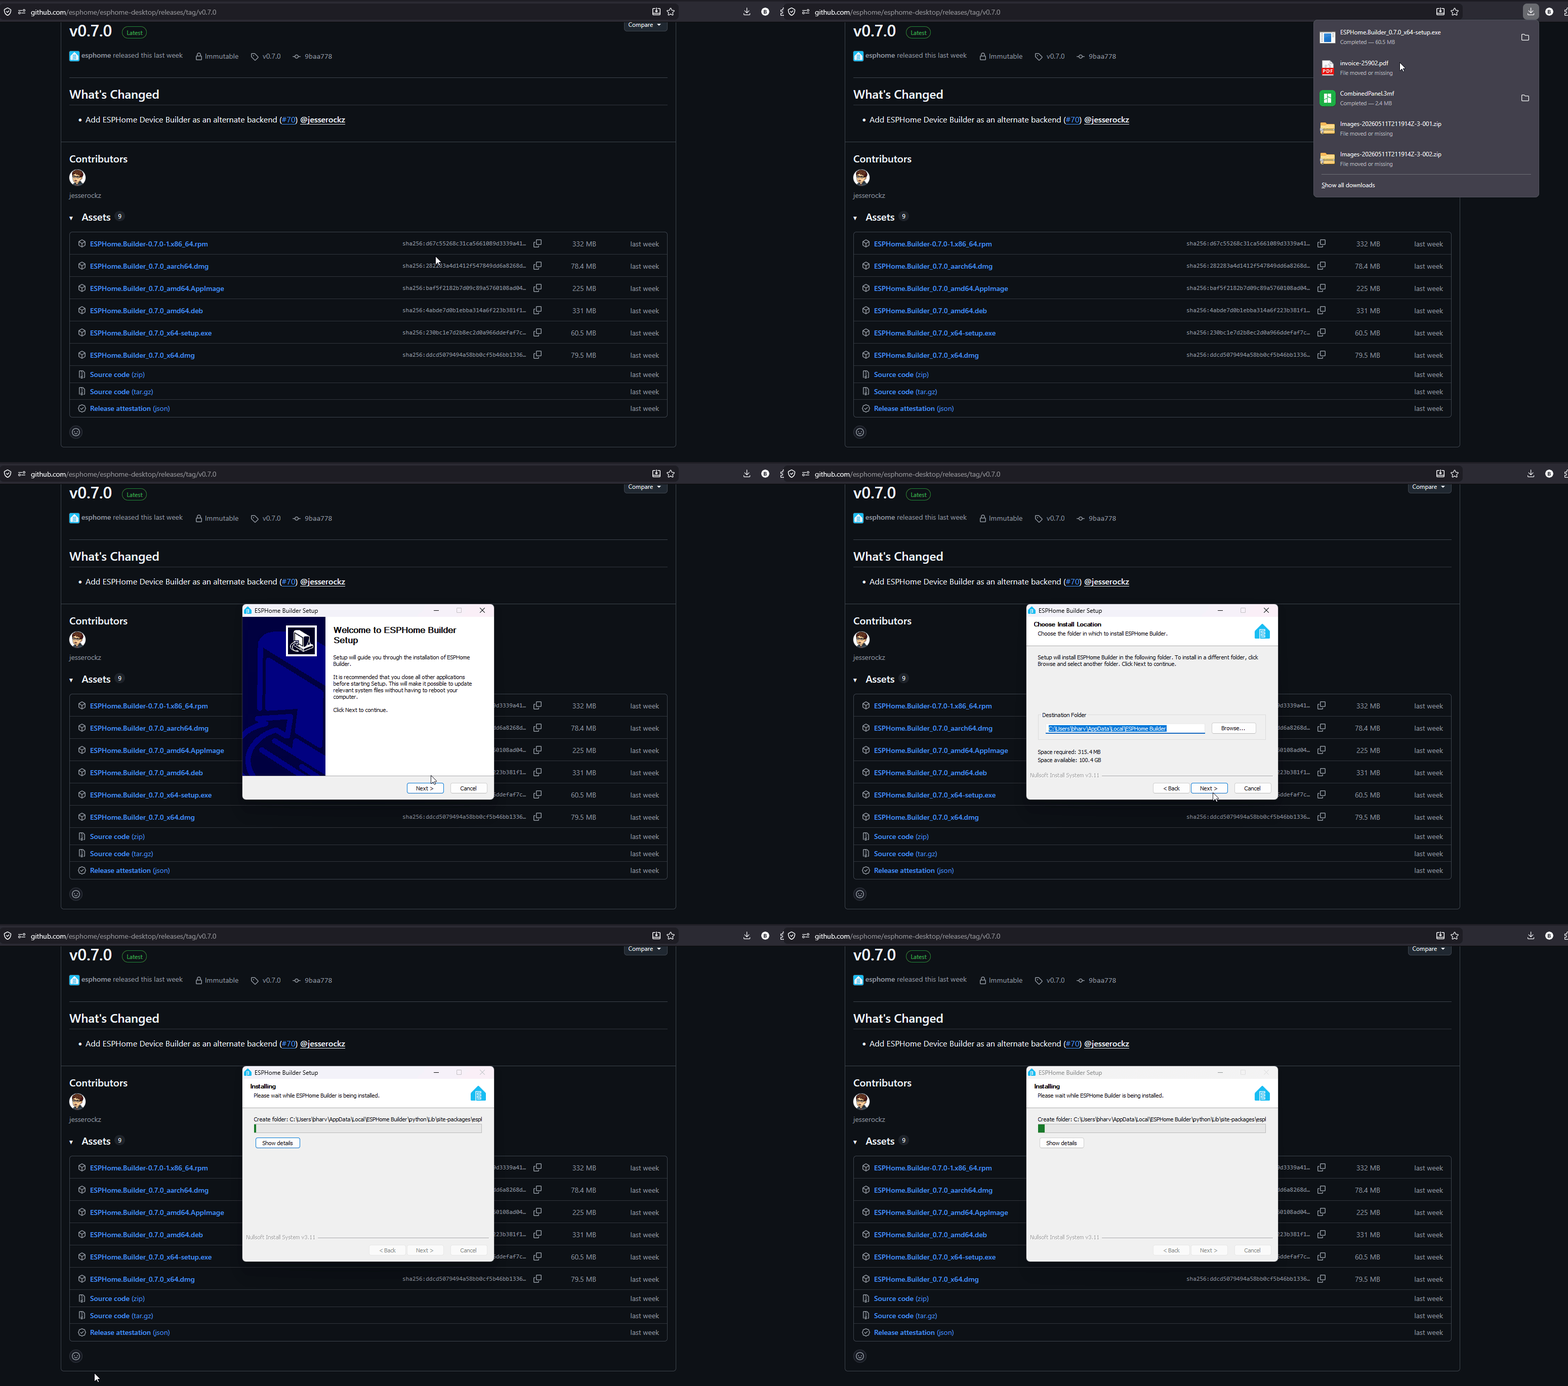
The first launch takes a moment while it sets itself up, then the dashboard opens in your browser at http://localhost:6052/. An ESPHome icon lands in your notification area for getting back to it later.
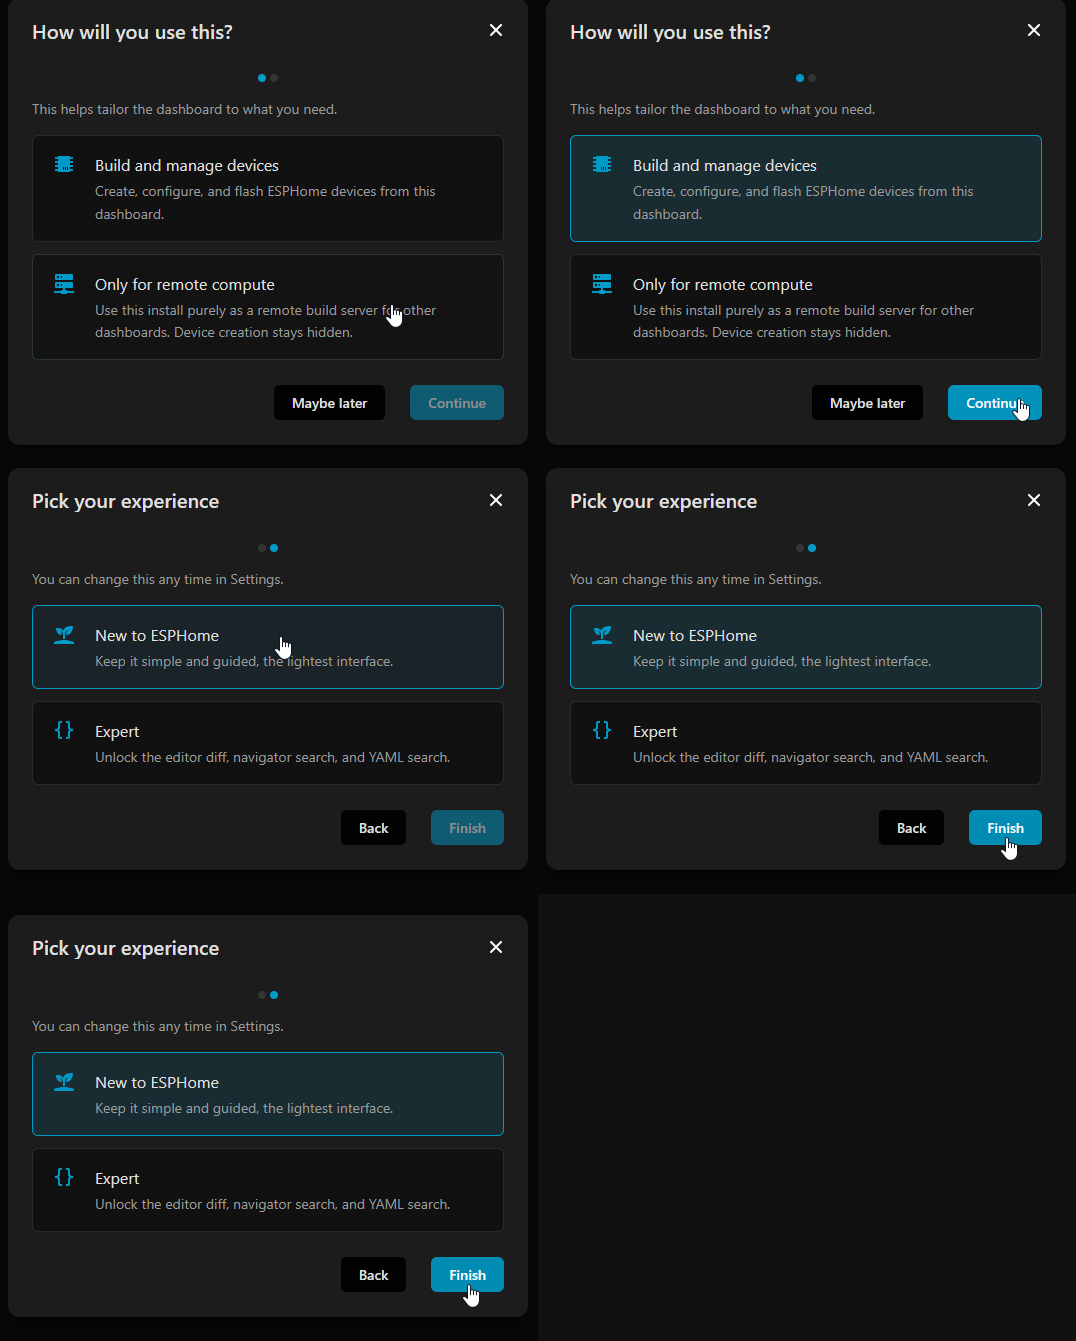
A short wizard runs the first time:
- Click Continue on the welcome screen.
- Choose Installation of the ESPHome Device Builder, since you're building on this computer.
- Choose New to ESPHome for the simpler, guided interface.
Then take Start guided tour for a five minute walkthrough, or Maybe later.
-
Open esphome.io/install. The page detects your OS and opens the macOS tab. Pick the build that matches your chip:
- Apple Silicon (M1, M2, M3, M4, M5)
- Intel
Not sure which you have? Click the Apple menu → About This Mac.
-
Open the
.dmgand drag ESPHome Device Builder into your Applications folder. -
Open your Applications folder and double-click ESPHome Device Builder. The first time you run it, macOS may ask you to confirm. Click Open.
- If macOS blocks it outright with a Gatekeeper warning instead, right-click the app in Applications and choose Open, then click Open in the confirmation dialog. After that, double-click works normally.
The first launch takes a moment while it sets itself up, then the dashboard opens in your browser at http://localhost:6052/. An ESPHome icon lands in your menu bar for getting back to it later.
A short wizard runs the first time:
- Click Continue on the welcome screen.
- Choose Installation of the ESPHome Device Builder, since you're building on this computer.
- Choose New to ESPHome for the simpler, guided interface.
Then take Start guided tour for a five minute walkthrough, or Maybe later.
The ESPHome Device Builder runs as a Home Assistant app served right inside your existing HA dashboard. This is the easiest option if you already run Home Assistant OS or a supervised install.
Method 1
To add the ESPHome Device Builder to your Home Assistant instance, use this My button:

Method 2
- In Home Assistant, open Settings → Apps → App Store.
- Search for ESPHome Device Builder and click Install.
- Once installed, click Start, then Open Web UI. The Device Builder will open inside your Home Assistant dashboard.
-
Open esphome.io/install. The page opens on the Linux tab with Debian / Ubuntu selected. Choose the package format your distro uses, then the CPU architecture (x86_64 for a normal desktop or laptop, arm64 for a Raspberry Pi or similar board):
- Debian / Ubuntu → downloads a
.deb - Fedora / openSUSE → downloads a
.rpm - Arch (AUR) → installs the
esphome-desktop-binpackage - AppImage → a portable build that runs on any distro
- Debian / Ubuntu → downloads a
-
Install it. Double-click the downloaded
.debor.rpmin your file manager, or run the matching command in a terminal:- Debian / Ubuntu:
sudo apt install ./ESPHome.Device.Builder_*.deb - Fedora / openSUSE:
sudo dnf install ./ESPHome.Device.Builder-*.rpm - Arch:
yay -S esphome-desktop-bin - AppImage:
chmod +x ESPHome.Device.Builder_*.AppImagethen run./ESPHome.Device.Builder_*.AppImage
- Debian / Ubuntu:
-
Launch ESPHome Device Builder from your applications menu.
If your CAST-1 doesn't appear as a serial port later, add your user to the
dialoutgroup withsudo usermod -a -G dialout $USER, then log out and back in.
The first launch takes a moment while it sets itself up, then the dashboard opens in your browser at http://localhost:6052/. An ESPHome icon lands in your system tray for getting back to it later. Some Linux desktops, notably GNOME without a tray extension, don't show tray icons at all. The app still runs, so just use the dashboard in your browser.
A short wizard runs the first time:
- Click Continue on the welcome screen.
- Choose Installation of the ESPHome Device Builder, since you're building on this computer.
- Choose New to ESPHome for the simpler, guided interface.
Then take Start guided tour for a five minute walkthrough, or Maybe later.
Take Control of Your CAST-1
1. Open the ESPHome Device Builder.
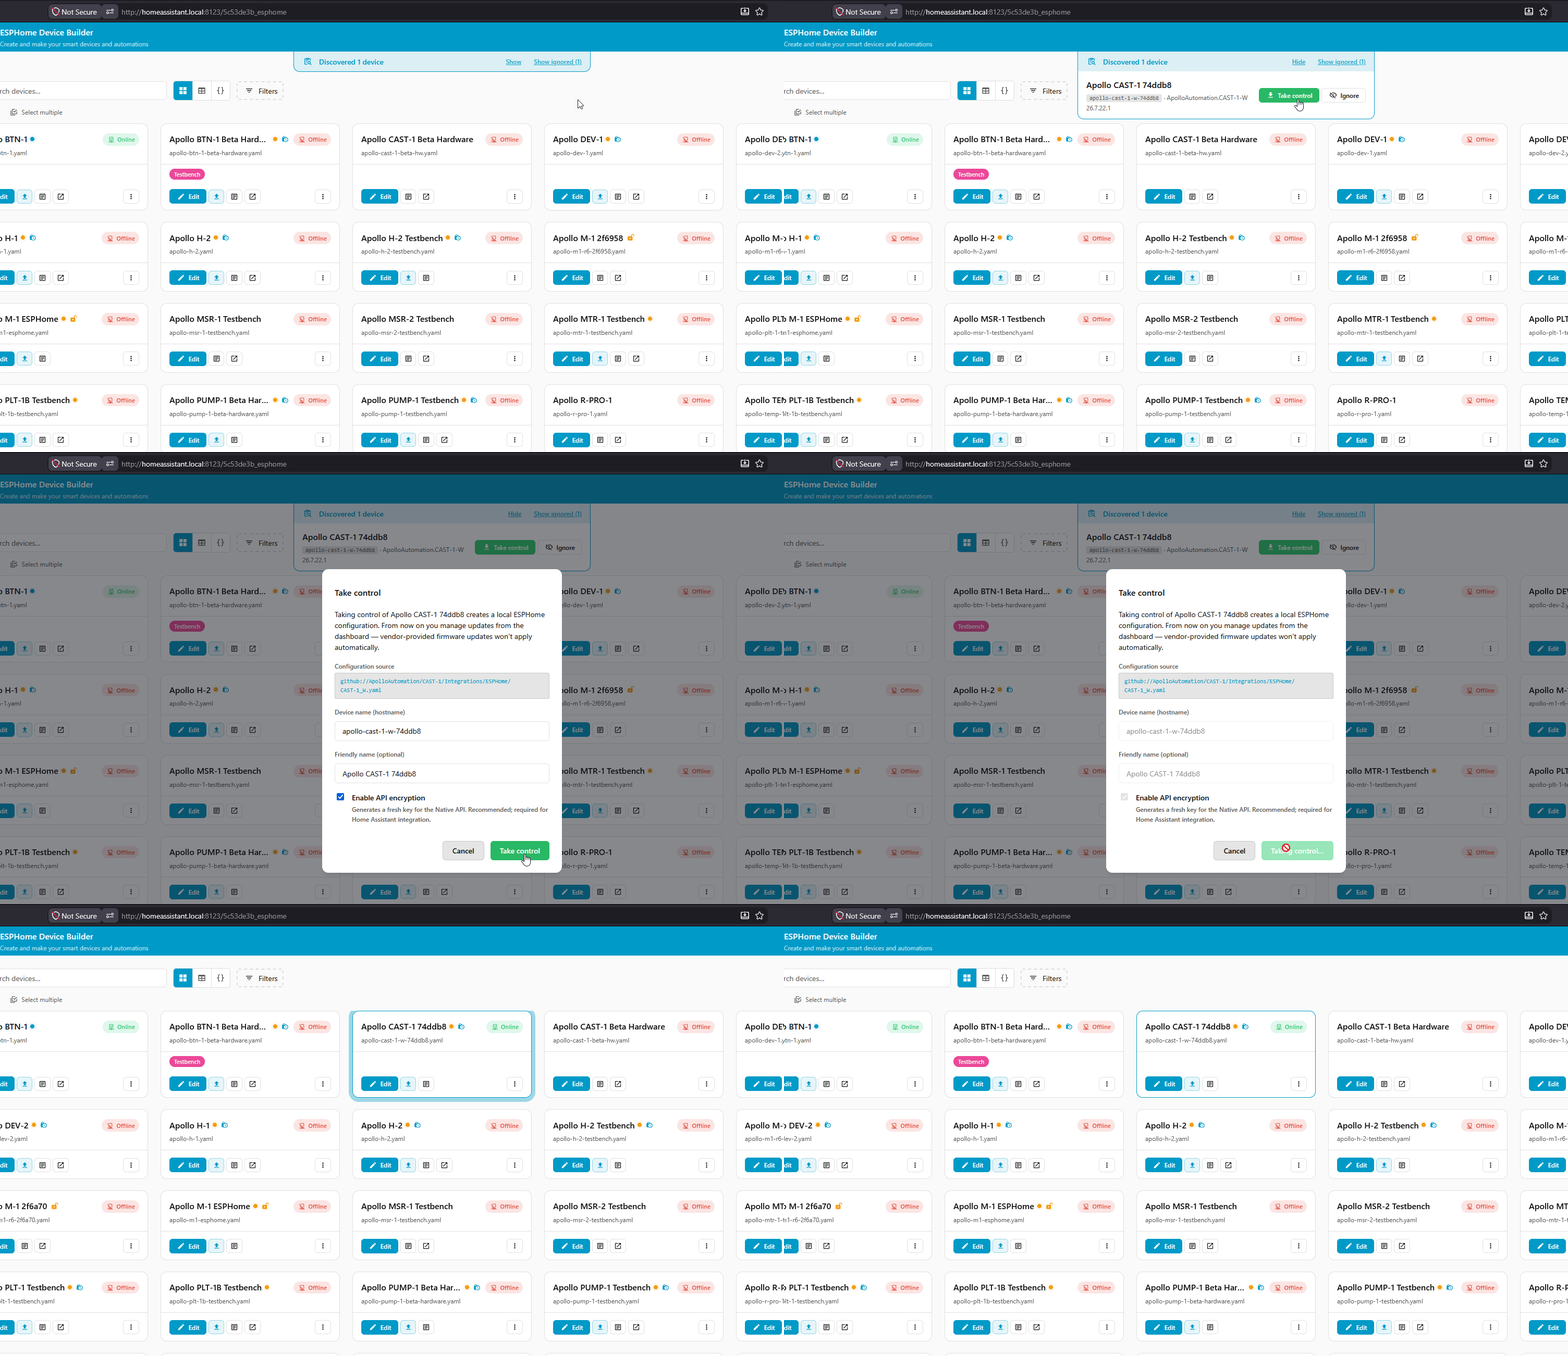
2. Click Show next to Discovered at the top, then click Take Control next to your CAST-1. Change the Name and Friendly Name if you'd like, or leave them, then click Take Control again.
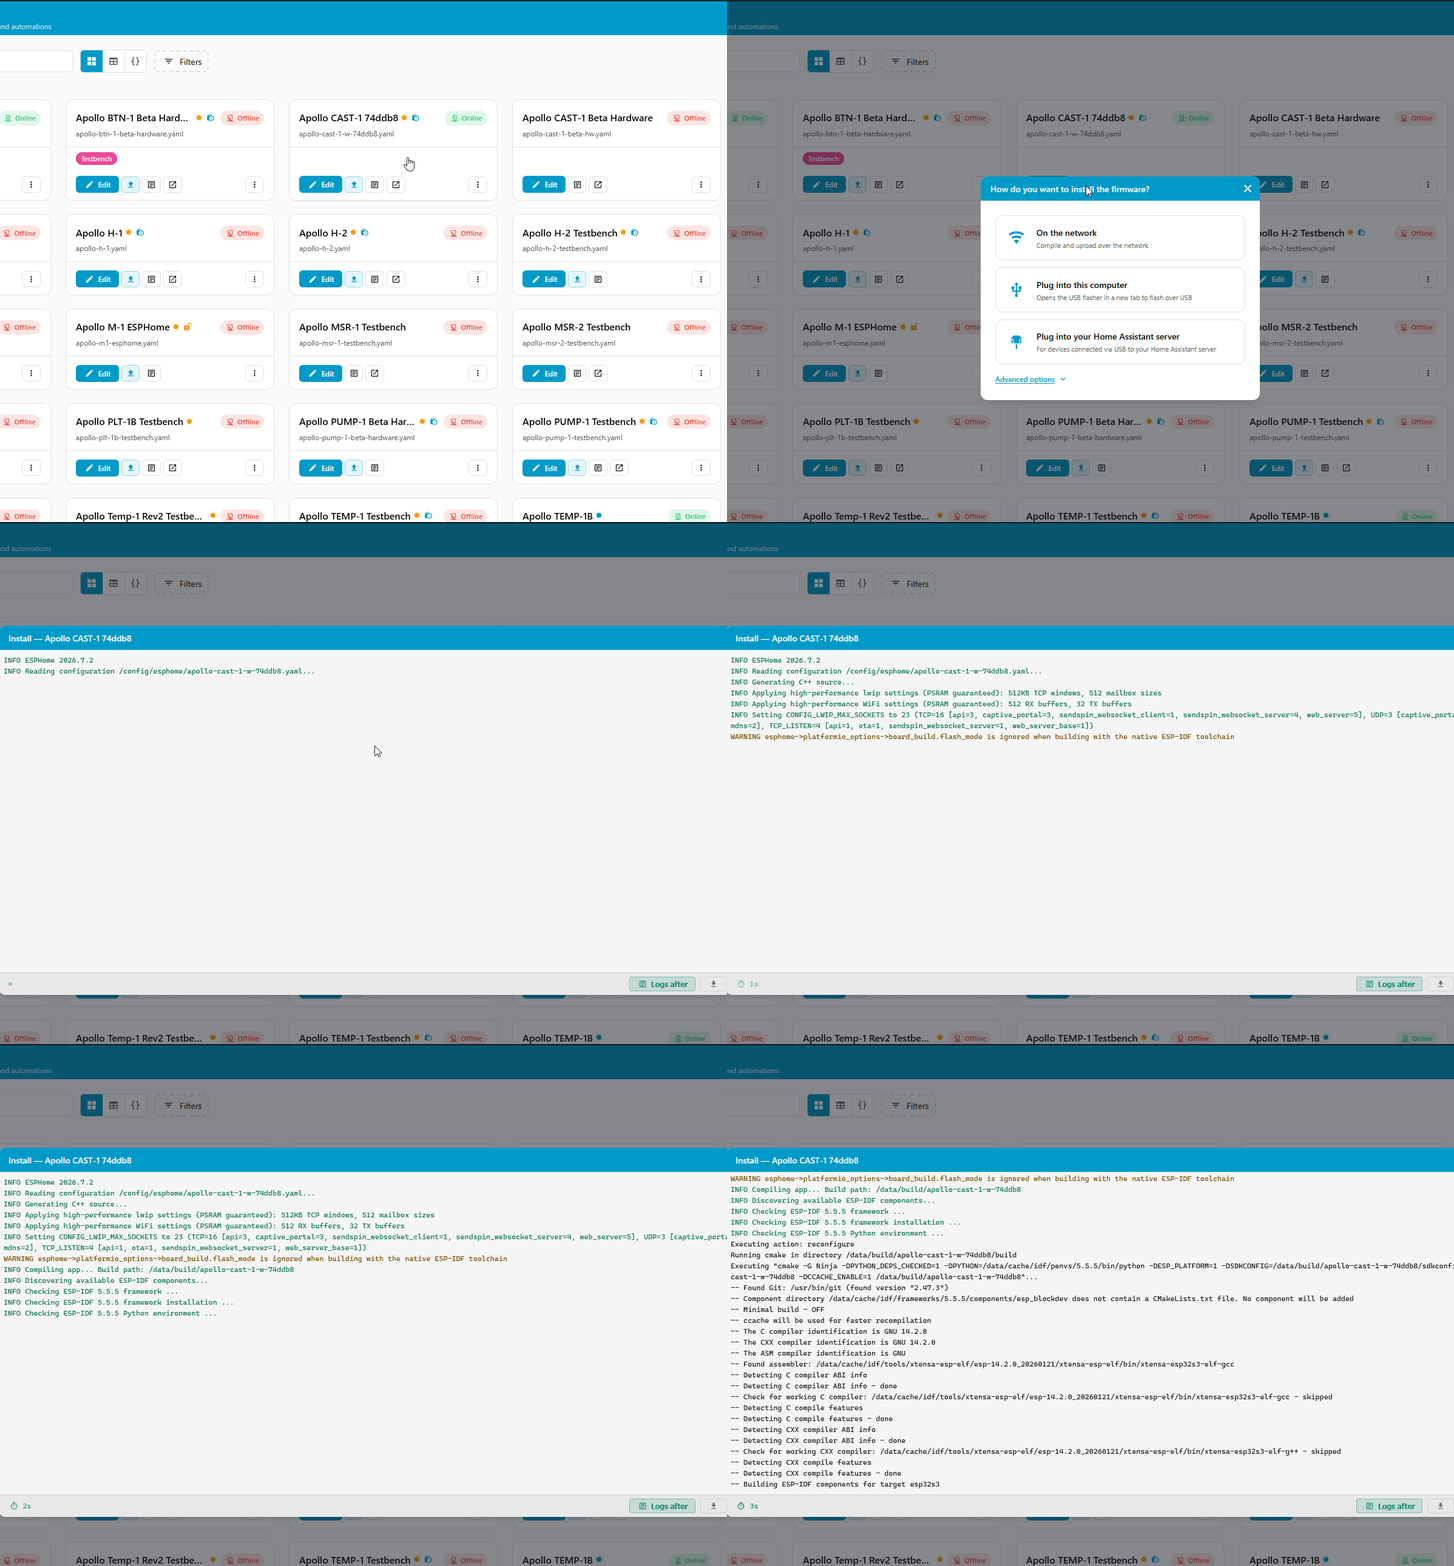
3. Click Install (the up arrow icon), then click On the network and watch it finish installing. (1)
- This takes 5 to 10 minutes depending on how fast your device is.
4. Once it completes, click Stop, then press the Reset button on your device. Your CAST-1 will reboot and it's now ready to test out!
You're all set!
Your CAST-1 is now adopted into the ESPHome Device Builder, where you can rename it or edit its YAML.