M-1 LED Matrix settings
These are the settings that make the HUB75 panel display correctly. You need them if you reflashed your M-1, wiped its settings, or changed the number of panels. Units that ship on WLED arrive already configured for one 64x64 panel.
Friendly name
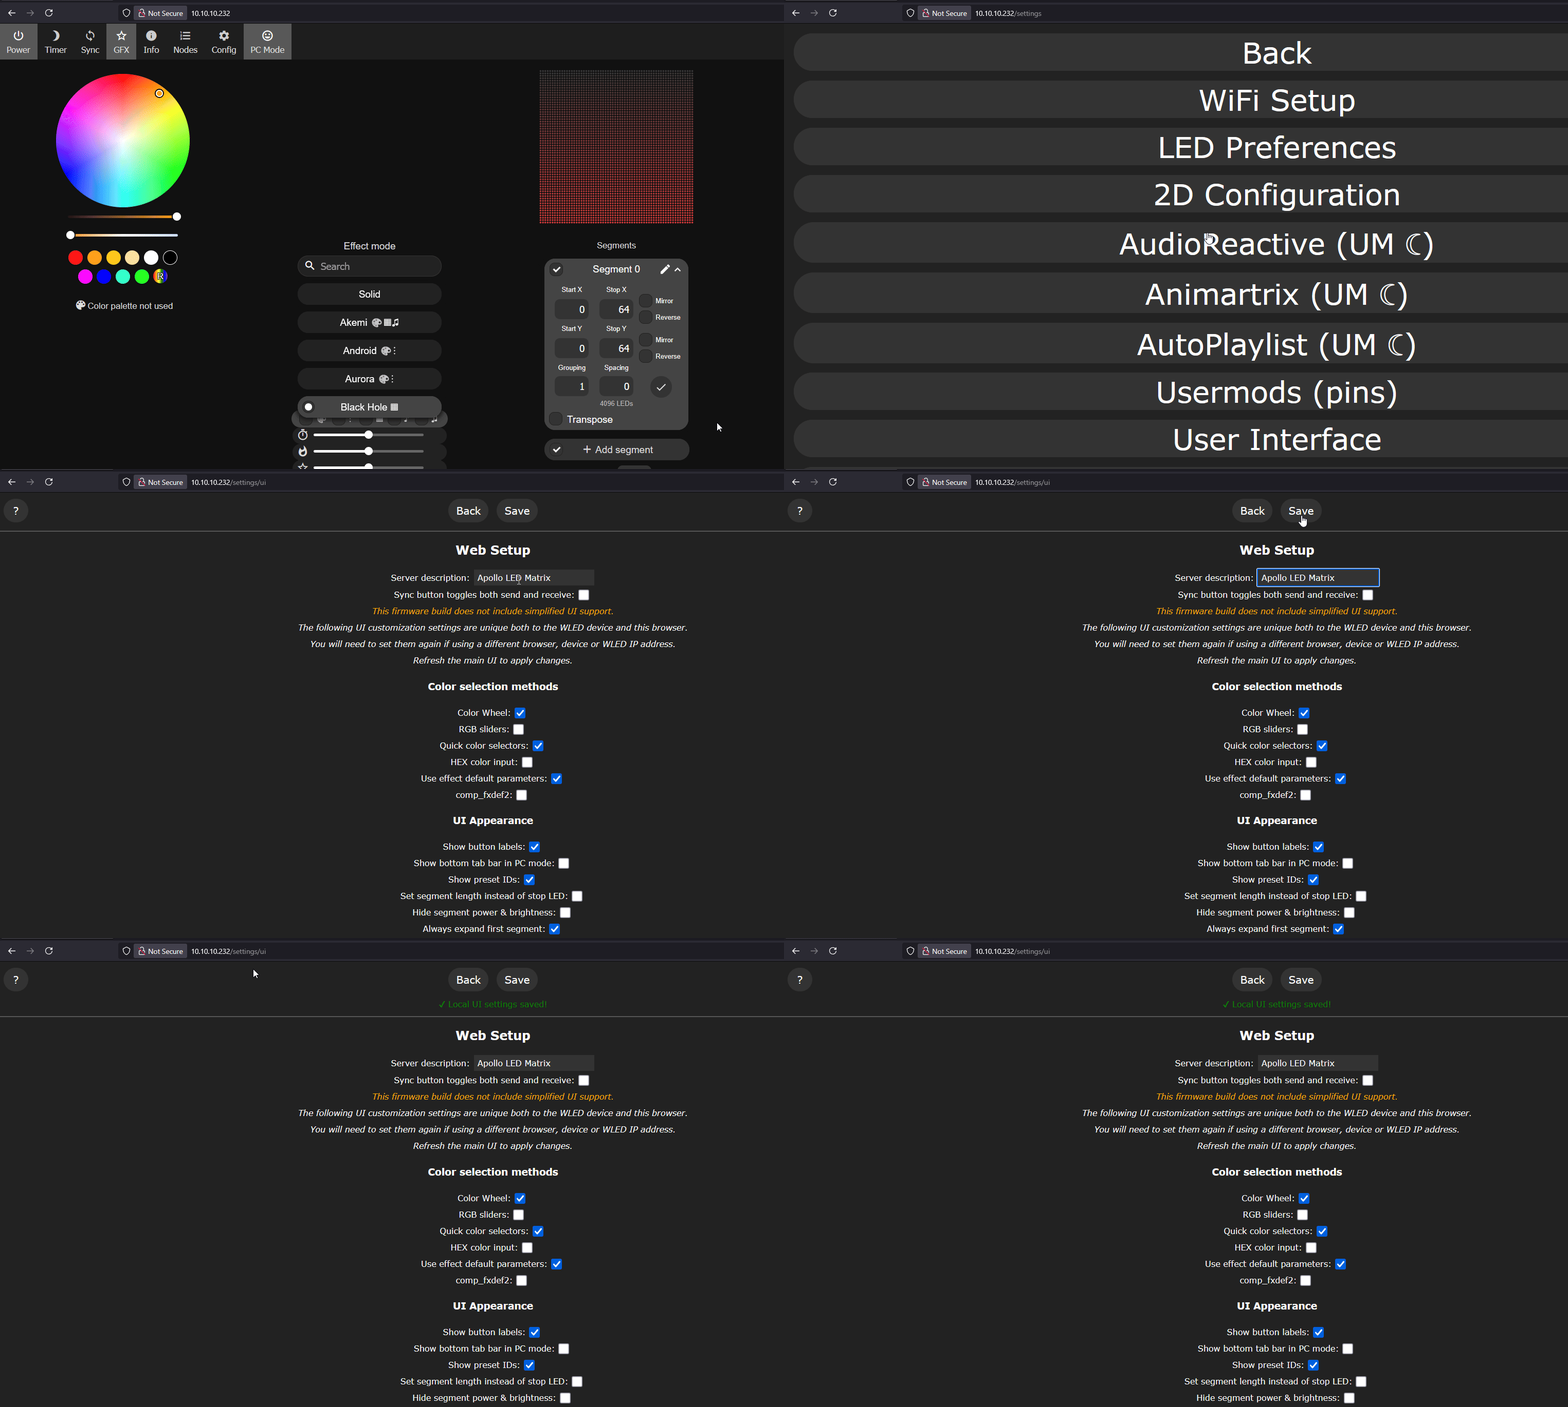
Click on Config, then User Interface. In the Server description field, enter the name you want your M-1 device to display as in the WLED interface, such as Apollo LED Matrix. It ships as Apollo M-1, so this is only worth changing if you want something else.
Hostname
Your M-1 already has one. It ships as apollo-led-matrix-xxxxxx, with the last six characters unique to your unit, so several M-1s can sit on the same network without clashing.
To change it, click on Config, then WiFi Setup. In the mDNS address field, enter the hostname you want your M-1 to use on your network such as apollo-led-matrix. Your device is then accessible via its IP address or the hostname you just made with ".local" added to the end such as http://apollo-led-matrix.local. If you own several M-1s, give each a distinct name, since two units sharing one mDNS address will fight over it.
Hostnames can only have numbers, letters, and dashes
Make sure not to use invalid characters for your hostname!
Length
- The entire hostname (including dots) must be ≤ 253 characters.
- Each label (the part between dots) must be 1–63 characters.
Characters
Allowed characters are:
- Lowercase a–z
- Digits 0–9
- Hyphen
-
No Special Characters
- No underscores (
_), spaces, punctuation, or other symbols.
Start and End Restrictions
- Each label must start and end with a letter or digit.
- Labels cannot begin or end with a hyphen.
Case-Insensitive
- Hostnames are not case sensitive (
HostName=hostname).
LED settings
Click Config, then LED Preferences, and find the HUB75 section.
| Field | Single panel |
|---|---|
| Type | HUB75 (Half Scan) |
| Panel (width x height) | 64 x 64 |
| No. of Panels | 1 |
| rows x cols | 1 and 1 |
| Reversed | unchecked |
Both boxes are 1 on a single panel. The first is how many panels down and the second is how many across, which only matters once you add panels.
Enable automatic brightness limiter stays unchecked and Global brightness factor stays at 100%. Total LEDs at the top of the page should read 4096. Click Save.
The panel goes black after any HUB75 change and stays dark until you reboot. That is expected, not a failed setting.
Running more than one panel? The grid fields are what make 2x2 and other layouts possible, and Multiple Panels covers every arrangement.
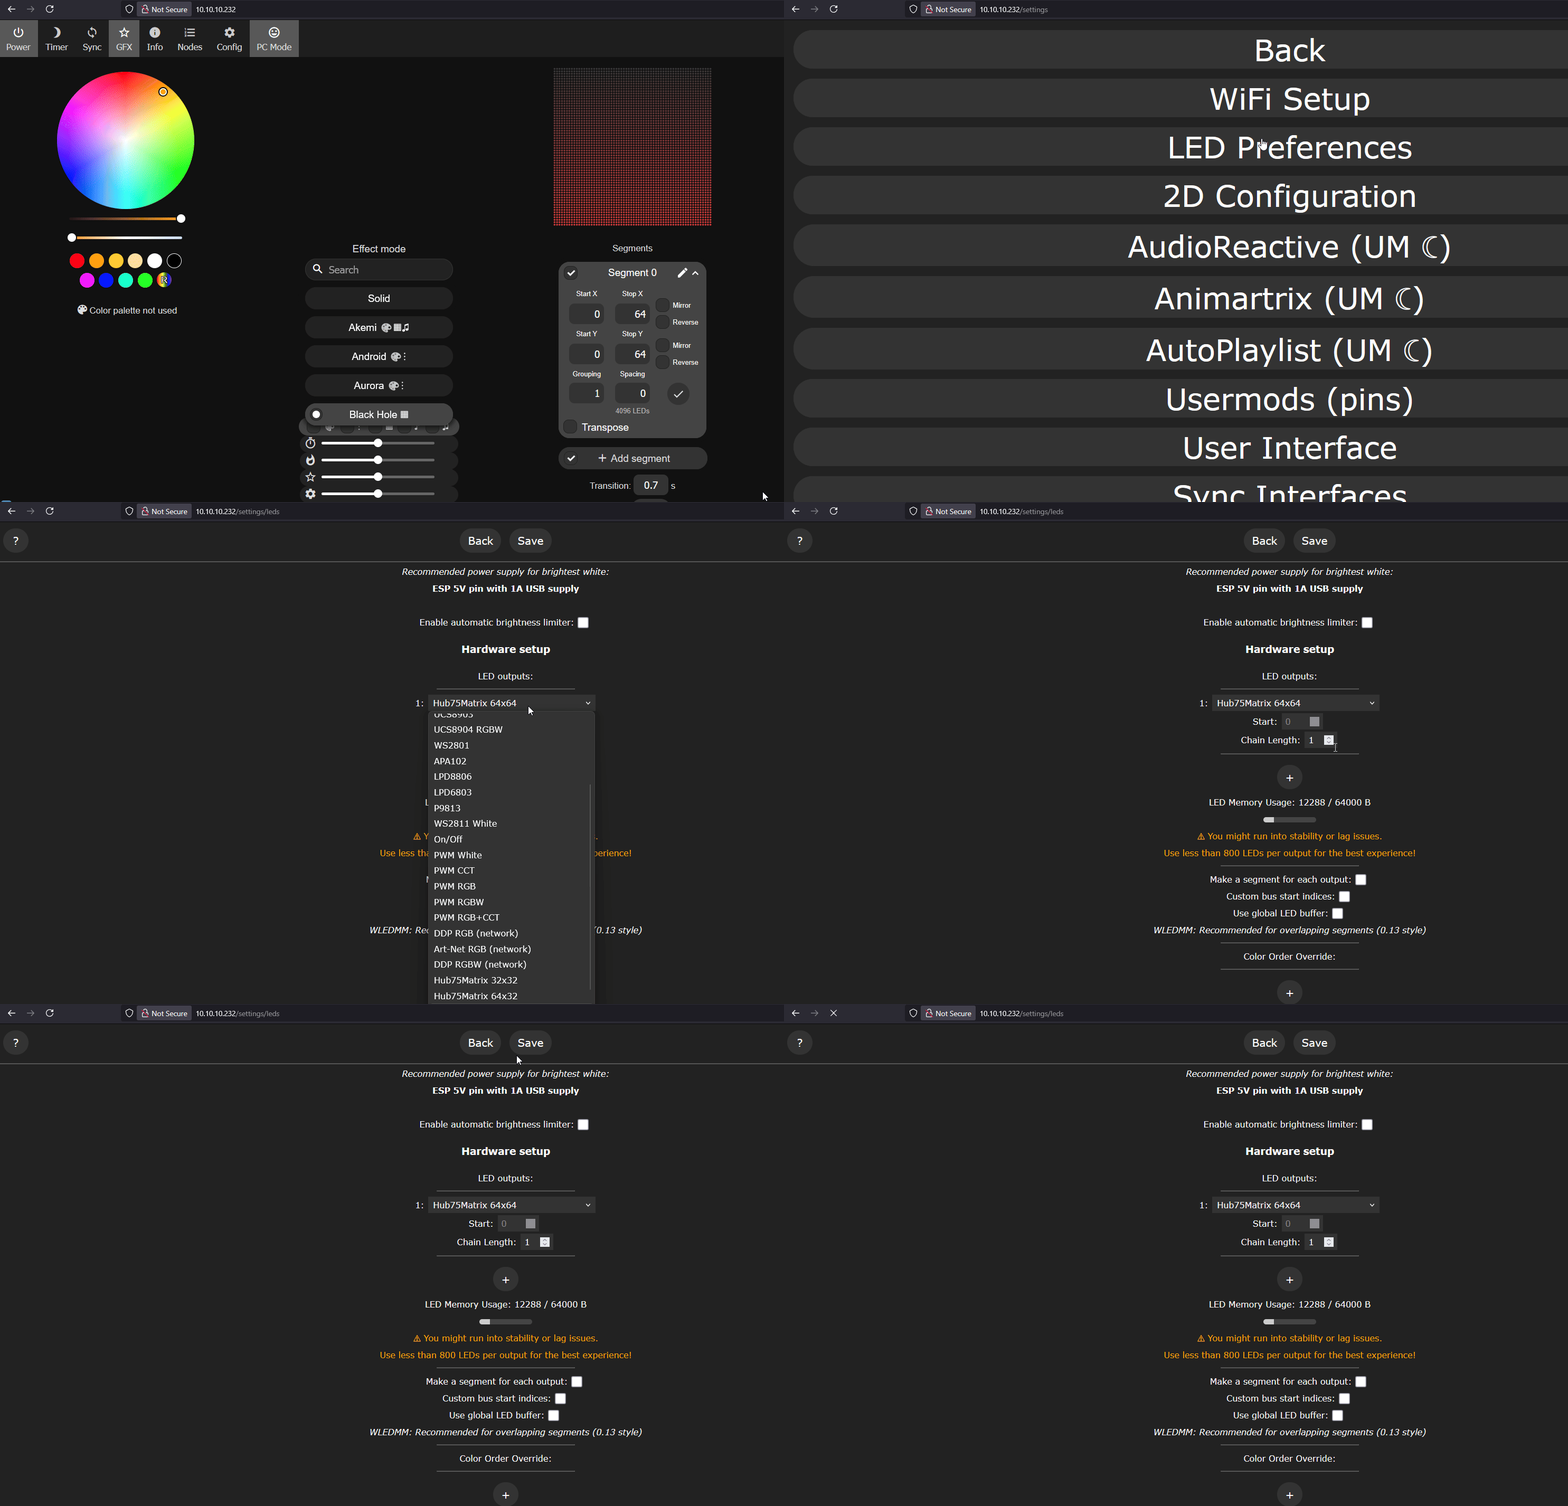
Click on Config, then LED Preferences. Select Hub75Matrix 64x64 and set Chain Length to 1 then uncheck the "enable automatic brightness limiter" and click Save.
2D settings
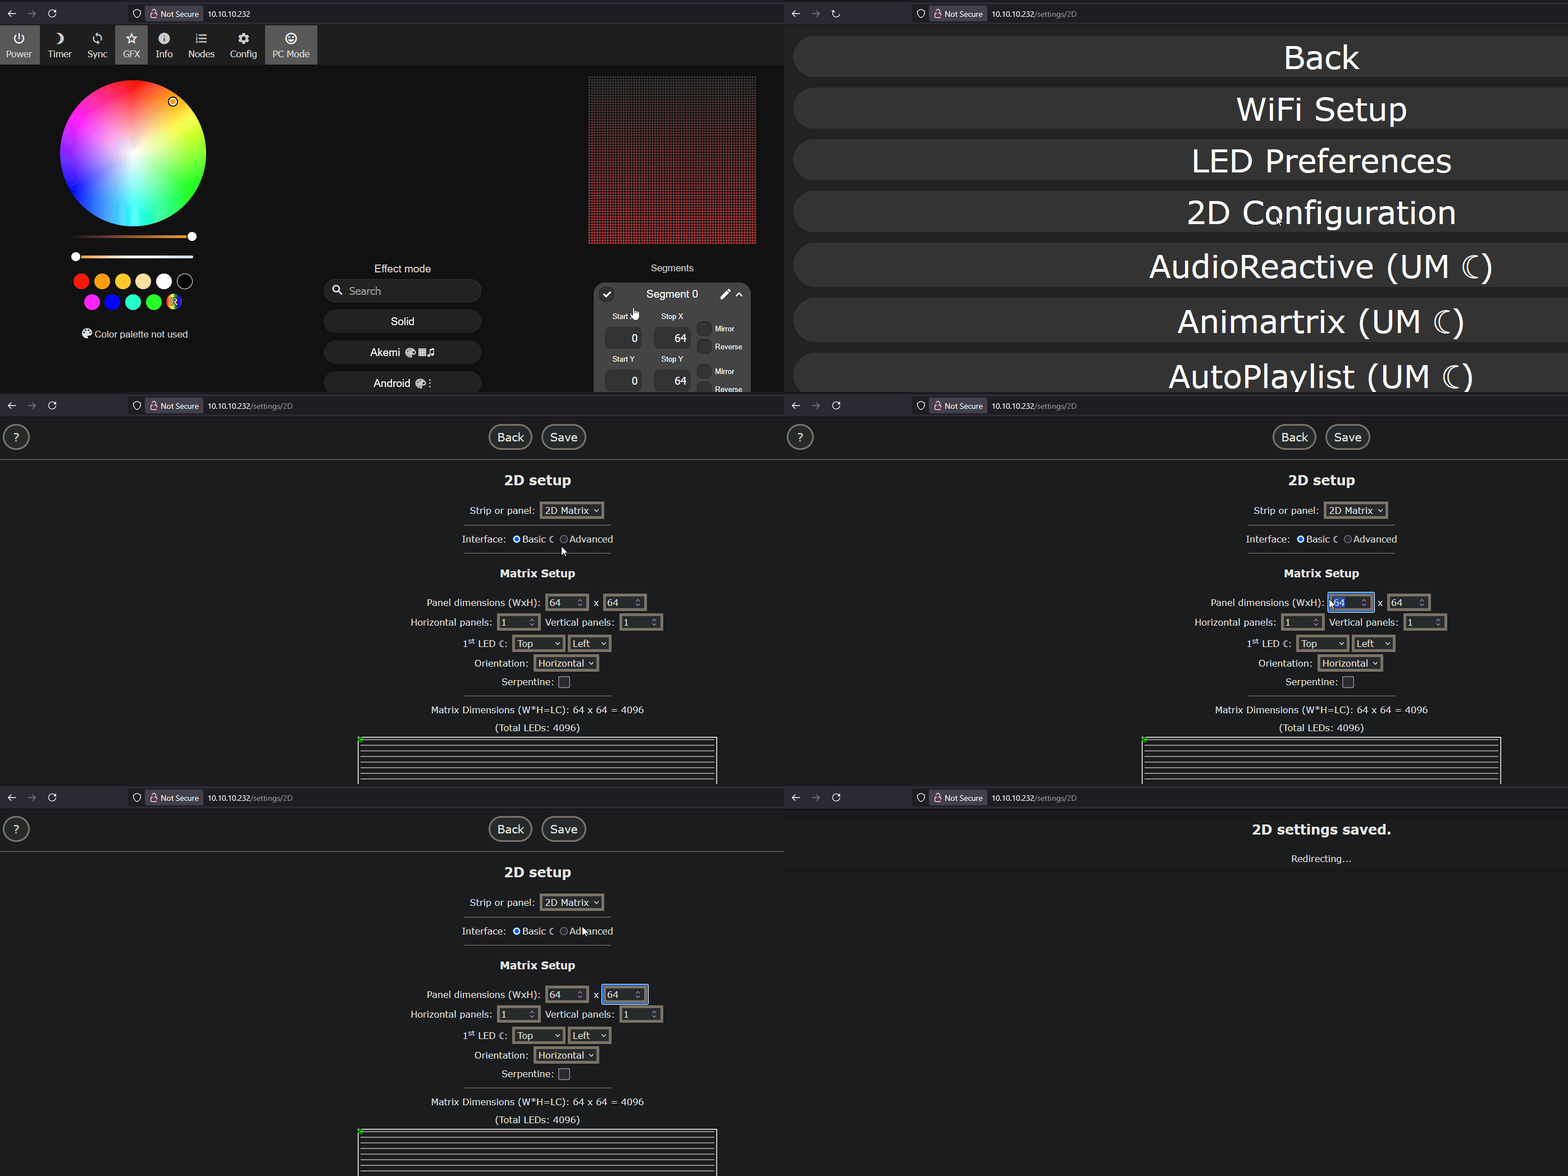
Click Config, then 2D Configuration. Set it to a single 64 x 64 panel with 1st LED at Top/Left, Horizontal orientation, and Serpentine off, then click Save.
The 2D setup does not follow the HUB75 output change on its own. If you change panel count or size, come back here and set the dimensions manually.
Finish by rebooting. Tap Info at the top, scroll down, select Reboot WLED, and tap again to confirm.
Click on Config, then 2D Configuration. Select 2D Matrix, click the circle next to Basic, change the Panel dimensions (WxH) to 64 x 64 and click Save.
AudioReactive settings
The Audioreactive is only available on a rev6 PCB with the optional microphone addon
The original Rev4 PCB does not have a microphone on the board and will not work. Only Rev6 or newer PCBs with the optional microphone addon will be able to use AudioReactive.
There is nothing to set up. Sound reactivity is on from the factory, with the type, pins, and sync mode all configured already. Plug in the microphone addon, pick any effect with a musical note beside it, and make some noise.
If effects are not reacting, check Config, then Usermods, then AudioReactive, and confirm Enabled is still on. The microphone addon page shows the full set of factory settings.
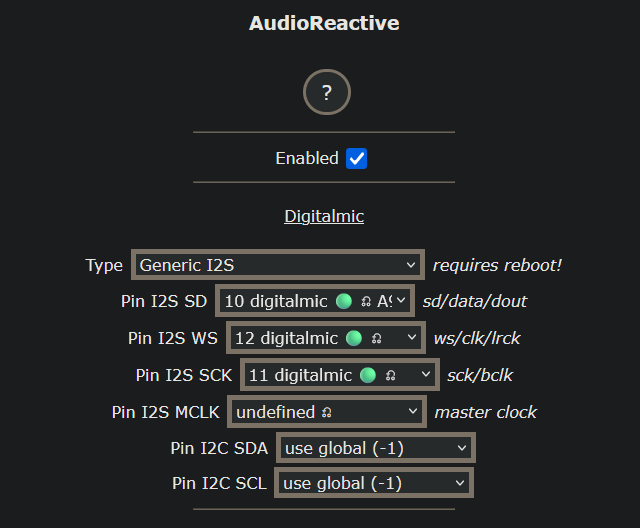
Click on Config, then AudioReactive. Check Enabled then select Generic I2S for the Type.
For the pins, select 10 digitalmic for Pin I2S SD, 12 digitalmic for Pin I2S WS, and 11 digitalmic for Pin I2S SCK, then click Save.
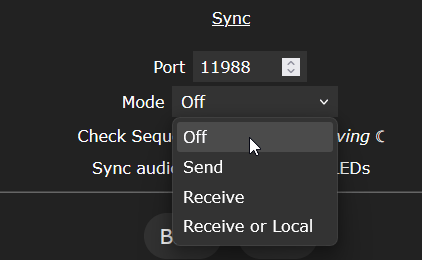
Scroll to the bottom of the AudioReactive settings and set the Mode to Off and click Save.