ESPHome Starter Kit - First Steps
This guide walks you through installing the ESPHome Device Builder app, and making your first ESPHome YAML configuration from scratch.
By the end you'll have your ESPHome Starter Kit flashed with a working configuration, showing up in Home Assistant, and reachable in a browser at its IP address or http://esphome-starter-kit.local via its built-in web server.
Click the Apollo dog for extra context
When you see a small Apollo dog peeking over a step or word, give it a click (1). It opens a side note with tips, gotchas, or examples you don't need on first read.
- Like this, you just opened your first annotation. Click outside the box to close it. Good dog.
Fun fact: the dog is Apollo Automation's original logo. Both the company name and the logo come from cofounder Trevor's real dog, Apollo.
ESPHome Device Builder
ESPHome Device Builder is the software that gives you a user interface for writing, compiling, and flashing ESPHome YAML configurations. You'll use it to build the firmware for your kit.
Think of it like telling the starter kit about what devices it has connected and how to use them!
Pick the platform you'll be running ESPHome Device Builder on:
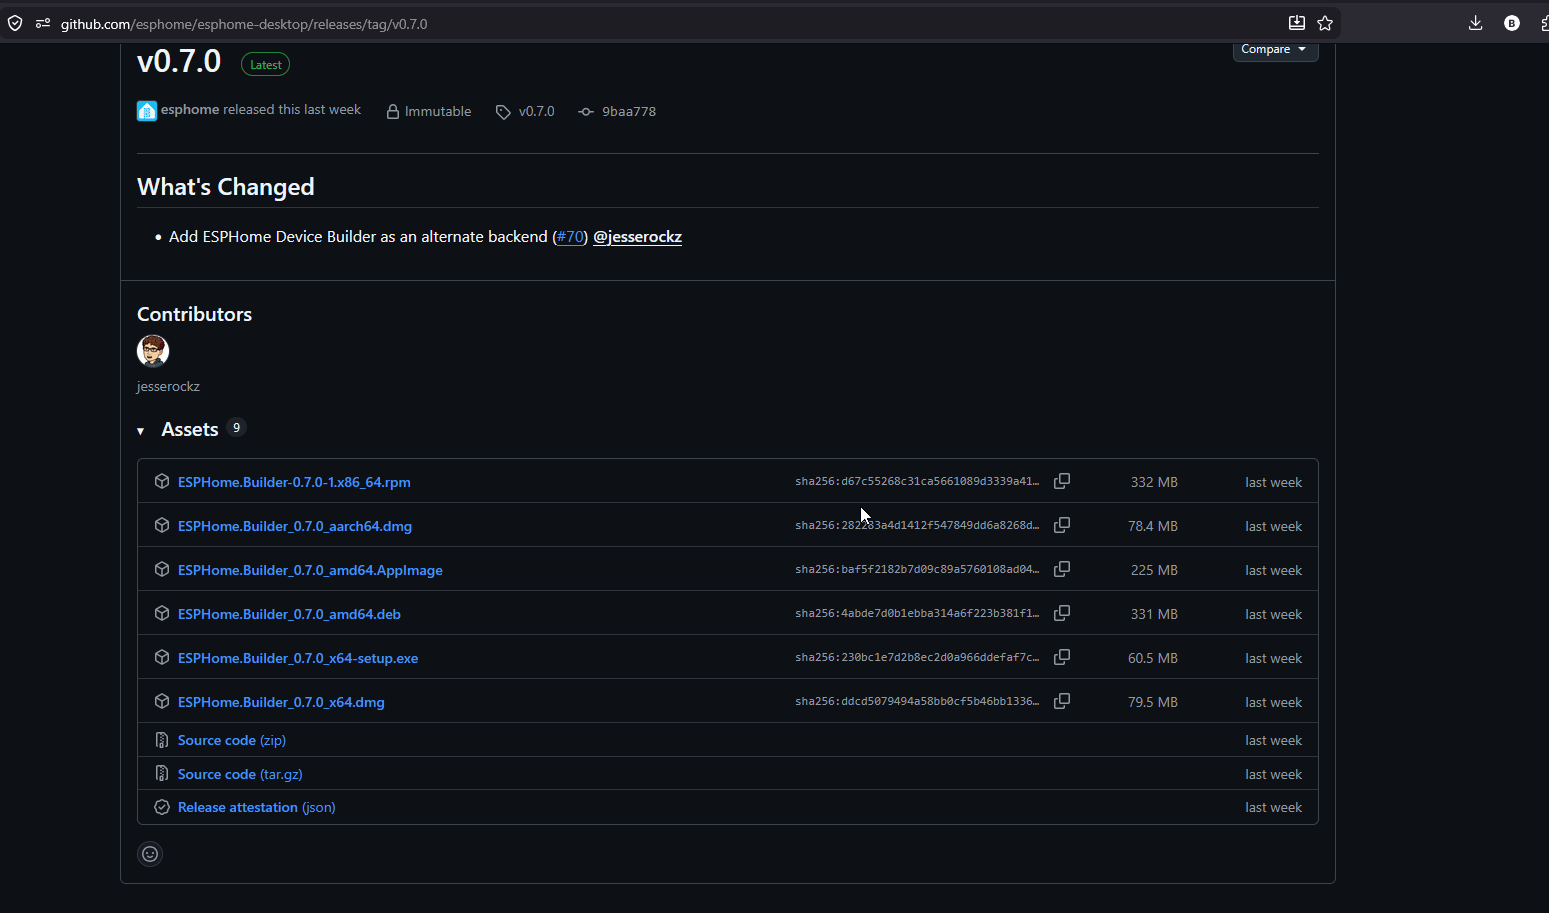
- Open esphome.io/install and click Download installer under the Windows tab.
- Open the installer and click Next then click Next again to start the installation process. Once it shows completed, click Next again then Finish to complete the installation.
You may see Windows prompts during install
- If Windows shows a blue Windows protected your PC warning, click More info → Run anyway to continue.
- If Windows Security asks whether to allow public and private networks to access Python, click Allow.
- If the installer fails or the Device Builder can't compile firmware, install Git for Windows from gitforwindows.org and try again. Future installer builds will bundle this for you.
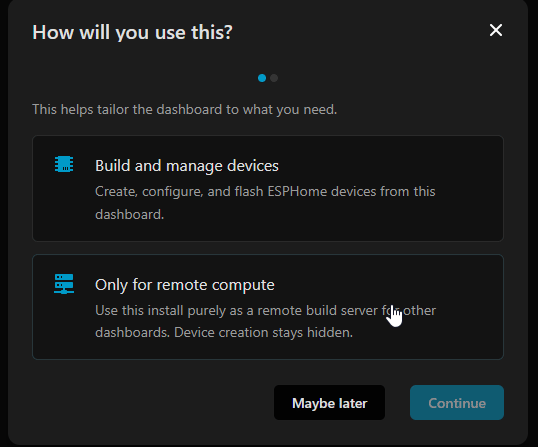
Once installed, a web browser should launch and navigate to http://localhost:6052/. On first launch, ESPHome Device Builder asks how you will use it. Select Build and manage devices, then select New to ESPHome and click Finish.
-
Open esphome.io/install. The page detects your OS and shows the macOS downloads. Pick the build that matches your chip:
- Apple Silicon (M1, M2, M3, M4, M5)
- Intel Mac
-
Open the
.dmgand drag ESPHome Builder into your Applications folder. Launch it from Applications or Spotlight.- On first launch, macOS may block the app with a Gatekeeper warning. If that happens, right-click the app in Applications and choose Open, then click Open in the confirmation dialog. After the first launch, double-click will work normally.
Once installed, a web browser should launch and navigate to http://localhost:6052/. On first launch, ESPHome Device Builder asks how you will use it. Select Build and manage devices, then select New to ESPHome and click Finish.
The ESPHome Device Builder runs as a Home Assistant app served right inside your existing HA dashboard. This is the easiest option if you already run Home Assistant OS or a supervised install.
Method 1
To add the ESPHome Device Builder to your Home Assistant instance, use this My button:

Method 2
- In Home Assistant, open Settings → Apps → App Store.
- Search for ESPHome Device Builder and click Install.
- Once installed, click Start, then Open Web UI. The Device Builder will open inside your Home Assistant dashboard.
-
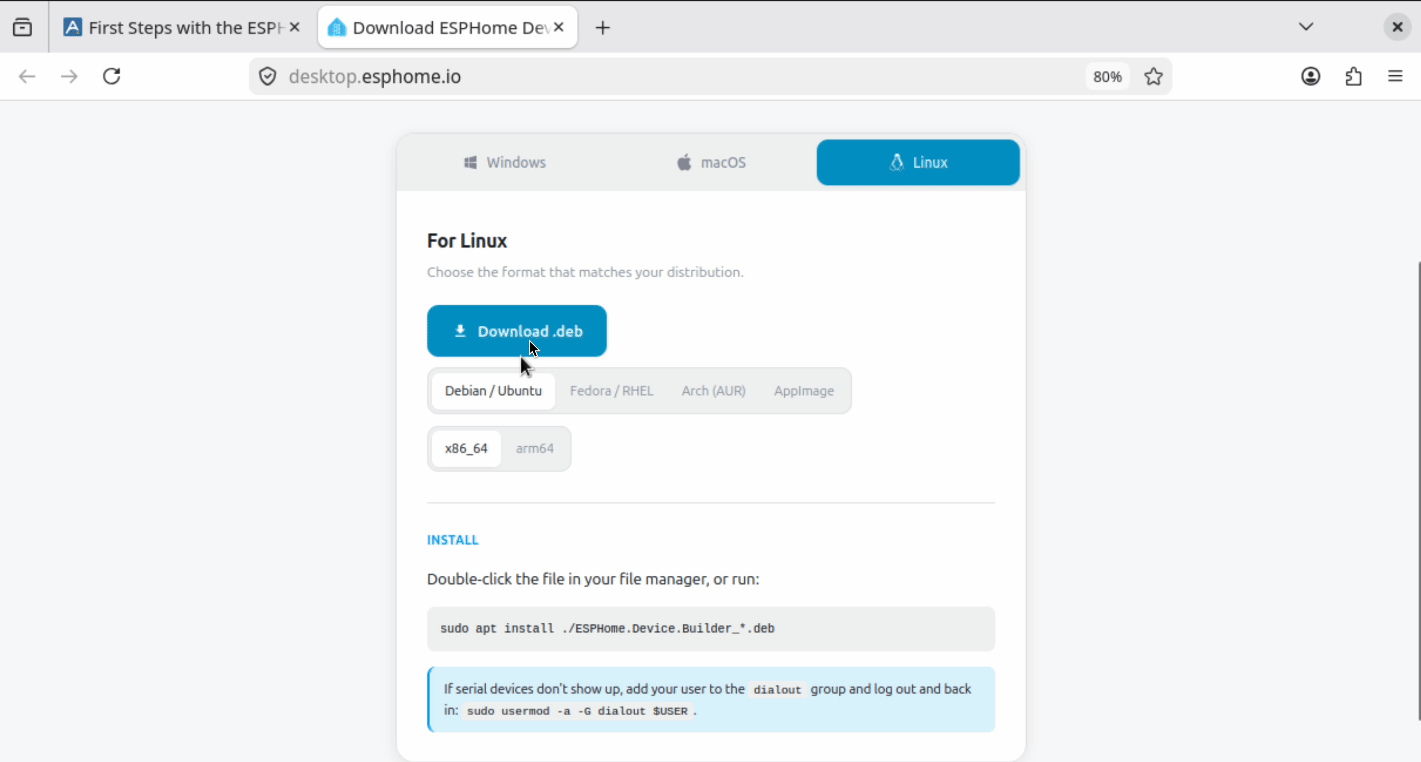
Open esphome.io/install. The page opens on the Linux tab and shows Download .deb as the default. Click Download .deb to grab the Debian / Ubuntu package.
If your distro fits a different format, switch to the matching tab on the download page first:
- Fedora / RHEL → downloads a
.rpm - Arch (AUR) → opens the AUR package page
- AppImage → downloads a portable AppImage that runs on any distro
- Fedora / RHEL → downloads a
-
Install the package. Pick the workflow you're more comfortable with:
Works for the
.debdownload. Skip to the CLI tab if you grabbed a.rpm, AUR package, or AppImage.- Open your Downloads folder in your file manager.
- Right-click the
ESPHome.Builder_*.debfile and choose Open with → Archive Manager (or whichever archive viewer your distro ships). - In the archive viewer, click Extract and pick a folder you can find again, like
~/esphome-desktop. - Open the extracted folder, then navigate into
usr→bin. - Double-click
esphome-desktopto launch the app.
From a terminal, run the installer that matches the file you downloaded:
- .deb (Debian / Ubuntu):
sudo apt install ./ESPHome.Builder_*.deb - .rpm (Fedora / RHEL):
sudo dnf install ./ESPHome.Builder*.rpm - AppImage (any distro):
chmod +x ESPHome.Builder_*.AppImagethen double-click the file, or run it from a terminal.
Once installed, a web browser should launch and navigate to http://localhost:6052/. On first launch, ESPHome Device Builder asks how you will use it. Select Build and manage devices, then select New to ESPHome and click Finish.
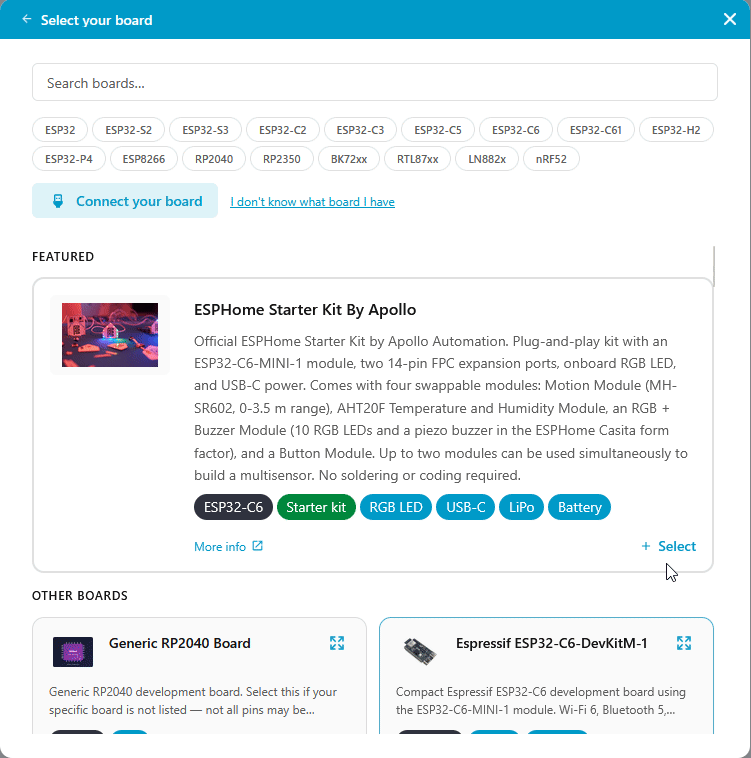
Add a new device
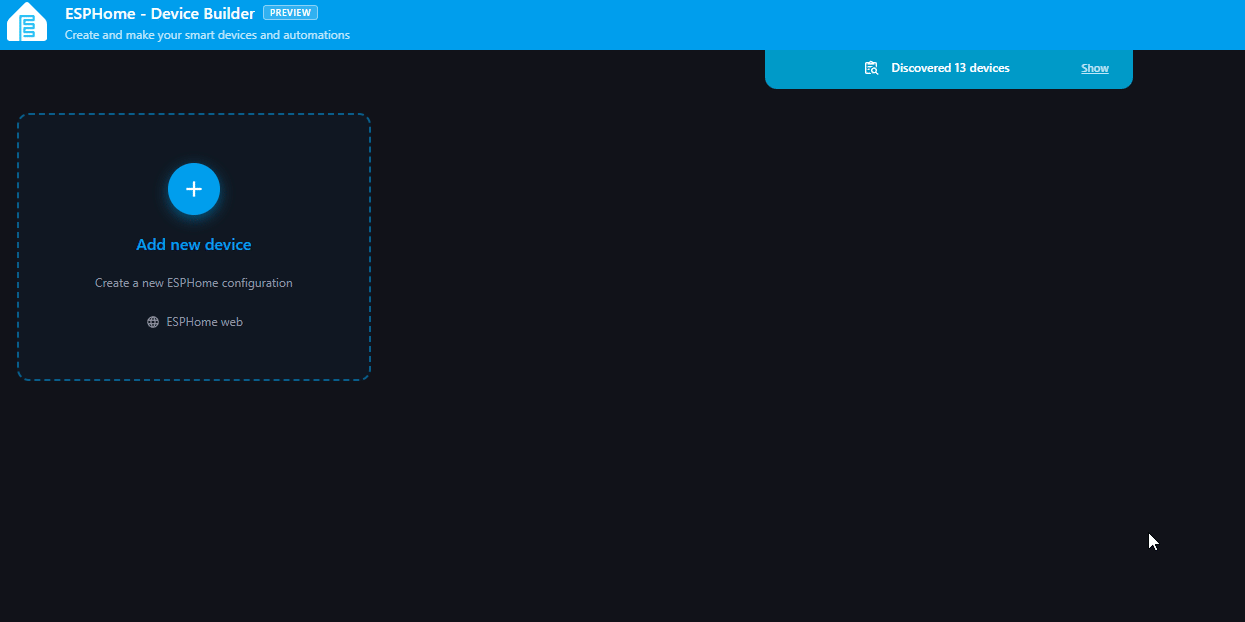
1. Navigate back to the ESPHome Device Builder and click Add new device then click Create new project.
2. Select the Apollo ESPHome Starter Kit and give it a name such as esphome-starter-kit, then click Next. (1) Type in your Wi-Fi network name (SSID) and Wi-Fi password, then click Finish Setup. (2)
- Remember the name you choose. You'll use it later to reach your device's web server at
http://your-name.local(for example, http://esphome-starter-kit.local/). - The password is case sensitive, so double-check it before you continue.
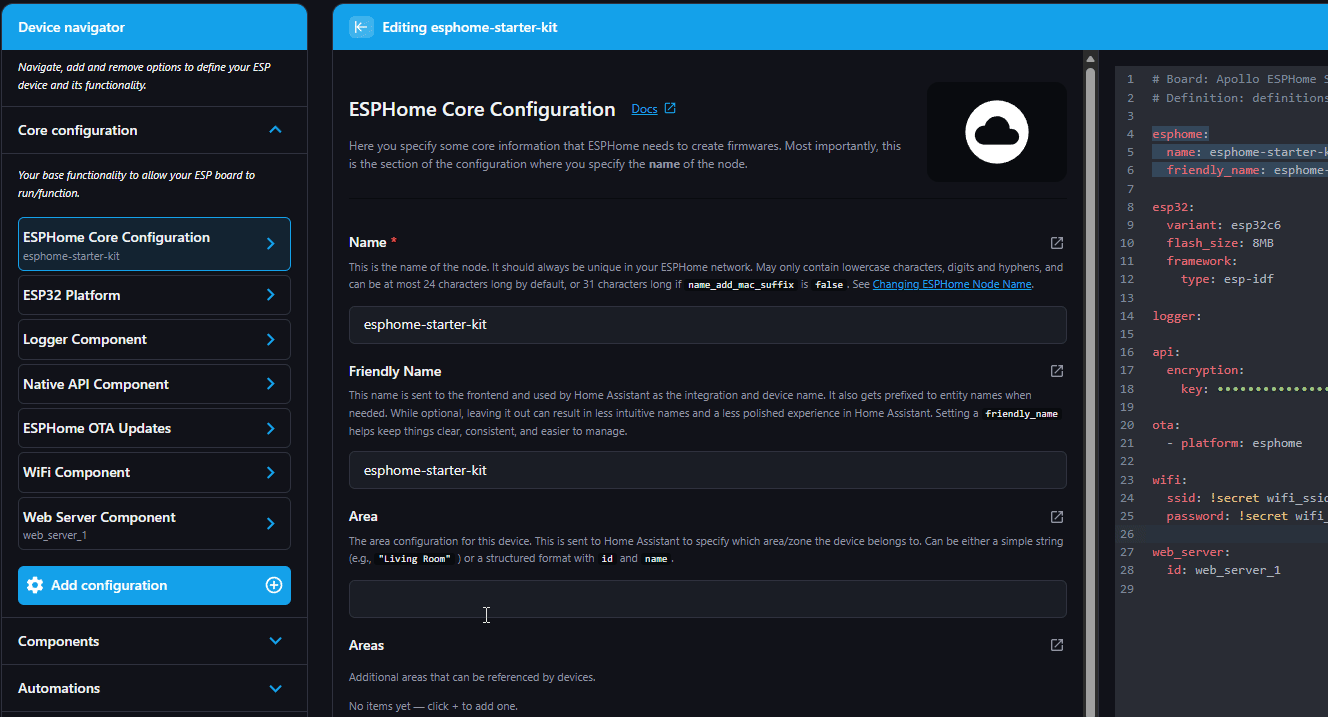
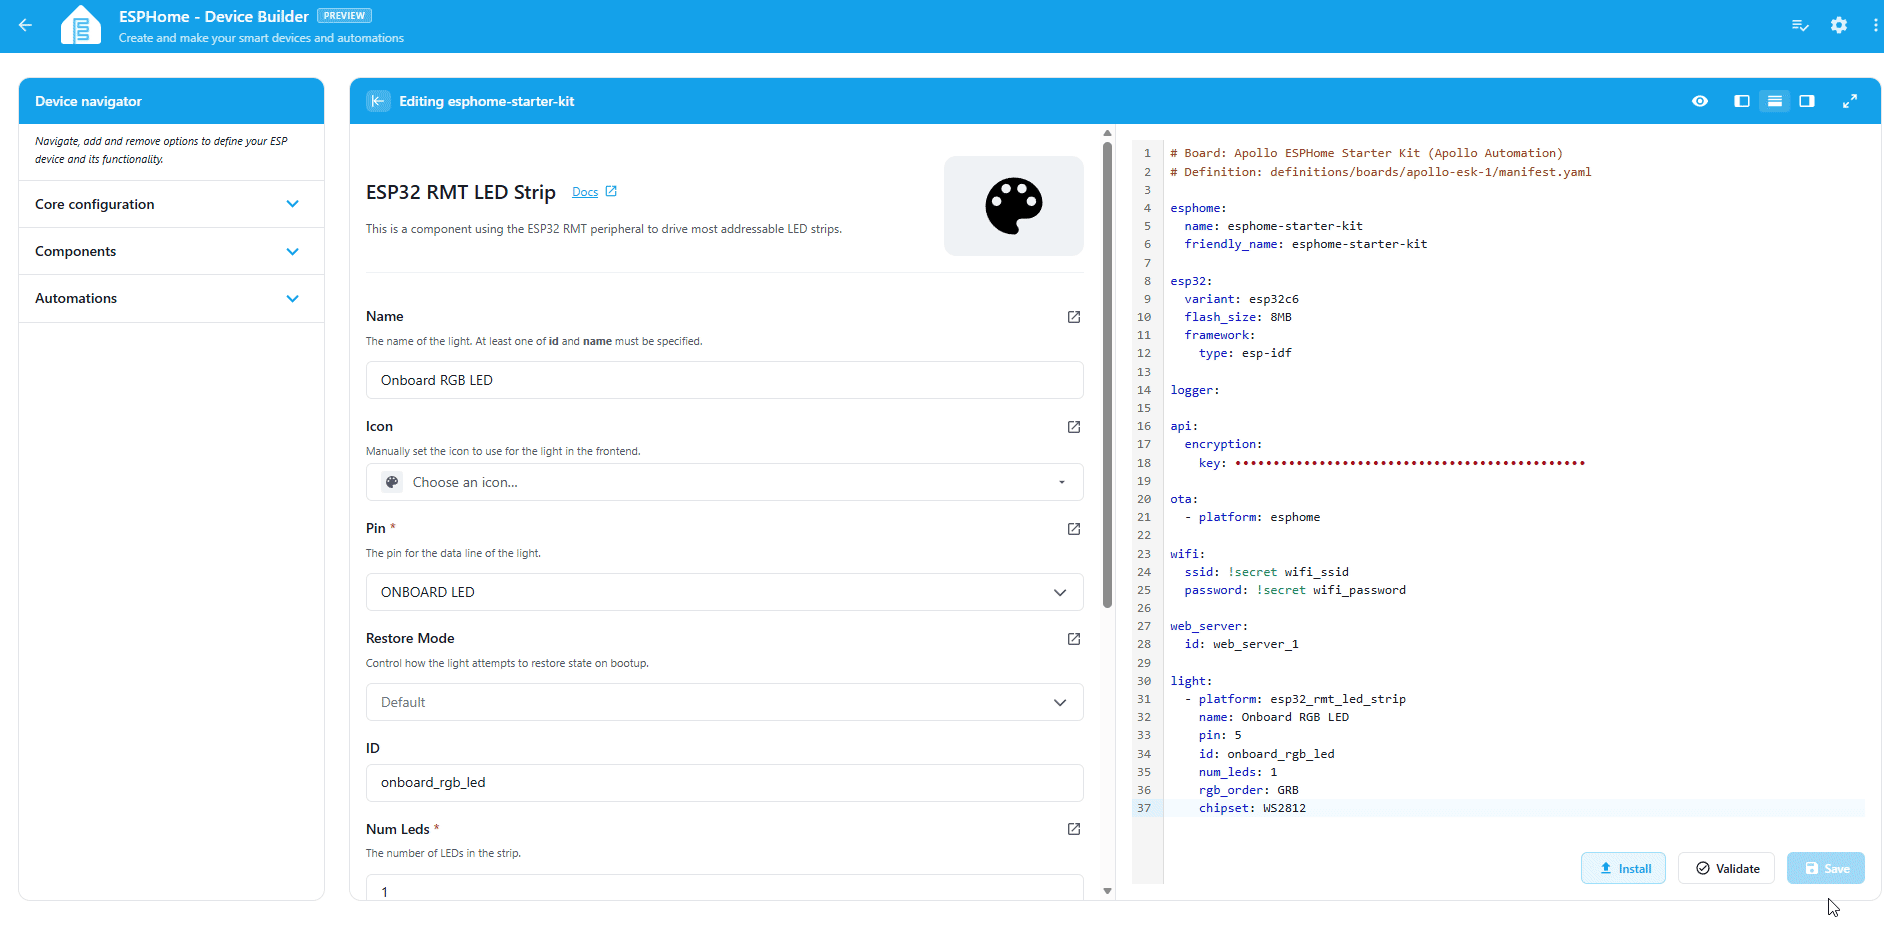
Configure Components
We're now ready to add your first component and turn your project into a smart device!
Below you will be learning how to add the Onboard RGB LED which will help you learn how to add a Component. You will be using this in the future for the other modules such as the Button and Motion modules!
When you create a new ESPHome Starter Kit project in ESPHome Device Builder, the Web Server and Accessory Power Rail components are already configured for you, so there's nothing extra to do for those. In this tutorial we'll add one more component: the Onboard RGB LED.
Onboard RGB LED
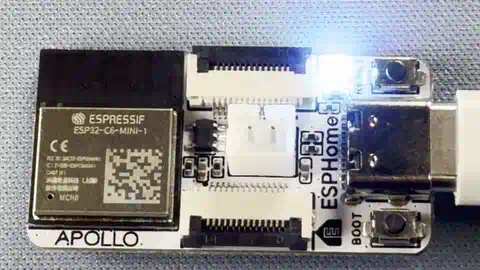
The Onboard RGB LED is a small LED above the Reset button of your ESP32-C6. Useful for testing automations and doubles as a status light.
- In the ESPHome Device Builder, navigate to the Components section.
- Click Add component.
- Scroll to Onboard RGB LED and click Add.
Boot Mode
The device is required to be flashed via USB using the bootloader mode the very first time it is used. Once you flash it once, you do not have to do these steps again
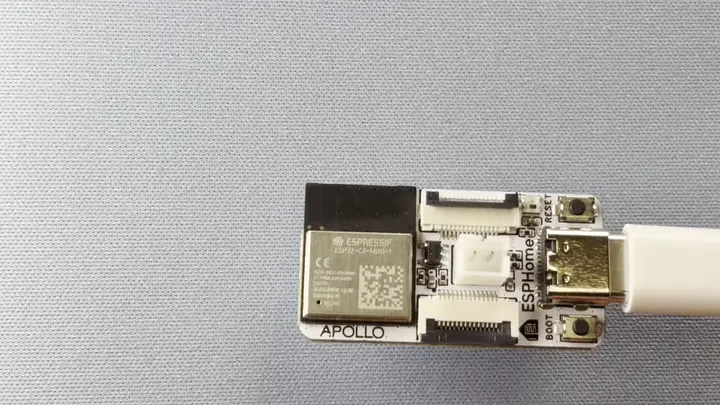
Use a quality USB-C cable and power source
ESP32 boards are sensitive to power. If your device keeps restarting, won't be detected, or won't broadcast its hotspot, try a different USB-C cable or a different USB port. A 5V 1A supply is plenty.
1. Hold the sides of the ESP32-C6 and gently push the USB-C cable firmly into the USB-C port. Plug in the other side of the USB-C cable into your computer. Please be careful not to snap or damage the FPC ribbon cable connectors located on the sides of the device.
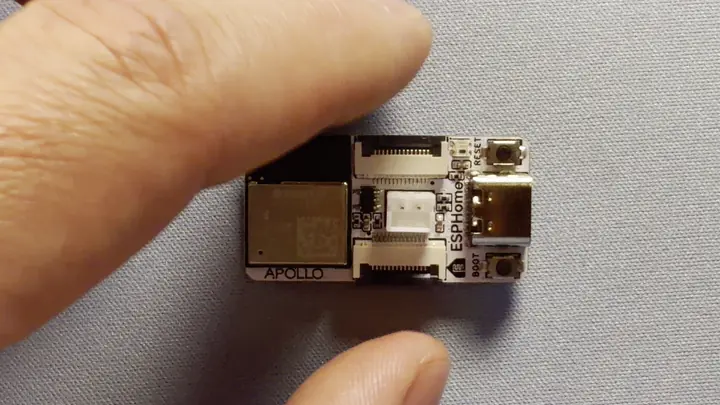
2. Hold down the boot button. While still holding the boot button, press and release the reset button, then release the boot button.
3. Your device is now in boot mode - The ESP32-C6 will now stay in bootloader mode until you flash it.
Installing Firmware
Before we continue, confirm that you installed the ESPHome Device Builder, configured your components, and put your device in boot mode.
- Click Save in the bottom right which will then show an Install button.
- Click Install in the bottom right.
- Click Plug into this computer.
- Select the COM port, then click Connect to connect to the ESP32-C6.
- Wait for the firmware to compile and install. This usually takes two to five minutes.
- Once it completes, click Stop, then press the Reset button on your device. Your device will reboot and it's now ready to test out!
Click Show details during the install to watch the compile and flash process
It's a great way to see what's happening under the hood.
Test your LED
Your kit's default project includes the Web Server component, which lets you navigate to the IP address of your device or the hostname.local such as http://esphome-starter-kit.local/
Use http:// not https://
Your kit only speaks http://. Some browsers quietly try https:// first, and the page just won't load. If that happens, click the address bar and add http:// before the name (so it looks like http://esphome-starter-kit.local/).
It should load your new device and show you the Onboard RGB LED. We can click the toggle button to make sure the RGB LED turns on and off on our device!
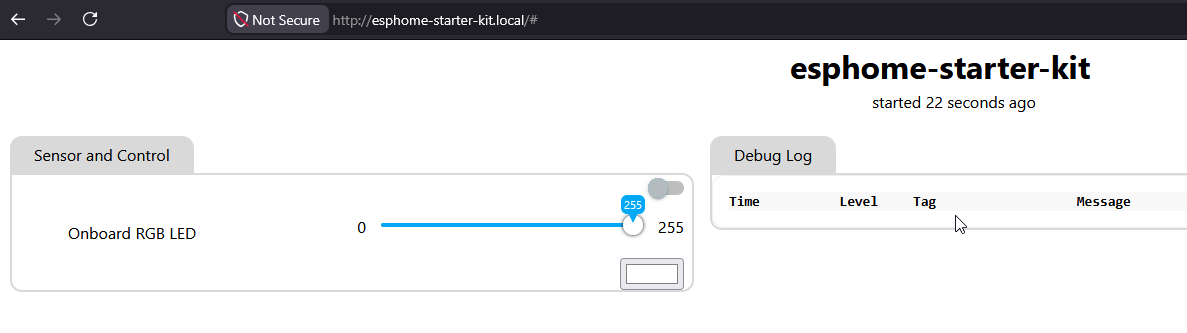
Example of the light changing colors below!
![]() Back - Start Here
Back - Start Here ![]() Add More Modules
Add More Modules ![]() Connect to Home Assistant
Connect to Home Assistant
New to ESPHome? We're here to help.
Stuck on a step or want to show off what you built? Ask questions and share projects with the Apollo community.