Bluetooth Proxy
This guide shows you how to make your Apollo device act as a "BLE Proxy" which lets Bluetooth devices talk back to home assistant using Apollo devices as the "next hop"!
Method 1: Switch to _BLE.yaml firmware
Select your product below to see the full walkthrough.
1. Open ESPHome Device Builder. The button below opens the app right in your Home Assistant.
2. Don't have it installed yet? Add it from the App Store with the badge below, then move on to step 3.

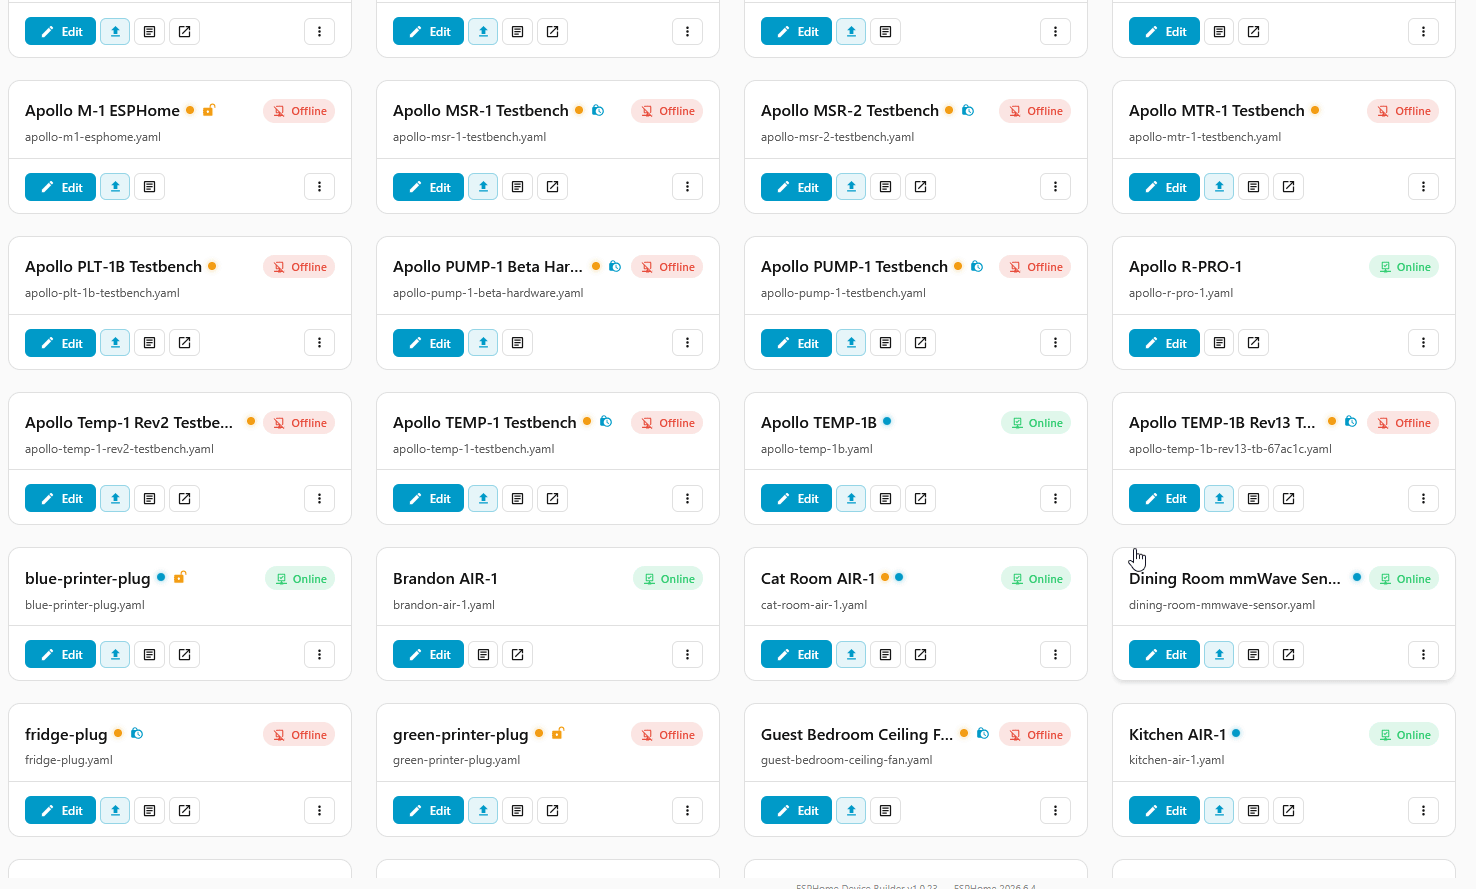
3. Find your device and click Edit.
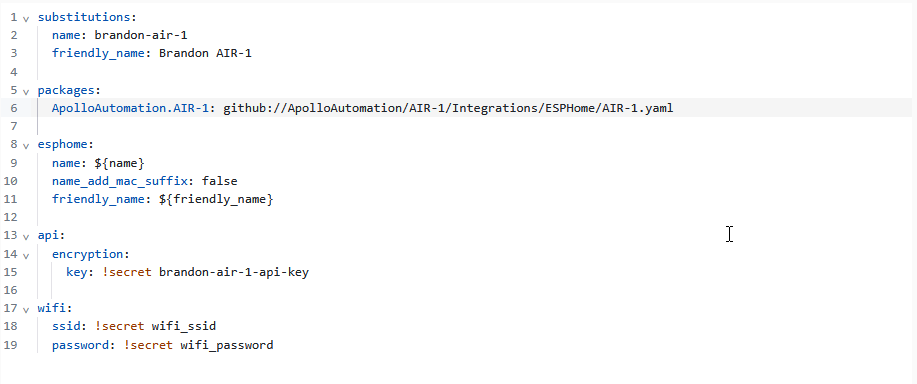
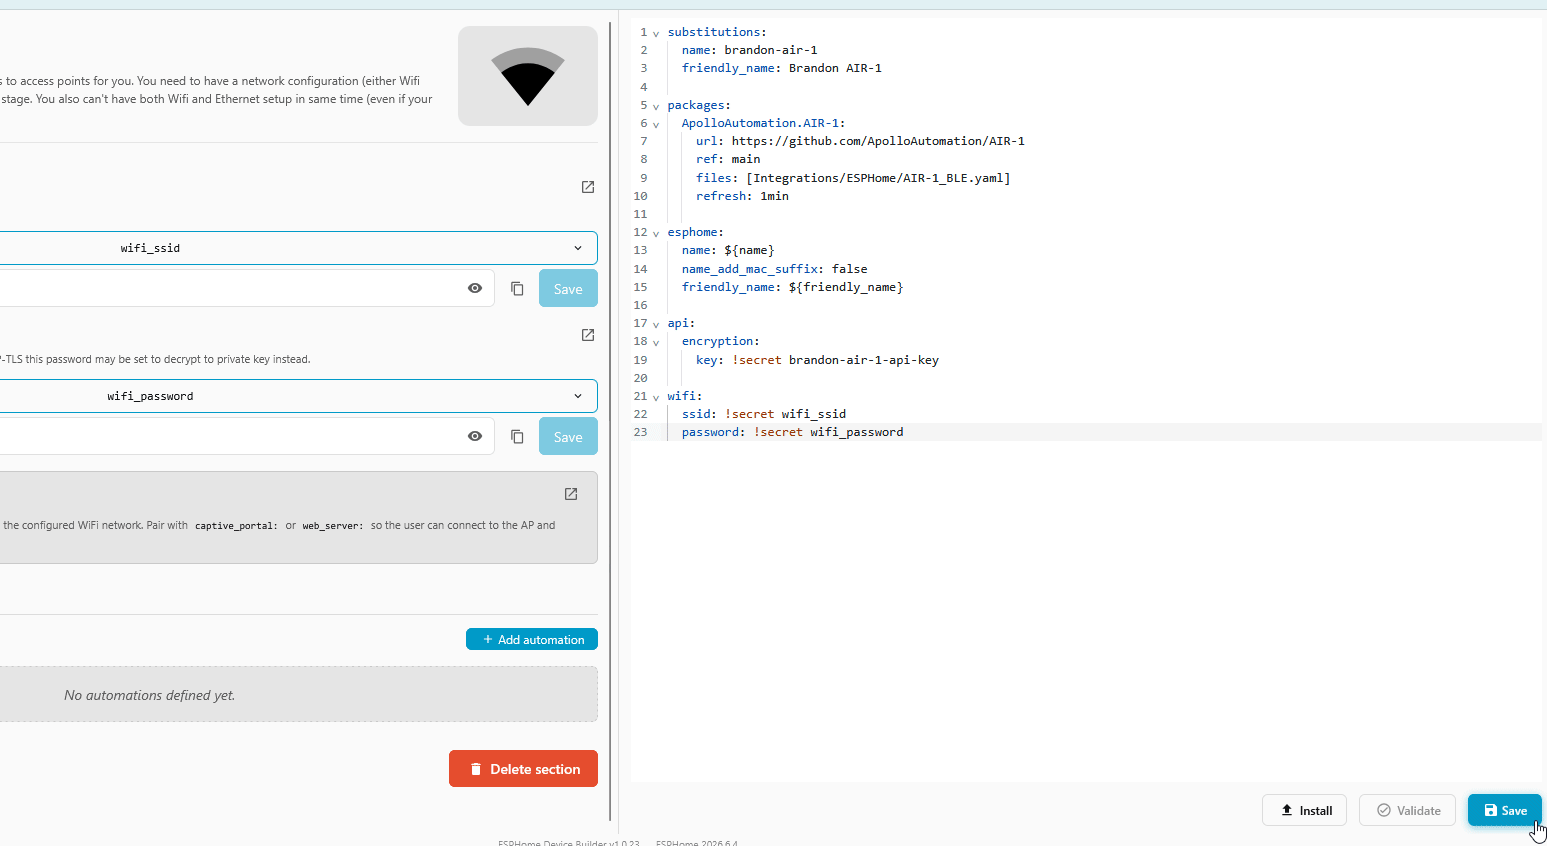
4. Replace the packages: line and the line directly below it with the code below.
packages:
  ApolloAutomation.AIR-1:
    url: https://github.com/ApolloAutomation/AIR-1
    ref: main
    files: [Integrations/ESPHome/AIR-1_BLE.yaml]
    refresh: 1min
5. Click Save then Install in the bottom right. Click On the network when prompted.
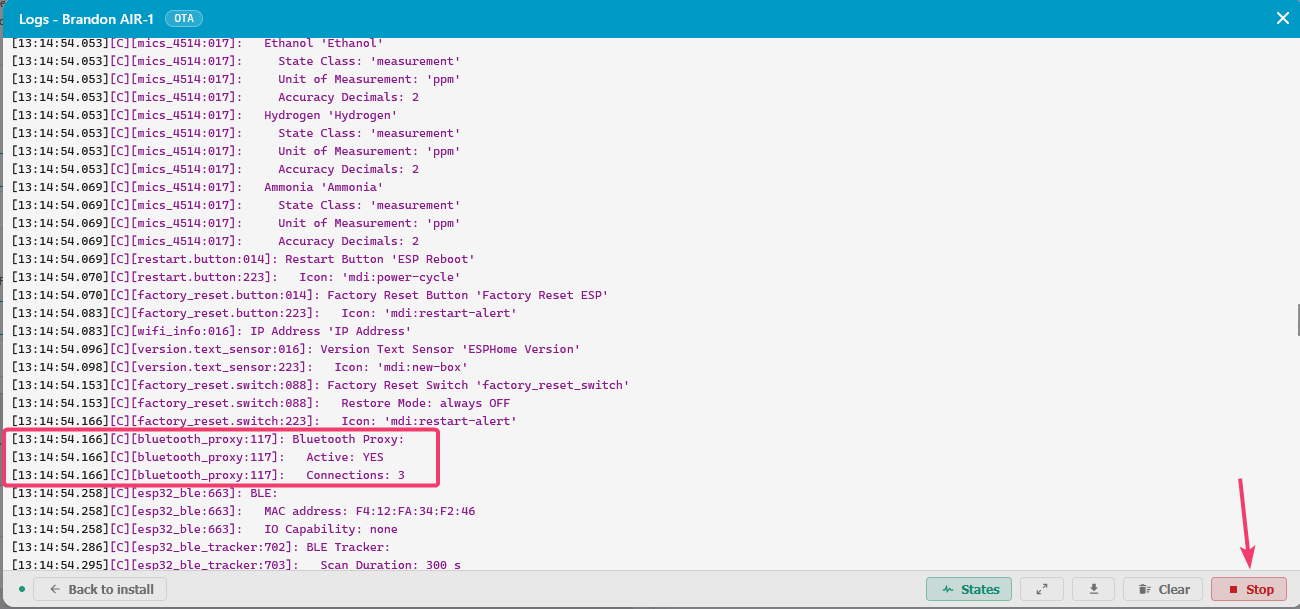
6. When you see the purple lines the device has booted successfully and the logs will show the Bluetooth Proxy section. Click Stop in the bottom right and you're finished!
Verify it works
Once the device reboots, Home Assistant picks it up as a Bluetooth proxy automatically. Open the Bluetooth advertisement monitor to watch nearby BLE devices roll in through it. Anything that shows up is ready to add under Settings → Devices & Services → Bluetooth like any other device.
1. Open ESPHome Device Builder. The button below opens the app right in your Home Assistant.
2. Don't have it installed yet? Add it from the App Store with the badge below, then move on to step 3.
3. Find your device and click Edit.
4. Replace the packages: line and the line directly below it with the code below.
packages:
  ApolloAutomation.MSR-1:
    url: https://github.com/ApolloAutomation/MSR-1
    ref: main
    files: [Integrations/ESPHome/MSR-1_BLE.yaml]
    refresh: 1min
5. Click Save then Install in the bottom right. Click On the network when prompted.
6. When you see the purple lines the device has booted successfully and the logs will show the Bluetooth Proxy section. Click Stop in the bottom right and you're finished!
Verify it works
Once the device reboots, Home Assistant picks it up as a Bluetooth proxy automatically. Open the Bluetooth advertisement monitor to watch nearby BLE devices roll in through it. Anything that shows up is ready to add under Settings → Devices & Services → Bluetooth like any other device.
1. Open ESPHome Device Builder. The button below opens the app right in your Home Assistant.
2. Don't have it installed yet? Add it from the App Store with the badge below, then move on to step 3.
3. Find your device and click Edit.
4. Replace the packages: line and the line directly below it with the code below.
packages:
  ApolloAutomation.MSR-2:
    url: https://github.com/ApolloAutomation/MSR-2
    ref: main
    files: [Integrations/ESPHome/MSR-2_BLE.yaml]
    refresh: 1min
5. Click Save then Install in the bottom right. Click On the network when prompted.
6. When you see the purple lines the device has booted successfully and the logs will show the Bluetooth Proxy section. Click Stop in the bottom right and you're finished!
Verify it works
Once the device reboots, Home Assistant picks it up as a Bluetooth proxy automatically. Open the Bluetooth advertisement monitor to watch nearby BLE devices roll in through it. Anything that shows up is ready to add under Settings → Devices & Services → Bluetooth like any other device.
1. Open ESPHome Device Builder. The button below opens the app right in your Home Assistant.
2. Don't have it installed yet? Add it from the App Store with the badge below, then move on to step 3.
3. Find your device and click Edit.
4. Replace the packages: line and the line directly below it with the code below.
packages:
  ApolloAutomation.MTR-1:
    url: https://github.com/ApolloAutomation/MTR-1
    ref: main
    files: [Integrations/ESPHome/MTR-1_BLE.yaml]
    refresh: 1min
5. Click Save then Install in the bottom right. Click On the network when prompted.
6. When you see the purple lines the device has booted successfully and the logs will show the Bluetooth Proxy section. Click Stop in the bottom right and you're finished!
Verify it works
Once the device reboots, Home Assistant picks it up as a Bluetooth proxy automatically. Open the Bluetooth advertisement monitor to watch nearby BLE devices roll in through it. Anything that shows up is ready to add under Settings → Devices & Services → Bluetooth like any other device.
This product needs Method 2
This product does not have a prebuilt _BLE.yaml firmware, so Method 1 does not apply. Scroll down and follow Method 2 to add the BLE proxy yaml to your existing config by hand.
This product needs Method 2
This product does not have a prebuilt _BLE.yaml firmware, so Method 1 does not apply. Scroll down and follow Method 2 to add the BLE proxy yaml to your existing config by hand.
1. Open ESPHome Device Builder. The button below opens the app right in your Home Assistant.
2. Don't have it installed yet? Add it from the App Store with the badge below, then move on to step 3.
3. Find your device and click Edit.
4. Replace the packages: line and the line directly below it with the code below.
packages:
  ApolloAutomation.PLT-1:
    url: https://github.com/ApolloAutomation/PLT-1
    ref: main
    files: [Integrations/ESPHome/PLT-1_BLE.yaml]
    refresh: 1min
5. Click Save then Install in the bottom right. Click On the network when prompted.
6. When you see the purple lines the device has booted successfully and the logs will show the Bluetooth Proxy section. Click Stop in the bottom right and you're finished!
Verify it works
Once the device reboots, Home Assistant picks it up as a Bluetooth proxy automatically. Open the Bluetooth advertisement monitor to watch nearby BLE devices roll in through it. Anything that shows up is ready to add under Settings → Devices & Services → Bluetooth like any other device.
1. Open ESPHome Device Builder. The button below opens the app right in your Home Assistant.
2. Don't have it installed yet? Add it from the App Store with the badge below, then move on to step 3.
3. Find your device and click Edit.
4. Replace the packages: line and the line directly below it with the code below.
packages:
  ApolloAutomation.PLT-1:
    url: https://github.com/ApolloAutomation/PLT-1
    ref: main
    files: [Integrations/ESPHome/PLT-1B_BLE.yaml]
    refresh: 1min
5. Click Save then Install in the bottom right. Click On the network when prompted.
6. When you see the purple lines the device has booted successfully and the logs will show the Bluetooth Proxy section. Click Stop in the bottom right and you're finished!
Verify it works
Once the device reboots, Home Assistant picks it up as a Bluetooth proxy automatically. Open the Bluetooth advertisement monitor to watch nearby BLE devices roll in through it. Anything that shows up is ready to add under Settings → Devices & Services → Bluetooth like any other device.
1. Open ESPHome Device Builder. The button below opens the app right in your Home Assistant.
2. Don't have it installed yet? Add it from the App Store with the badge below, then move on to step 3.
3. Find your device and click Edit.
4. Replace the packages: line and the line directly below it with the code below.
packages:
  ApolloAutomation.TEMP-1:
    url: https://github.com/ApolloAutomation/TEMP-1
    ref: main
    files: [Integrations/ESPHome/TEMP-1_BLE_R2.yaml]
    refresh: 1min
5. Click Save then Install in the bottom right. Click On the network when prompted.
6. When you see the purple lines the device has booted successfully and the logs will show the Bluetooth Proxy section. Click Stop in the bottom right and you're finished!
Verify it works
Once the device reboots, Home Assistant picks it up as a Bluetooth proxy automatically. Open the Bluetooth advertisement monitor to watch nearby BLE devices roll in through it. Anything that shows up is ready to add under Settings → Devices & Services → Bluetooth like any other device.
1. Open ESPHome Device Builder. The button below opens the app right in your Home Assistant.
2. Don't have it installed yet? Add it from the App Store with the badge below, then move on to step 3.
3. Find your device and click Edit.
4. Replace the packages: line and the line directly below it with the code below.
packages:
  ApolloAutomation.TEMP-1:
    url: https://github.com/ApolloAutomation/TEMP-1
    ref: main
    files: [Integrations/ESPHome/TEMP-1B_BLE_R2.yaml]
    refresh: 1min
5. Click Save then Install in the bottom right. Click On the network when prompted.
6. When you see the purple lines the device has booted successfully and the logs will show the Bluetooth Proxy section. Click Stop in the bottom right and you're finished!
Verify it works
Once the device reboots, Home Assistant picks it up as a Bluetooth proxy automatically. Open the Bluetooth advertisement monitor to watch nearby BLE devices roll in through it. Anything that shows up is ready to add under Settings → Devices & Services → Bluetooth like any other device.
This product needs Method 2
This product does not have a prebuilt _BLE.yaml firmware, so Method 1 does not apply. Scroll down and follow Method 2 to add the BLE proxy yaml to your existing config by hand.
Sleep must be disabled for the BTN-1 to work as a Bluetooth Proxy. See the Prevent Sleep guide.
Method 2: Manually enter the BLE proxy yaml
This method works the same on every product.
The easiest way is to let ESPHome Device Builder add the component for you. You can also paste the single line by hand.
1. Open ESPHome Device Builder and click Edit on your device. The button below opens the app right in your Home Assistant.
Don't have it installed yet? Add it from the App Store with the badge below first.
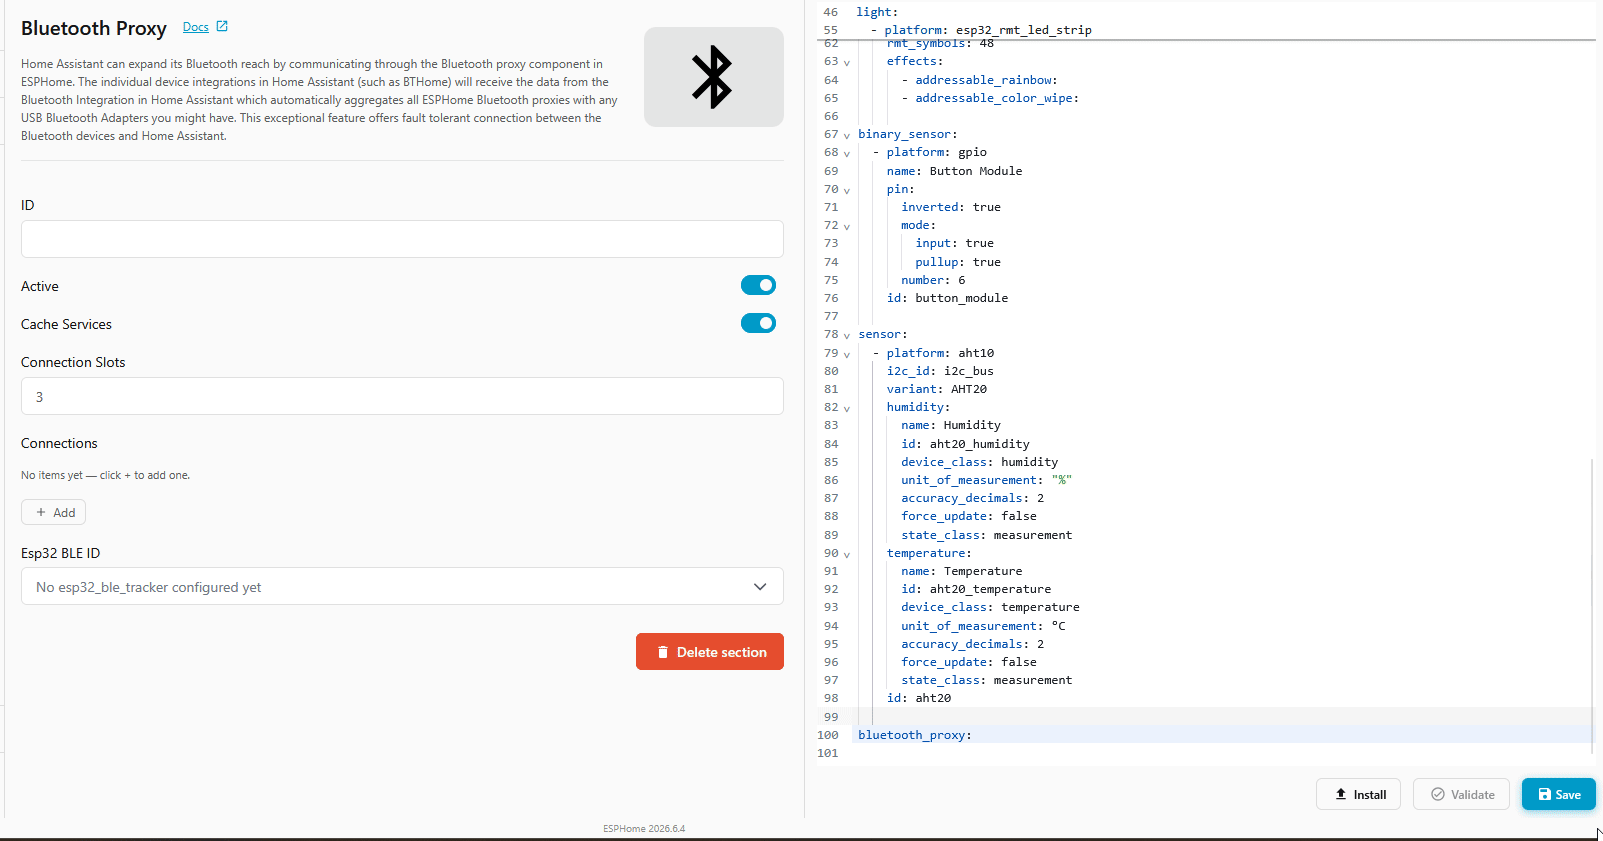
2. Click Add Component in the editor toolbar, search for Bluetooth Proxy, and click Add.
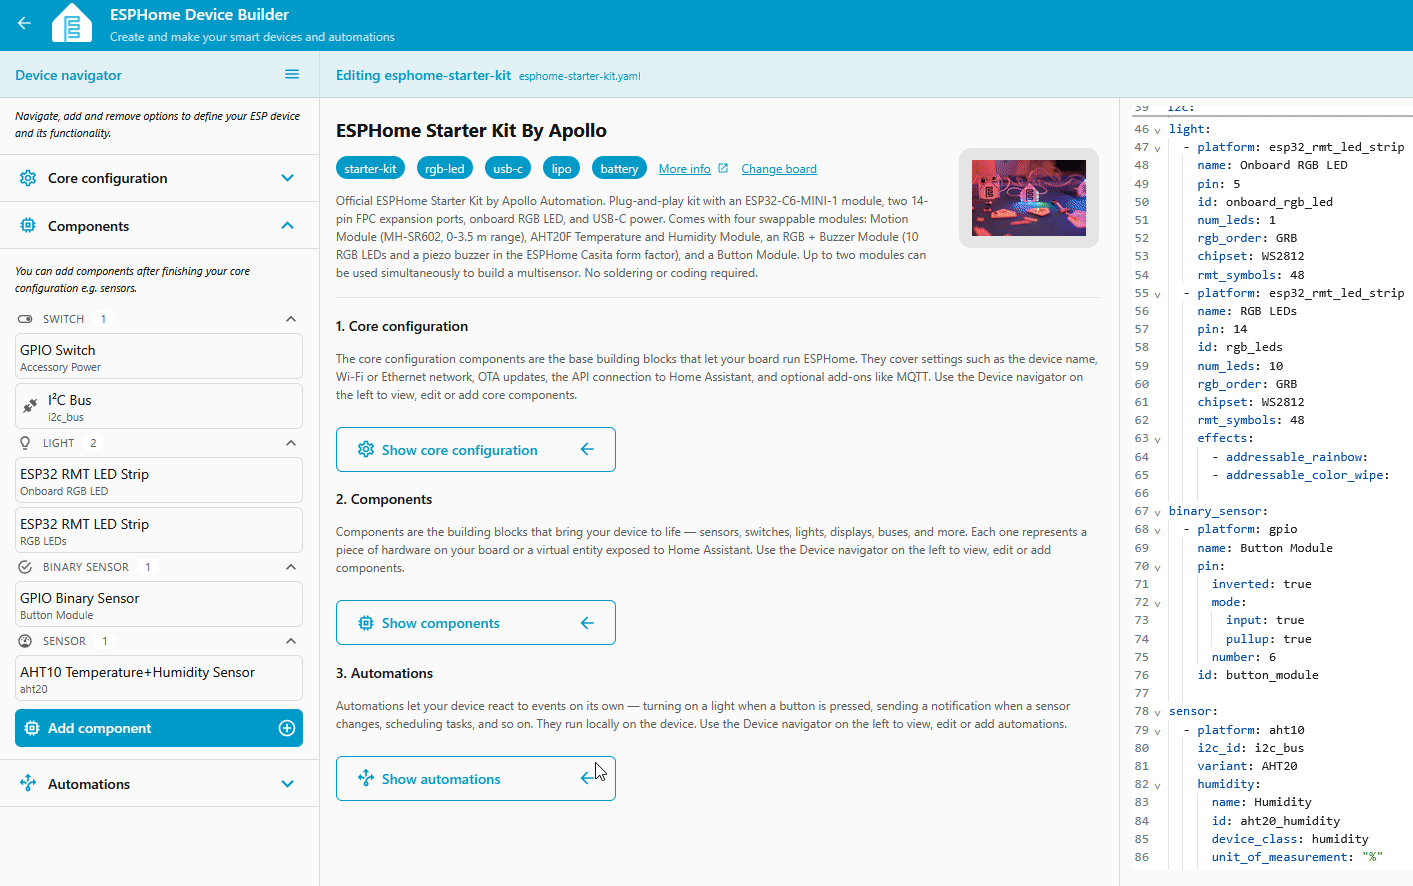
Device Builder drops a single line into your config:
That's all it needs. Active connections are on by default, and bluetooth_proxy automatically pulls in the ESP32 BLE Tracker it depends on, so there's nothing else to add. Prefer to type it? Paste that one line at the top level of your YAML instead of using Add Component.
3. Click Save, then Install, and choose On the Network to flash the new firmware over Wi-Fi.
Verify it works
Once the device reboots, Home Assistant picks it up as a Bluetooth proxy automatically. Open the Bluetooth advertisement monitor to watch nearby BLE devices roll in through it. Anything that shows up is ready to add under Settings → Devices & Services → Bluetooth like any other device.