Apollo DEV-2 introduction
The Apollo DEV-2 is a very small dev board that we use to prototype before creating other new products. It's a great starter device for tinkerers. You can buy it on its own, or with a breadboard and dupont wires (jumper wires) if you need those too.
Pinout and power
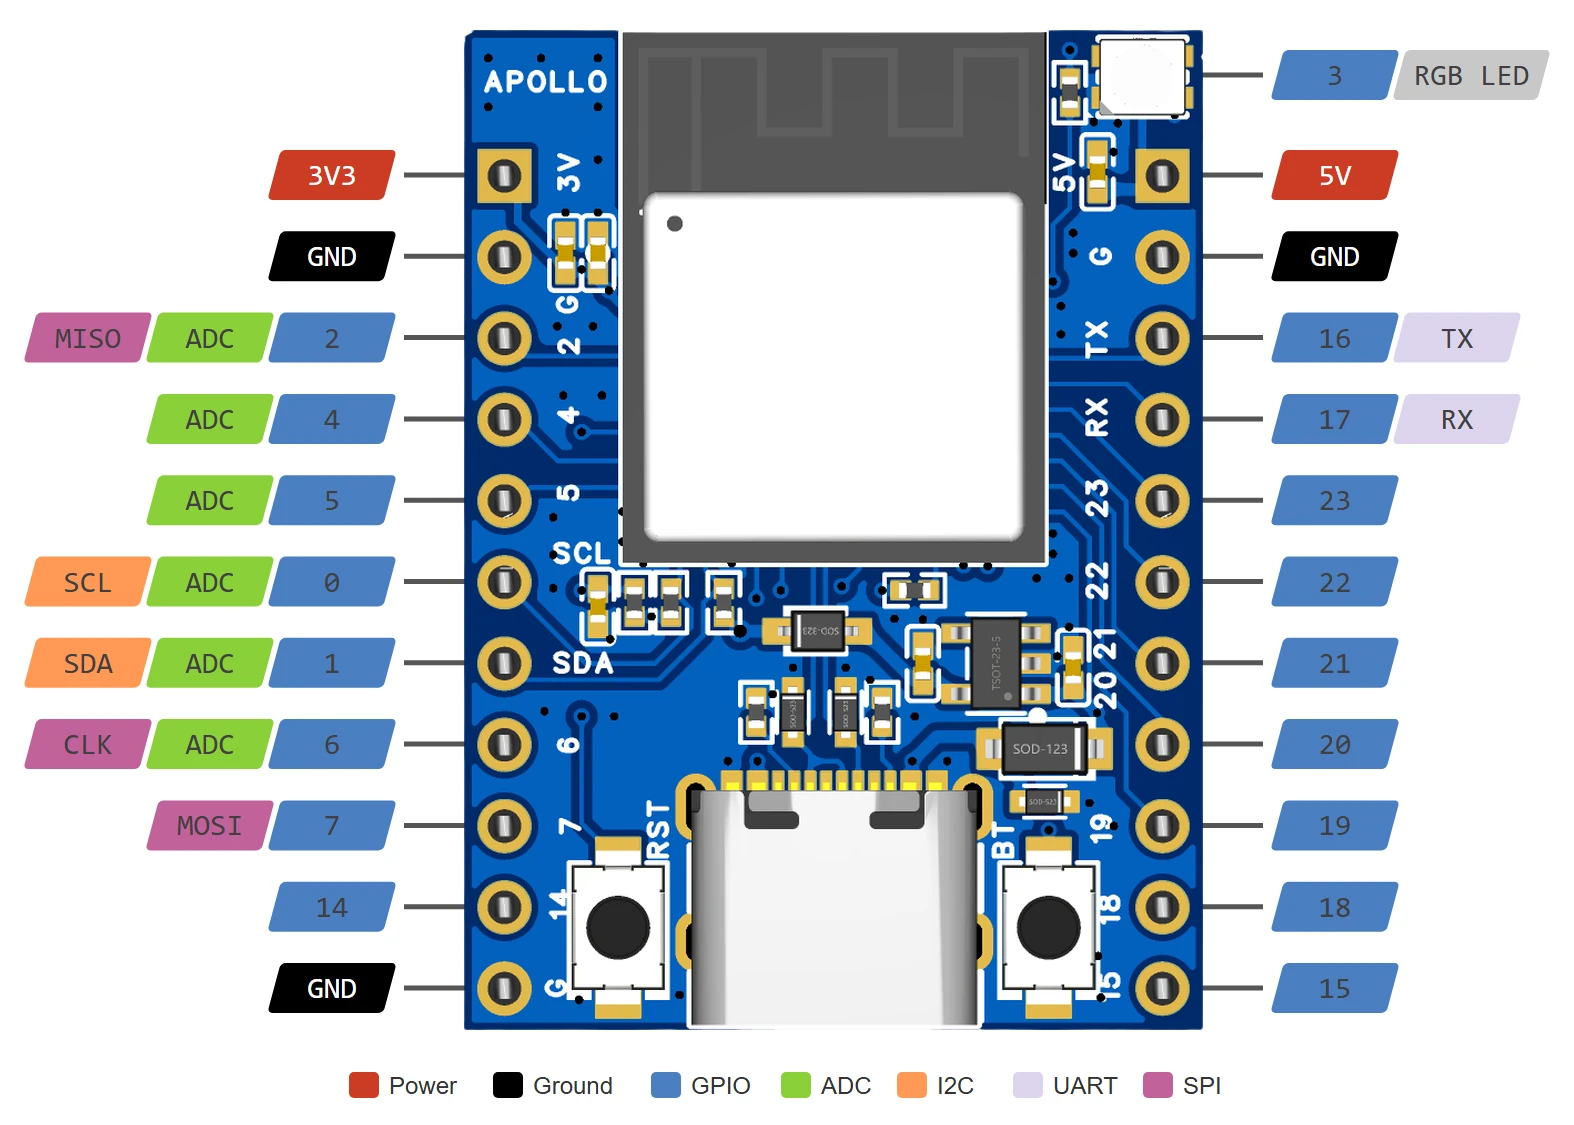
- Built-in RGB light: on GPIO3.
- 3.3V pin: supplies up to 600mA, but the microcontroller itself uses 100-200mA of that.
Use one power source at a time
You can power the DEV-2 through the USB-C port or back-feed power through the 5V and G (ground) pins, but not both at the same time.
GPIO pins
These are the DEV-2's I2C, UART, ADC, and onboard RGB LED pins, written as ESPHome YAML:
#These are the i2c pins
i2c:
  sda: GPIO1
  scl: GPIO0

#These are the UART pins
uart:
  tx_pin: GPIO16
  rx_pin: GPIO17
  baud_rate: 115200 #match the device you connect

#ADC pins: GPIO0, GPIO1, GPIO2, GPIO4, GPIO5, GPIO6

#Onboard RGB LED: GPIO3
Flash your DEV-2
The DEV-2 doesn't come pre-flashed with ESPHome or WLED, so you flash it yourself. We made the getting started video below on the older DEV-1 board. The information is still the same, except you use the DEV-2 YAML further down this page.
Example ESPHome YAML
Use the example configuration below as a starting point for your DEV-2. Before you use it, give it your own API encryption key:
1. Open the ESPHome API documentation and copy the randomly generated API key from the code block, as shown in the red box below.
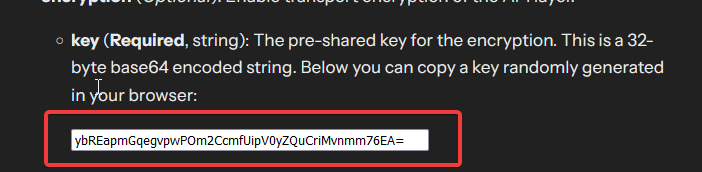
2. In the YAML below, find the key: line under api: and replace your-api-key-here with the key you copied.
Your configuration now uses its own encryption key.
The DEV-2 now has 8MB flash, but was originally sold with 4MB flash
If you're using an older DEV-2 with 4MB flash, change flash_size: 8MB to flash_size: 4MB in the YAML below.
Here's the full example for the DEV-2:
#Define Project
substitutions:
  name: apollo-dev-2
  version:  "1"
  device_description: ${name} made by Apollo Automation - version ${version}.

esphome:
  name: "${name}"
  friendly_name: Apollo DEV-2
  comment: Apollo DEV-2

  project:
    name: "ApolloAutomation.DEV-2"
    version: "${version}"

# Define Board
esp32:
  variant: esp32c6
  flash_size: 8MB
  framework:
    type: esp-idf

# Enable logging
logger:

# Enable Home Assistant API
api:
  encryption:
    key: "your-api-key-here"

ota:
  - platform: esphome
    password: !secret ota_password

wifi:
  ssid: !secret wifi_ssid
  password: !secret wifi_password

  # Enable fallback hotspot (captive portal) in case wifi connection fails
  ap:
    ssid: "Apollo-Dev-2 Fallback Hotspot"
    password: !secret wifi_password

captive_portal:

web_server:
  port: 80
  version: 3

#onboard LED using pin GPIO3 as shown below
light:
  - platform: esp32_rmt_led_strip
    id: rgb_onboard_light
    name: "RGB Onboard Light"
    pin: GPIO3
    default_transition_length: 0s
    chipset: WS2812
    num_leds: 1
    channel_colors: GRB
    effects:
      - pulse:
          name: "Slow Pulse"
          transition_length: 1000ms
          update_interval: 1000ms
          min_brightness: 50%
          max_brightness: 100%
      - pulse:
          name: "Fast Pulse"
          transition_length: 100ms
          update_interval: 100ms
          min_brightness: 50%
          max_brightness: 100%

button:
  - platform: restart
    icon: mdi:power-cycle
    name: "ESP Reboot"

sensor:
  - platform: internal_temperature
    name: "ESP Temperature"
    id: sys_esp_temperature

  - platform: uptime
    name: Uptime
    id: sys_uptime
    update_interval: 60s

  - platform: wifi_signal
    name: RSSI
    id: wifi_signal_db
    update_interval: 60s
    entity_category: "diagnostic"

text_sensor:
  - platform: wifi_info
    ip_address:
      name: "${name} IP"
      icon: "mdi:ip-outline"