Temp-Reactive LEDs
Difficulty: Level 2
🌱 New here? Try these first:
This tutorial uses the Temperature and Humidity module and the LED & Buzzer module connected to the ESP32-C6. As the room temperature drifts across set thresholds, the RGB LEDs change color so you can see the comfort band at a glance. It's the same trigger-then-action pattern as Button Controlled LEDs, swapping the button trigger for a sensor-value trigger and adding one trigger per band.
Before you start
Work through these pages first. This tutorial assumes your device is flashed and both modules are connected:
- First Steps to create your starter kit device in ESPHome Device Builder.
- Adding the Temperature and Humidity Module to wire up the sensor.
- Adding the LED & Buzzer Module to wire up the RGB output.
How the color bands work
The temperature sensor publishes a new reading every minute by default. We wire three triggers to the same sensor, one per band, so whichever band the latest reading falls into sets the LED color.
| Temperature band | Color |
|---|---|
| Below 18 °C (64 °F) | Blue |
| 18 °C to 24 °C (64 °F to 75 °F) | Green |
| Above 24 °C (75 °F) | Red |
The GUI fields take Celsius numbers
The AHT20 sensor publishes its readings in Celsius, so the Above and Below values you enter in Device Builder need to be Celsius numbers. The Fahrenheit values in the table above are for reference only. Tune the thresholds to whatever fits your space, in Celsius.
Build the automation
ESPHome Device Builder has a GUI for building automations, so you can wire a trigger to an action without hand-writing YAML. We'll add three automations on the same temperature sensor, one for each color band.
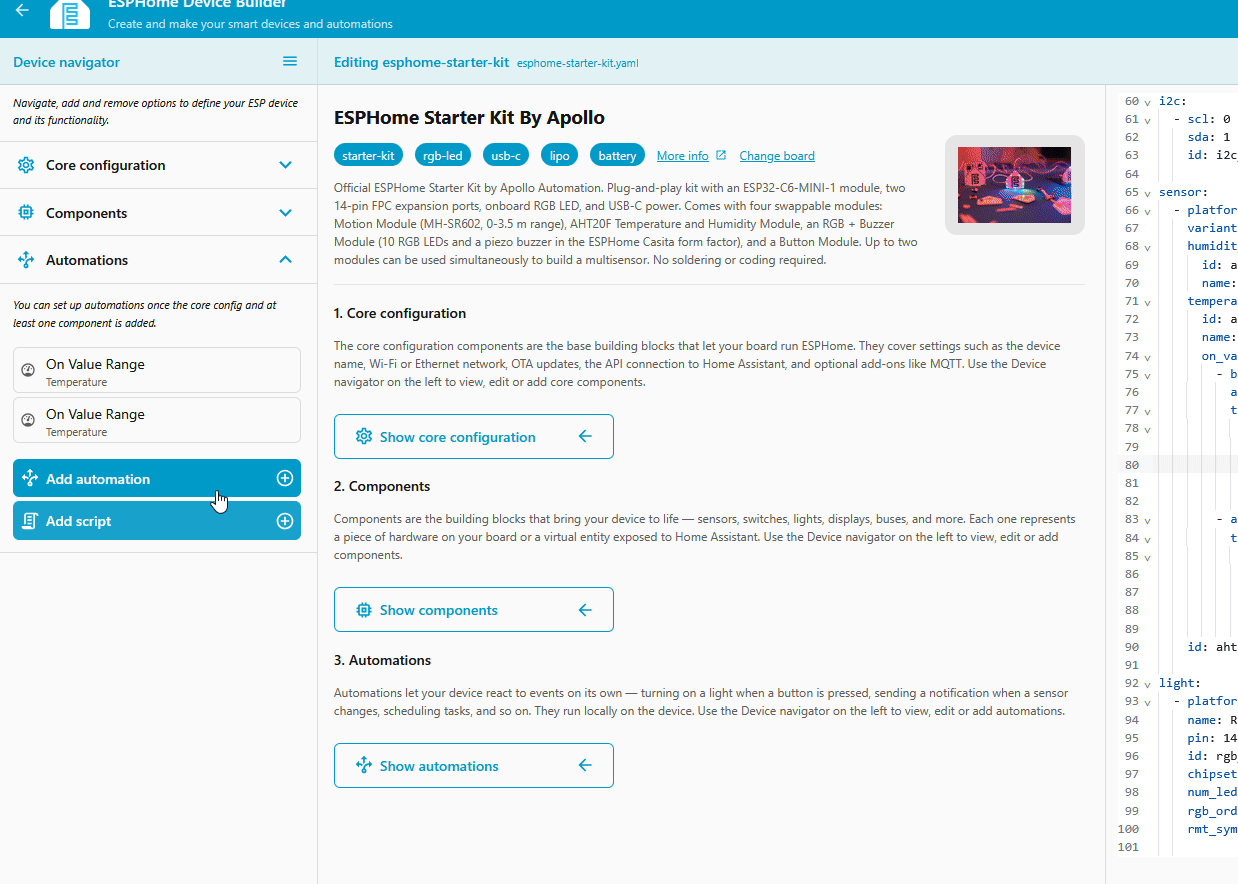
- Open your starter kit device in ESPHome Device Builder and click Edit. If you need a refresher on the editor, see the Device Builder Tour.
-
In the editor's left pane, expand the Automations dropdown and click Add Automation.

Cold band: below 18 °C → Blue
-
Set up the trigger:
- What should this automation react to? → A configured component
- Which configured component? → Temperature (sensor)
- Which trigger? → Sensor → On Value Range (1)
- On Value Range fires whenever a new sensor reading lands inside the band you describe. The dropdown also offers On Value, On Raw Value, and On State for other sensor behaviors.
-
Click Continue. You land on the Sensor → On Value Range editor with the Target already set to your temperature sensor. Set Below to
18.0and leave Above blank. -
Set up the action:
- Under Actions, click + Add action.
- In the Add action dialog, stay on the By target tab and scroll down towards the bottom, then choose Light → Turn On under the RGB LED group.
- On the new action, click the ID dropdown and select RGB LEDs. (1)
- Toggle on Show advanced settings to reveal the color fields, then set Red to
0%, Green to0%, and Blue to100%.
- The ID dropdown only needs changing if your device also has an Onboard RGB LED component configured. If RGB LEDs is the only light, it's already selected.
Comfortable band: 18 °C to 24 °C → Green
Add another automation, this time picking Sensor → On Value Range with Above 18.0 and Below 24.0. The action targets RGB LEDs with Red 0%, Green 100%, Blue 0%.
Hot band: above 24 °C → Red
Add a third automation with Sensor → On Value Range and Above 24.0 (leave Below blank). The action targets RGB LEDs with Red 100%, Green 0%, Blue 0%.
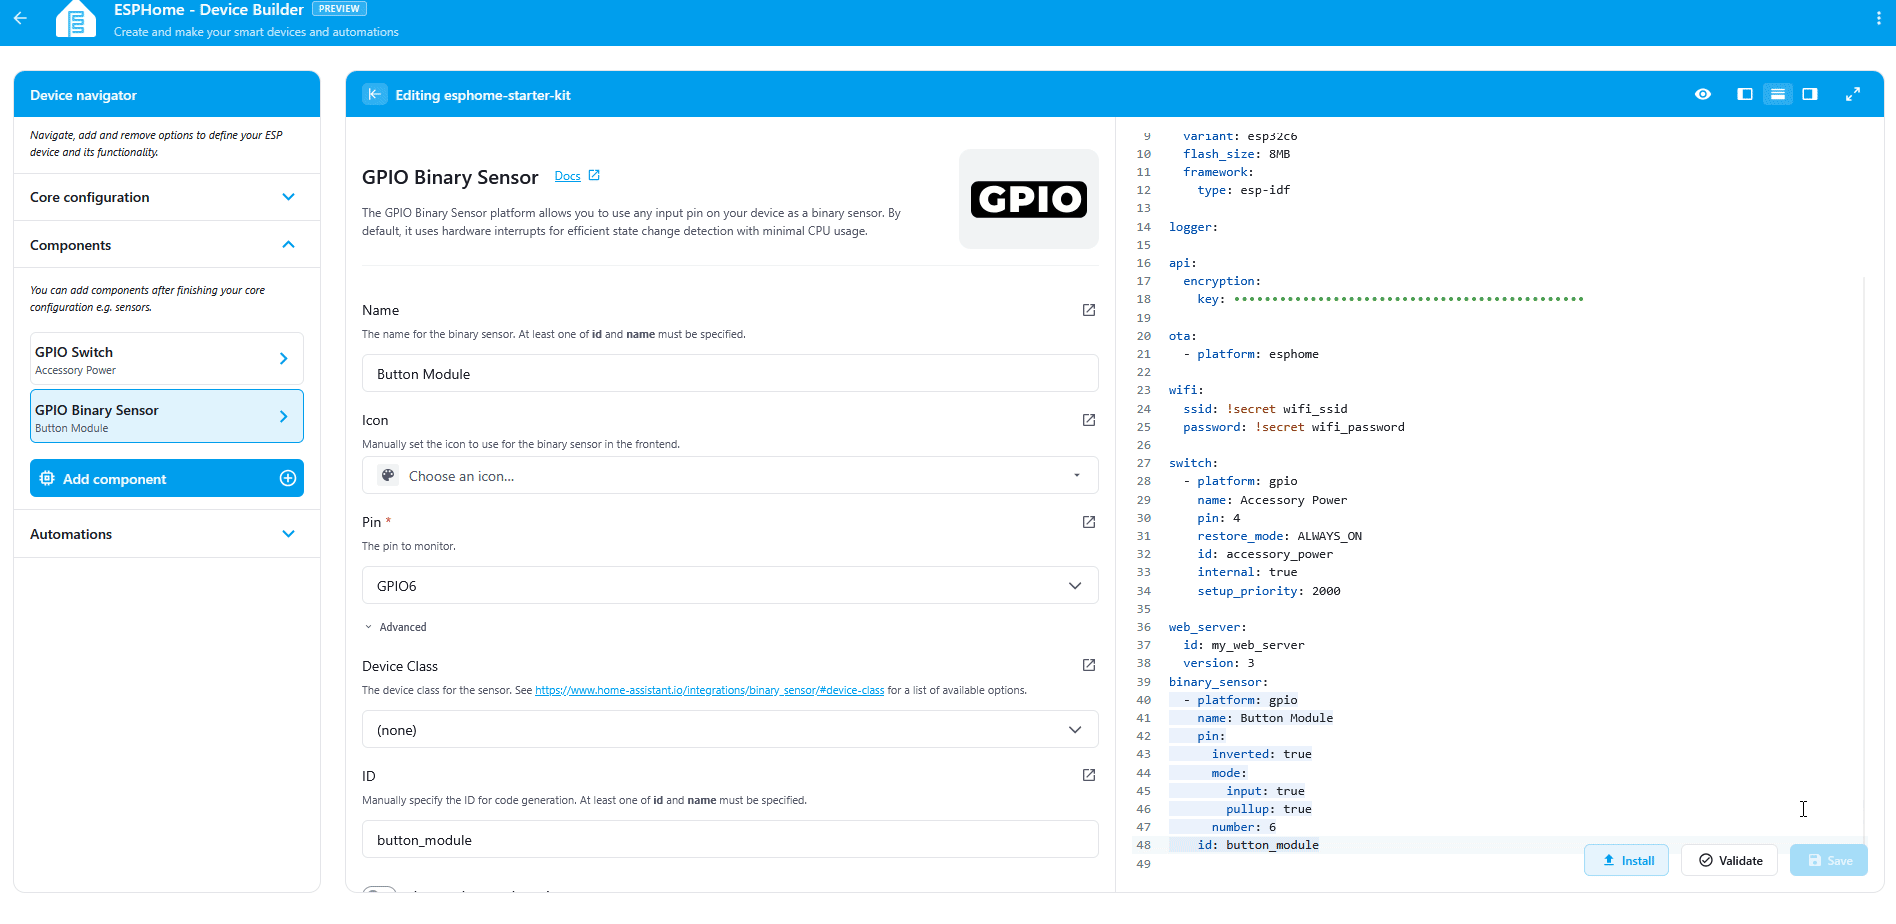
What the GUI built in YAML
The form pane and the YAML editor on the right of the editor stay in sync. Your temperature sensor now grows three on_value_range triggers, one per band:
sensor:
  - platform: aht10
    variant: AHT20
    humidity:
      id: aht20_humidity
      name: Humidity
    temperature:
      id: aht20_temperature
      name: Temperature
      on_value_range:
        - below: 24
          above: 18
          then:
            - light.turn_on:
                id: rgb_leds
                green: 100%
                red: 0%
                blue: 0%
        - above: 24
          then:
            - light.turn_on:
                id: rgb_leds
                blue: 0%
                green: 0%
                red: 100%
        - below: 18
          then:
            - light.turn_on:
                id: rgb_leds
                blue: 100%
                green: 0%
                red: 0%
    id: aht20
See Device Builder Tour → YAML editor (right) for the full breakdown of the YAML pane.
Install the firmware
Your three automations are saved in Device Builder, but the device is still running its old firmware. Compile and install the new code to push the change.
- Click Save in the bottom right of the editor.
- Click Install, then pick On the Network to push the new firmware over Wi-Fi.
- Wait for the compile and flash to finish. The device reboots once the install is done.
Test the automation
With the device back online, the next sensor reading sets the LED color. With update_interval: 60s you may wait up to a minute for the first update. To force a quicker change, cup a warm hand around the sensor for a few cycles and watch the color shift toward red, then let it cool back to green.
Want faster updates?
Lower the update_interval on the temperature sensor in the YAML pane (for example update_interval: 10s) for snappier color changes while you're testing. Raise it back when you're done so the kit isn't broadcasting more often than it needs to.
Tune the thresholds
Open the Comfortable and Hot triggers in the GUI and edit the Above / Below numbers to whatever bands fit your space. The three triggers stay independent, so you can move one boundary without touching the others.
You've built a sensor-reactive light!
Same trigger-then-action pattern, new trigger type. Next, bring it into Home Assistant so the readings show up alongside the rest of your kit.
![]() Next - Connect to Home Assistant
Next - Connect to Home Assistant
New to ESPHome? We're here to help.
Stuck on a step or want to show off what you built? Ask questions and share projects with the Apollo community.