Microphone
This will guide you through installing and configuring the microphone on your M-1 LED Matrix.
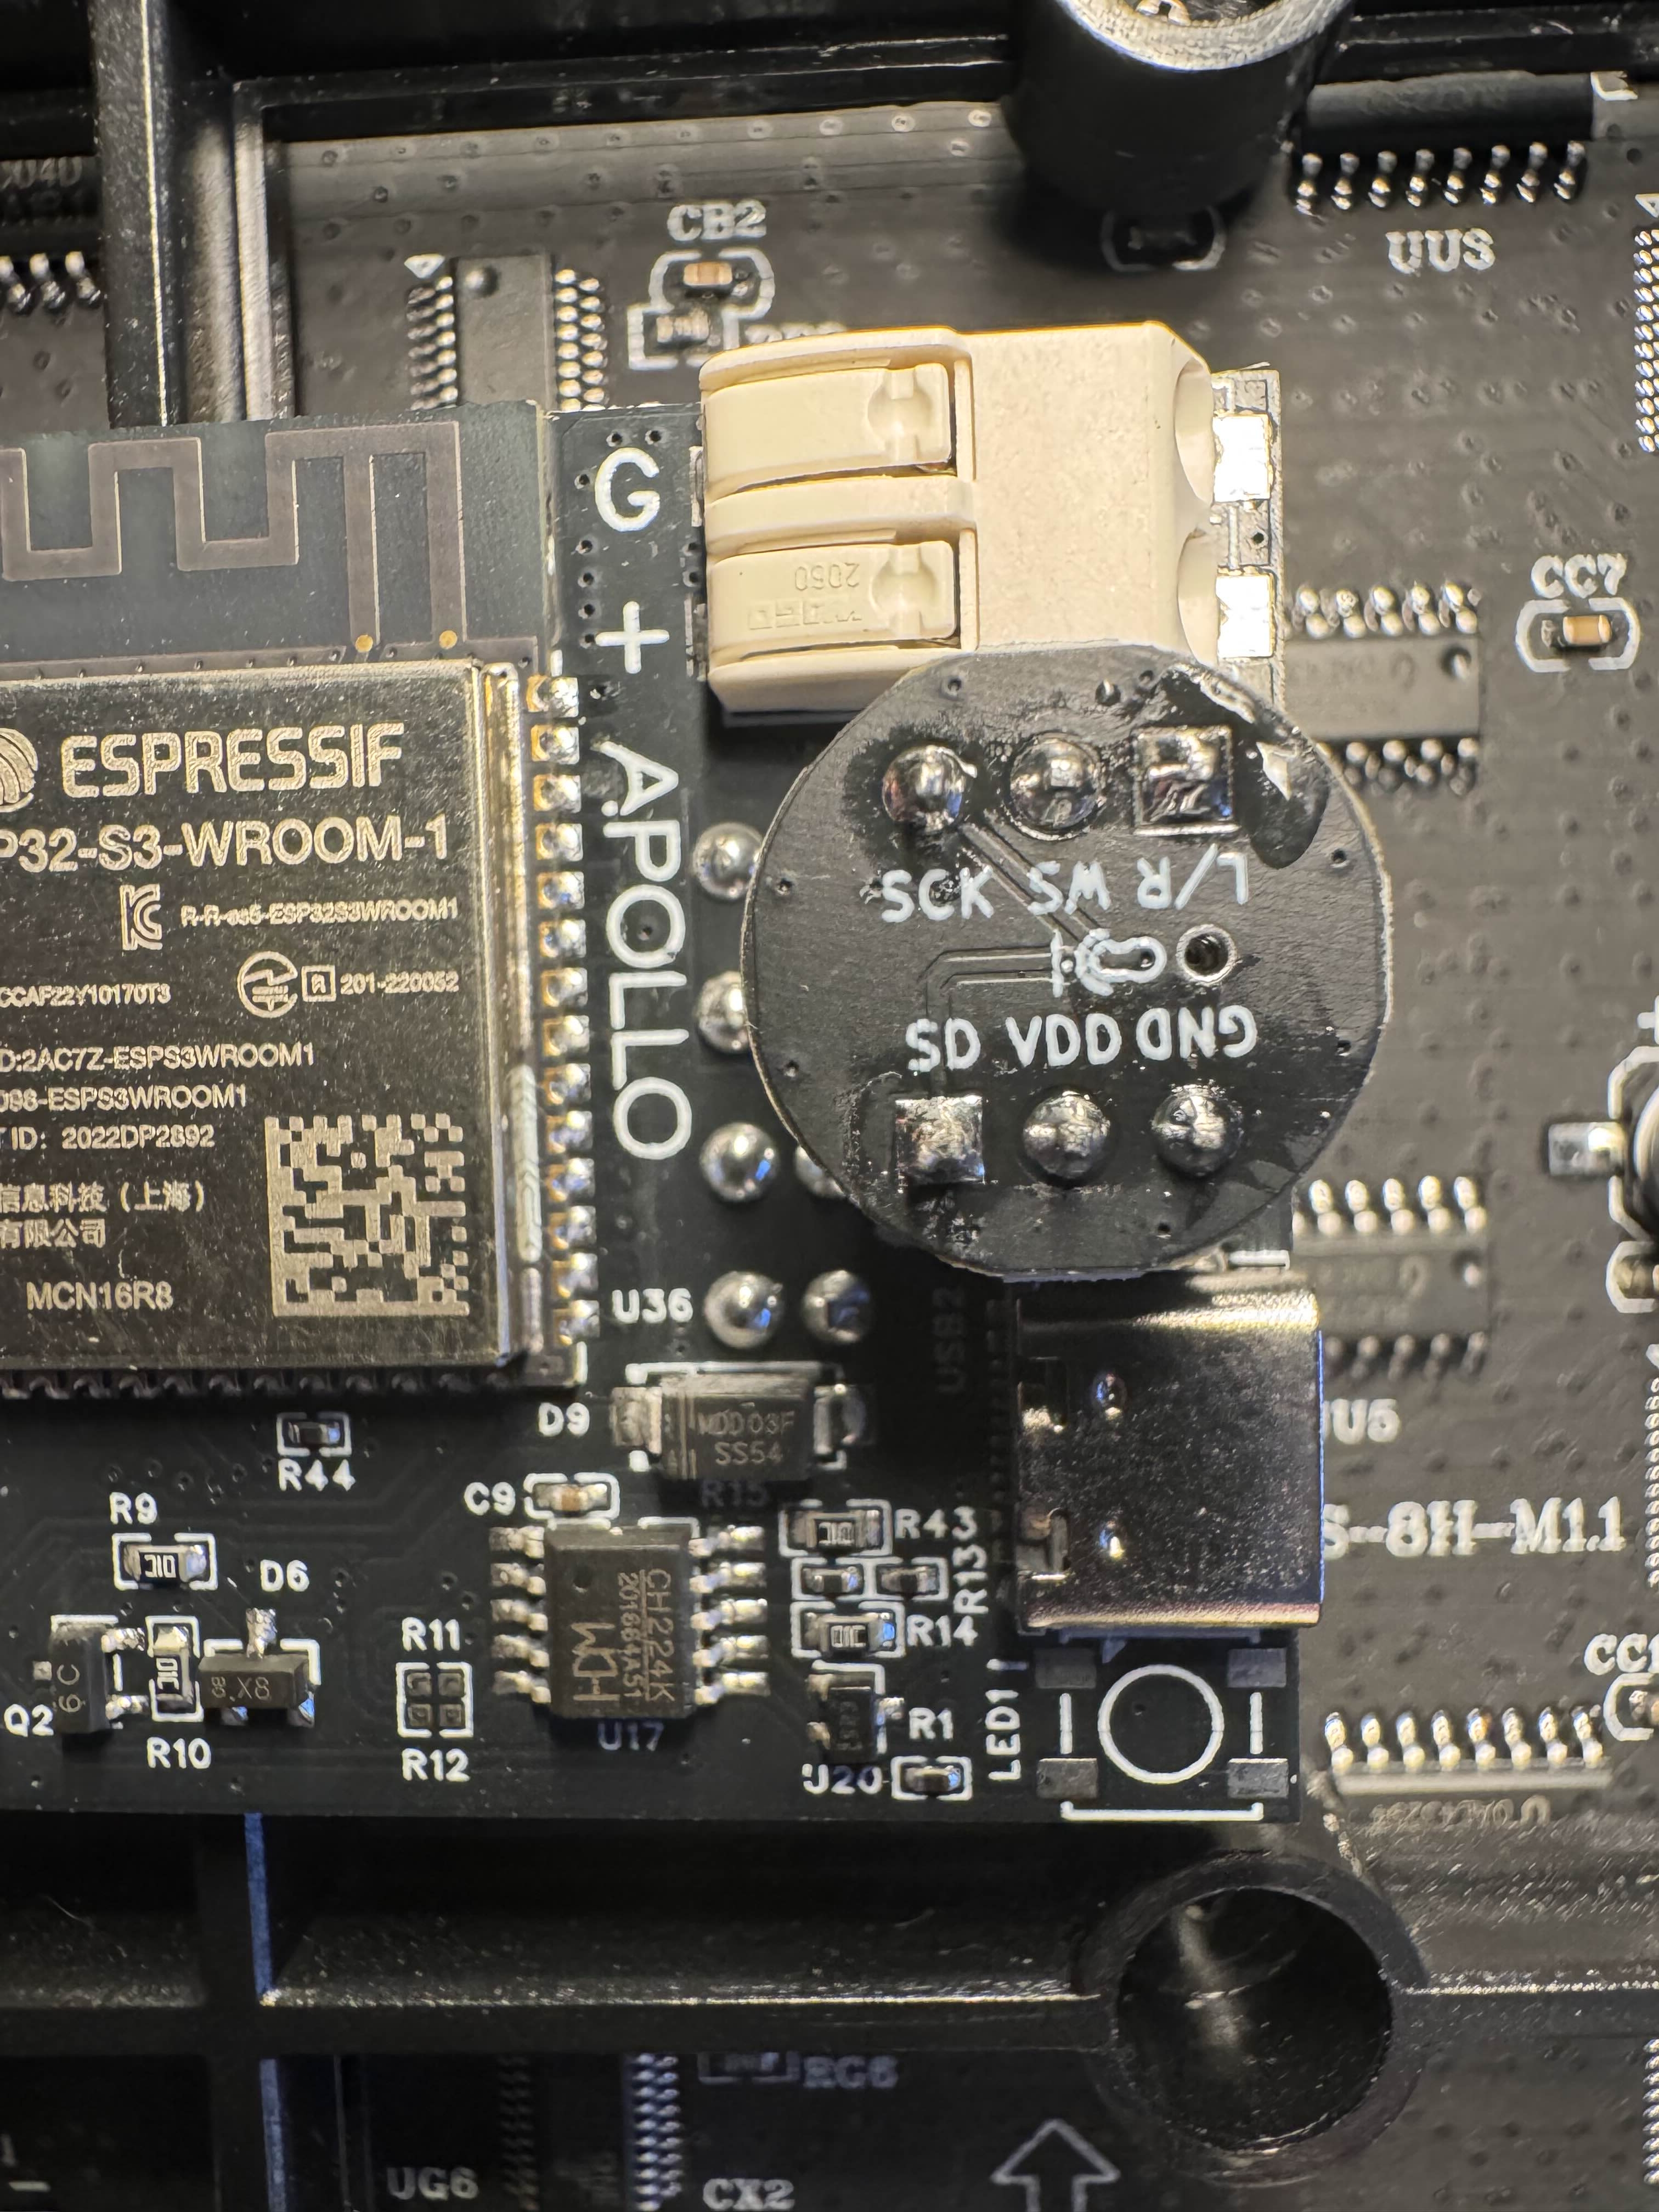
The microphone addon fits Rev6 and newer controllers. Rev4 boards do not have the connector for it. The revision is printed on the controller board.
Install the Hardware
1. Unplug your M-1 from power and set the matrix side face down with the M-1 Controller PCB facing you.
2. Insert the microphone addon as shown in the image below. Make sure the Microphone image is facing to the right side and the GND pin is on the bottom right!
Turn It On
There is no software setup. Sound reactivity is configured at the factory, so power the M-1 back up, pick any effect with a musical note beside it in the effect list, and make some noise.
If nothing reacts, confirm the microphone board is seated all the way into its connector, then click Config, then Usermods, and find AudioReactive. These are the settings your M-1 ships with, so use them to check nothing has been changed.
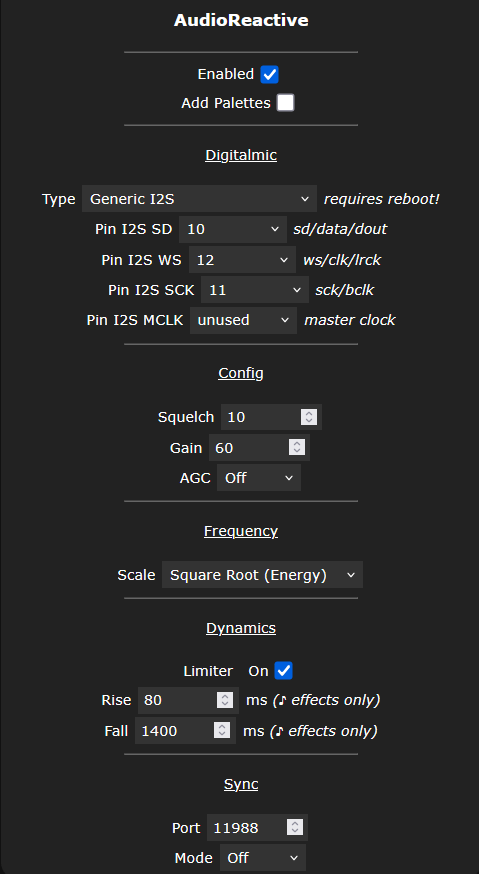
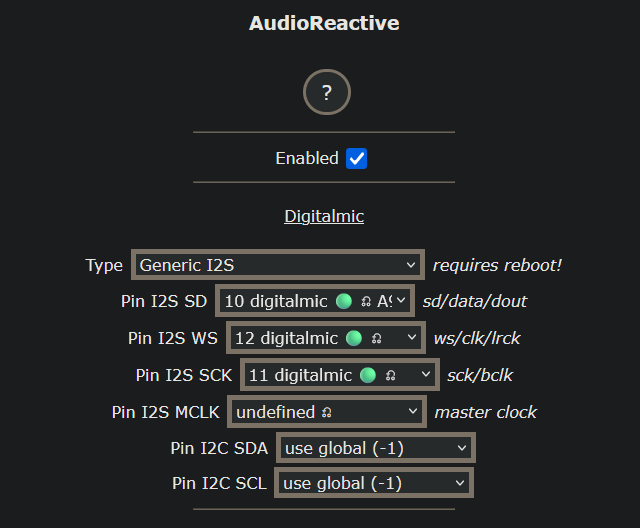
3. Click on Config, then AudioReactive. Check Enabled then select Generic I2S for the Type.
4. Select 10 digitalmic for Pin I2s SD, select 12 digitalmic A5 for Pin I2S WS, and select 11 digitalmic for Pin I2S SCK and click Save.
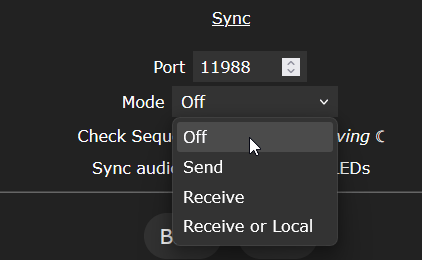
5. Scroll to the bottom of the AudioReactive settings and set the Mode to Off and click Save.
Then pick an effect with a musical note beside it and make some noise.