Pixel Forge on the M-1
Pixel Forge ships inside WLED and runs on the M-1 itself. It converts images to GIFs sized for your matrix, builds scrolling text with live values like time and temperature, and writes everything straight to the device's filesystem. The old routine of resizing a GIF on an external site and uploading it by hand is gone.
WLED only
Pixel Forge is a stock WLED feature, so it is not in WLED-MM 14.5.1. On a Rev6 controller you can upgrade to WLED and keep your settings.
Open it from the icon below the color picker in the WLED interface, or go straight to http://<your-m1-ip>/pixelforge.htm.
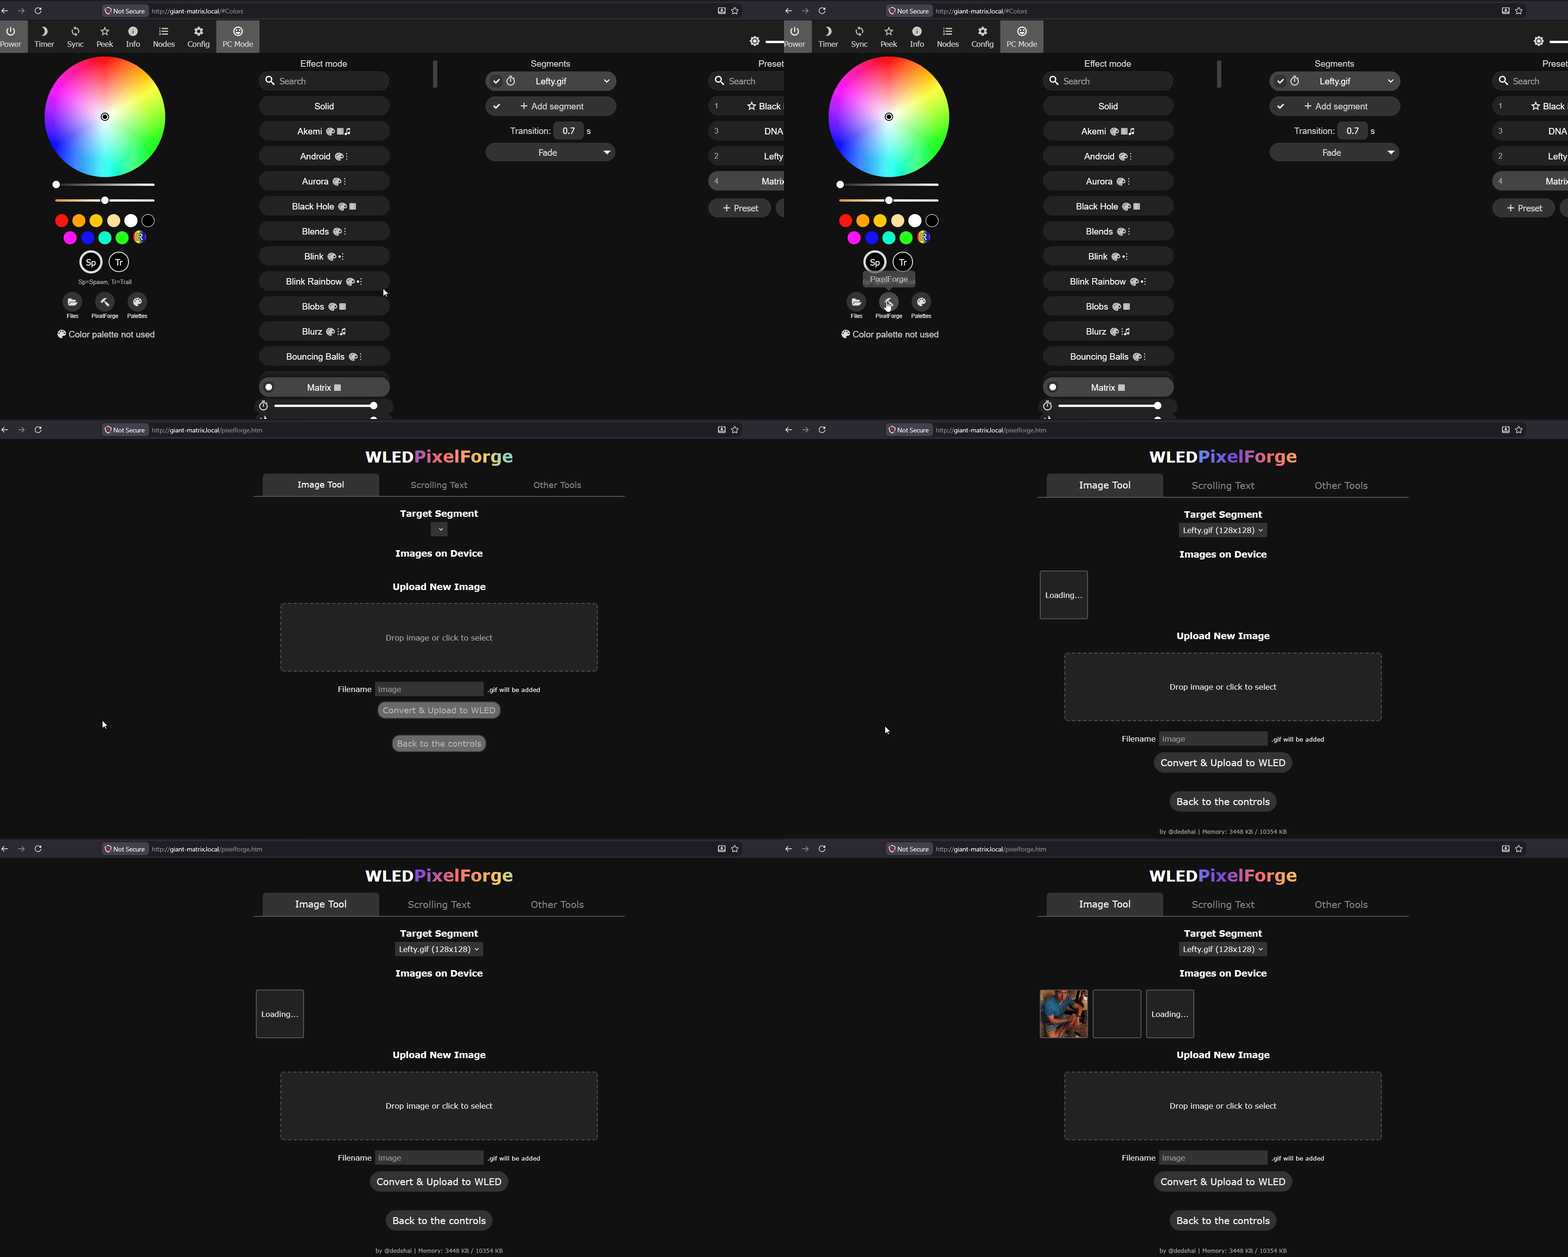
Pixel Forge has three of its own tabs: Image Tool, Scrolling Text, and Other Tools.
Image Tool
Turns any image into a GIF the matrix can play.
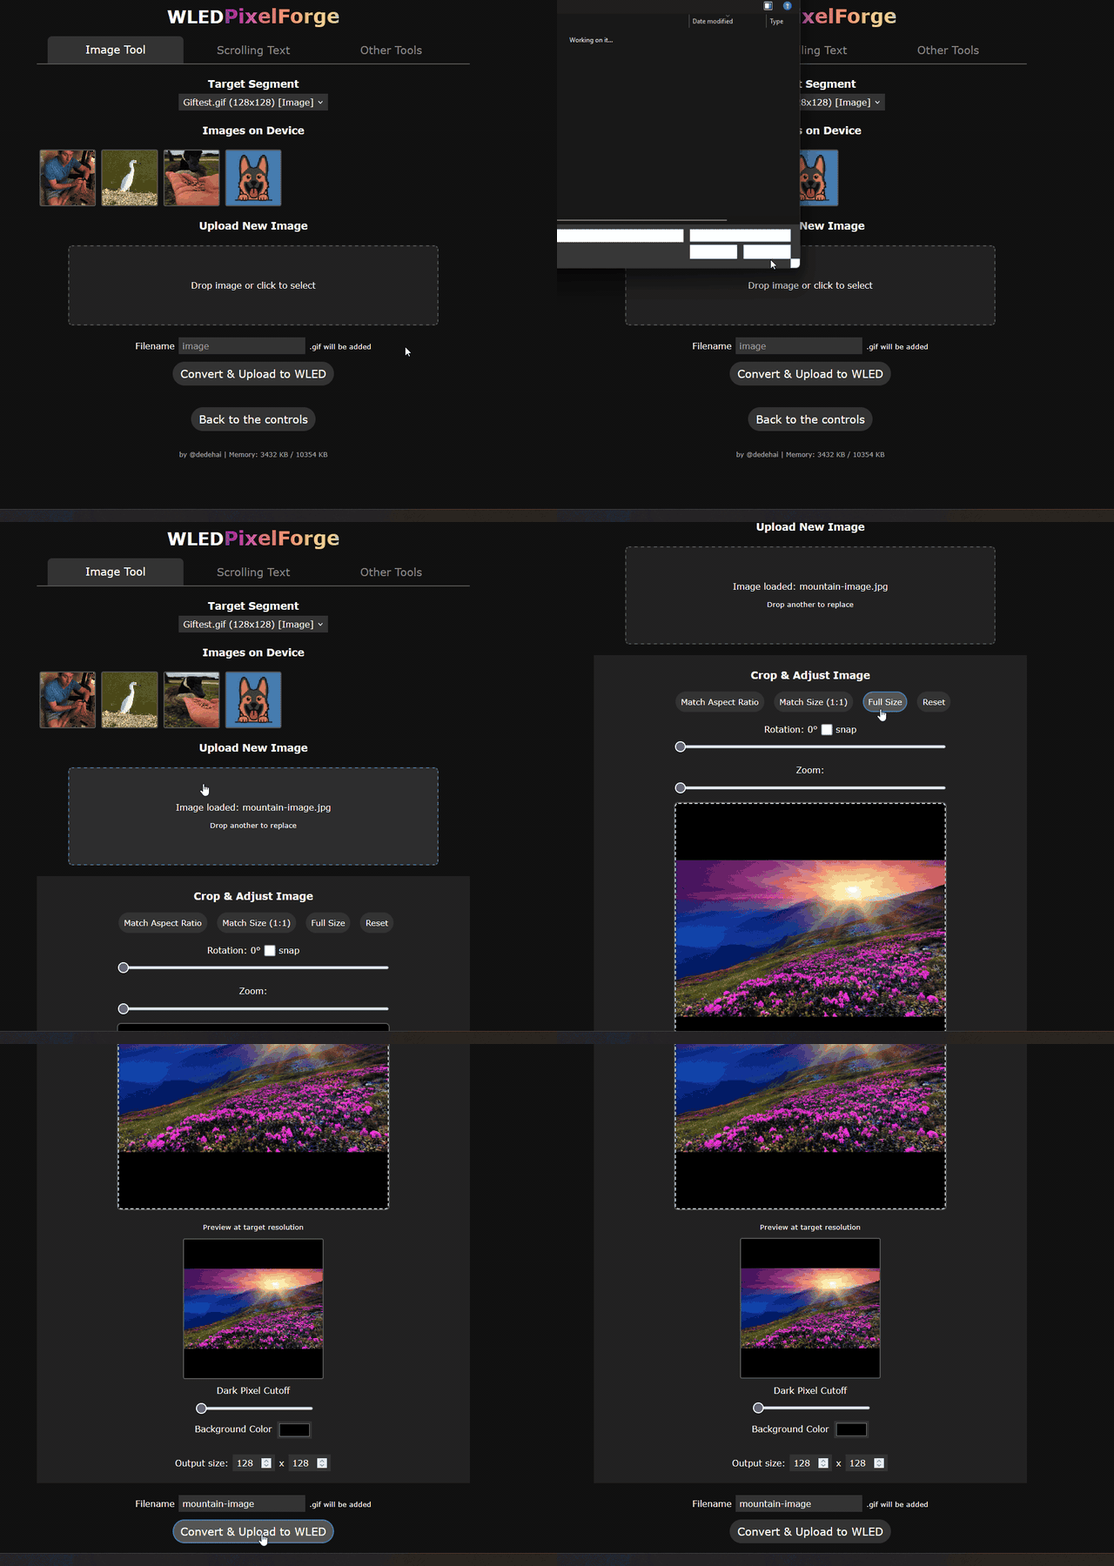
1. Pick the segment the image will display on under Target Segment. One image goes to one segment.
2. Under Upload New Image, drop a file onto the box or click to select one. JPEG, PNG, WebP, BMP, and animated GIF all work. A red frame around the preview means the format is not supported.
3. Frame the picture. Drag the crop frame over the part you want, use the zoom and rotation sliders to fit it, and pan by dragging outside the frame.
4. If the image has a dark background you want to drop out, raise the Dark Pixel Cutoff slider until those pixels go transparent.
5. Type a Filename, which gets .gif appended for you, and set the output size. On a single M-1 panel that is 64 x 64. On a 2x2 grid it is 128 x 128.
6. Click Convert & Upload to WLED. The converted GIF lands on the M-1's filesystem and shows up in the effects list, ready to run. (1)
- Pixel Forge shows how much filesystem space is left as you go, which matters because the M-1 stores these images on the device.
Scrolling Text
Configures WLED's Scrolling Text effect without editing segment names by hand.
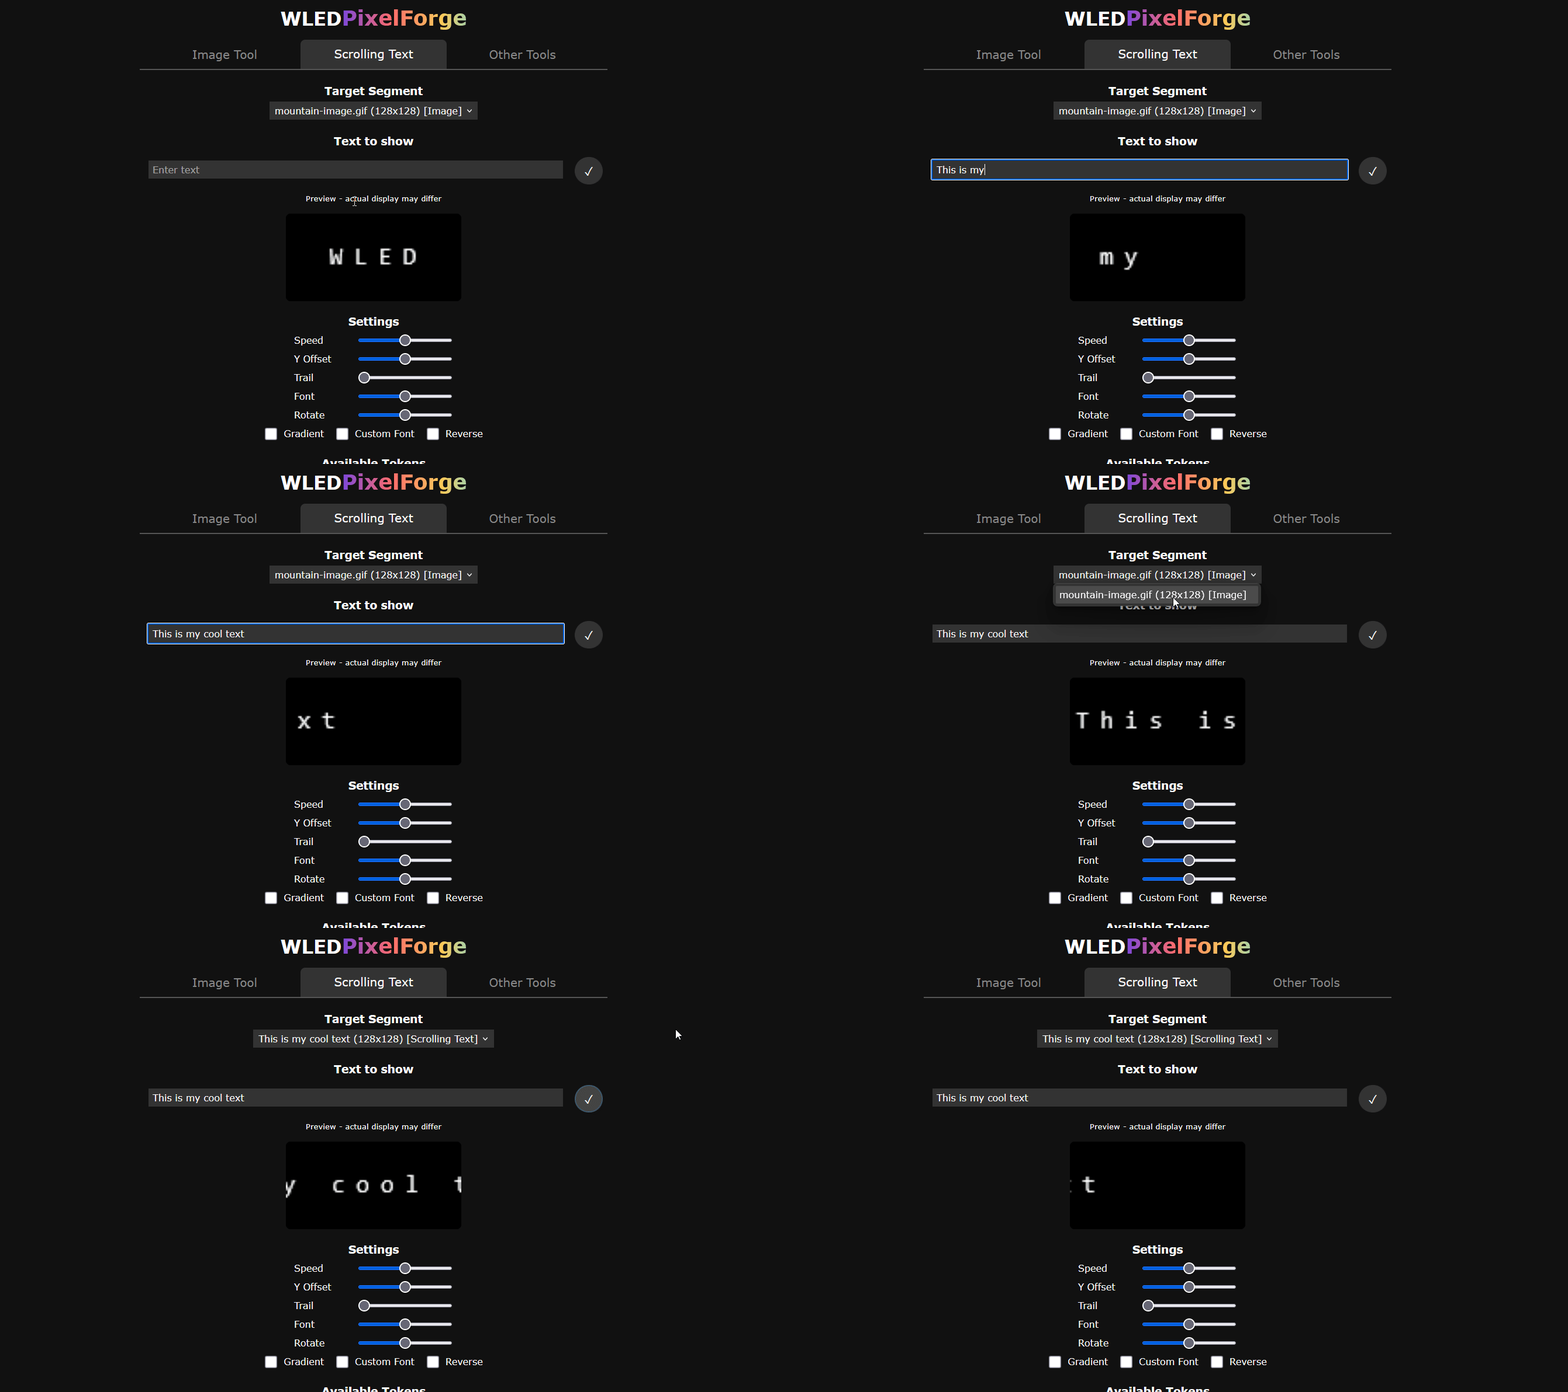
Choose your segment under Target Segment, type into Text to show, and click the checkmark to apply it. The preview underneath gives you a rough idea of the result, though it warns that the actual display may differ.
Settings holds sliders for Speed, Y Offset, Trail, Font, and Rotate, plus Gradient, Custom Font, and Reverse checkboxes.
The useful part is Available Tokens. Insert date, time, or temperature and the text keeps itself current instead of showing a fixed string. For values that come from elsewhere in your house, push them from Home Assistant over the JSON API instead.
Other Tools
Downloads extra utilities onto the M-1. Whatever you download stays there until you delete it, and works offline afterward.
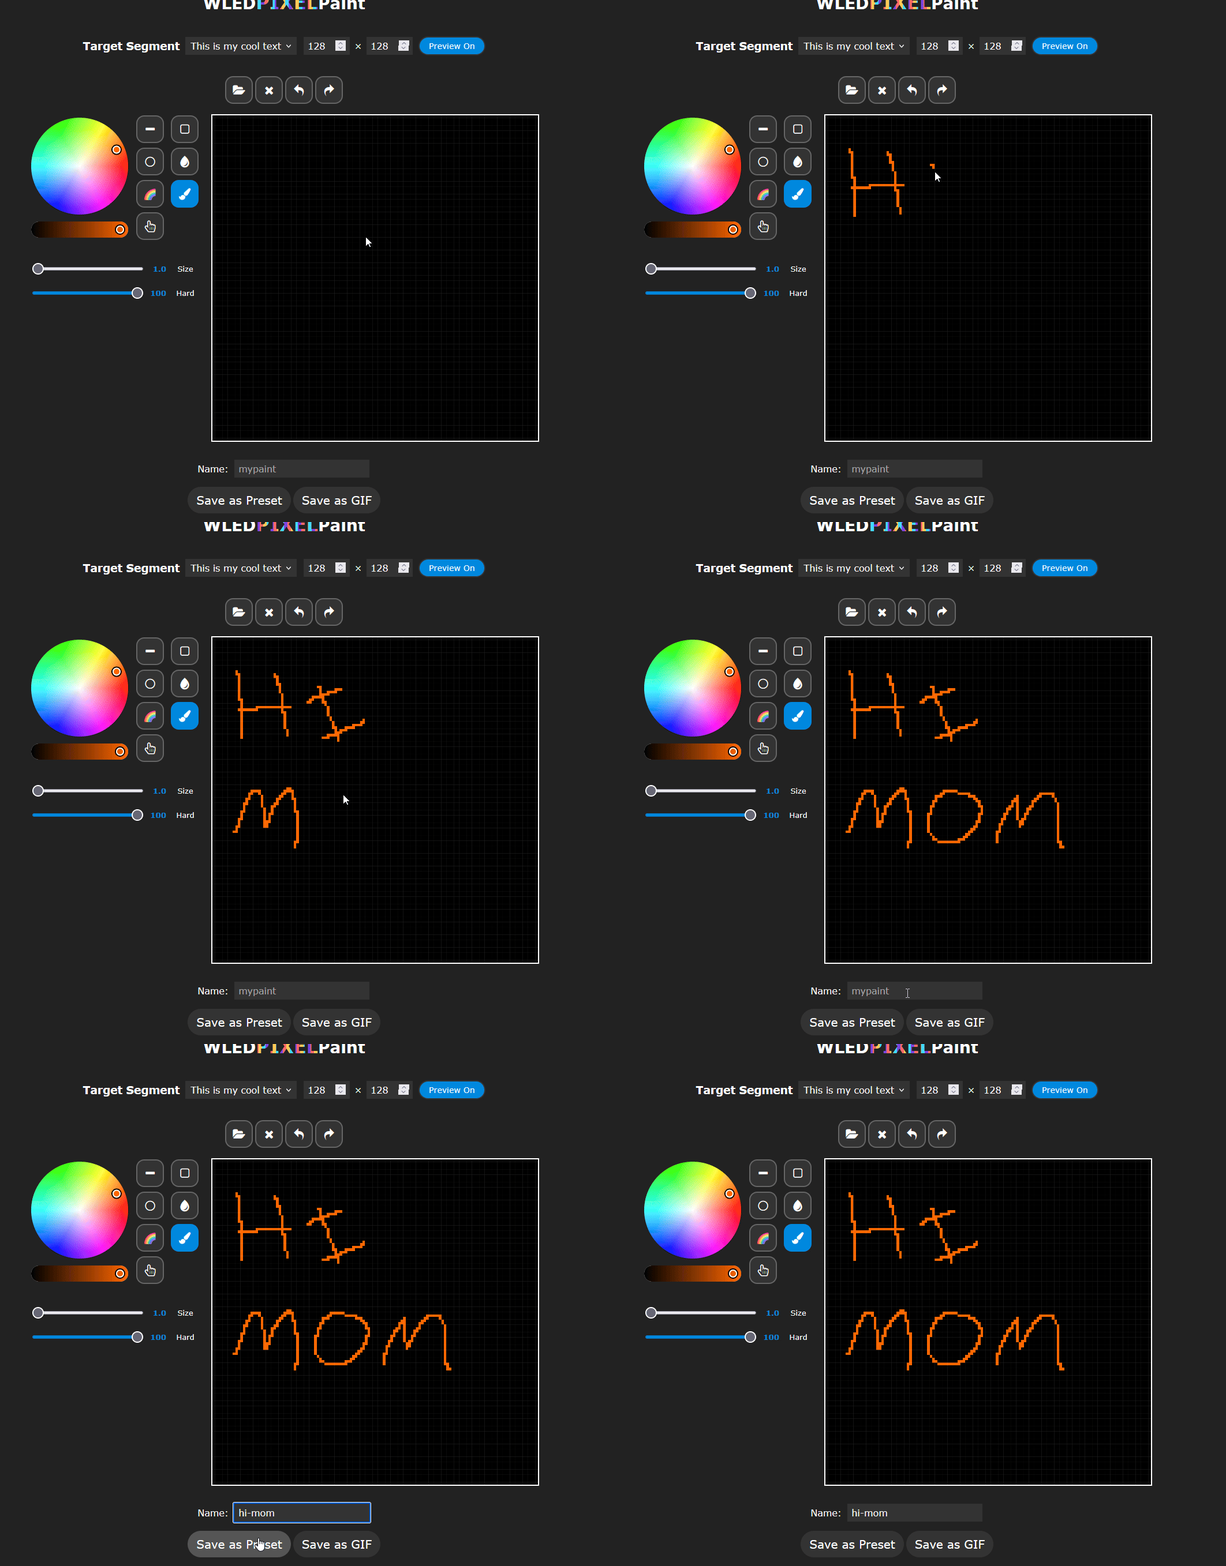
Pixel Paint is the one worth having. It draws straight onto the matrix, pixel by pixel, and Preview On mirrors your canvas to the panel live while you work, so you are drawing on the real thing rather than guessing.
Pick your Target Segment and canvas size along the top. The color wheel and brush tools run down the left side, with Size and Hard sliders for the brush, and undo and redo above the canvas. When you are happy, type a Name and choose Save as Preset or Save as GIF.
On WLED-MM the equivalent workflow is resizing a GIF externally and uploading it.