Create GIF
- Make sure you know your Apollo M-1 board revision (look on the back of the controller), Rev 4 or Rev 6, and are on firmware version 14.5.1. You can flash your device here. Also, make sure you have the correct LED matrix settings here.
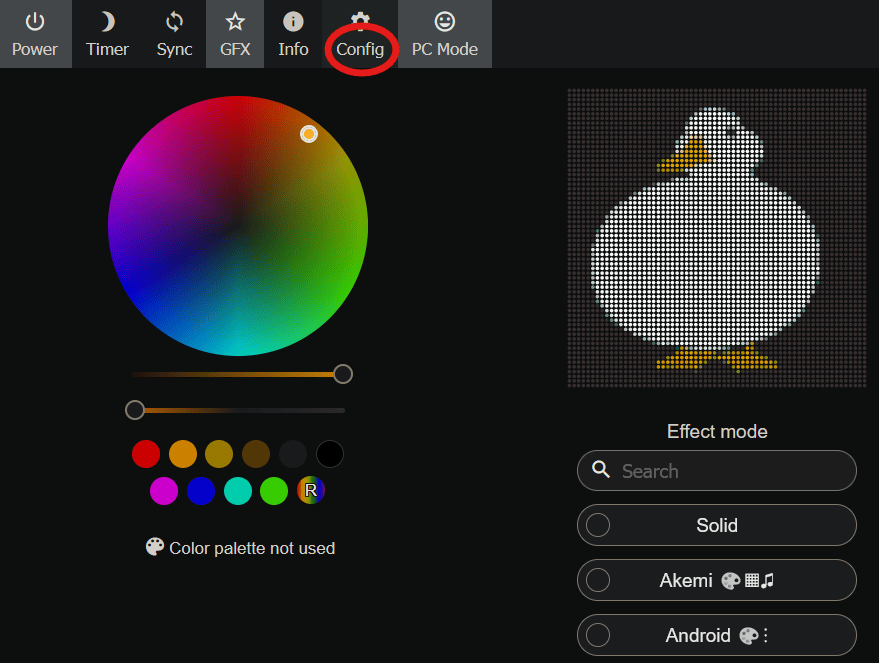
- Connect to the Apollo M-1 Wi-Fi hot spot and it should take you directly to the main dashboard. Then select Config.

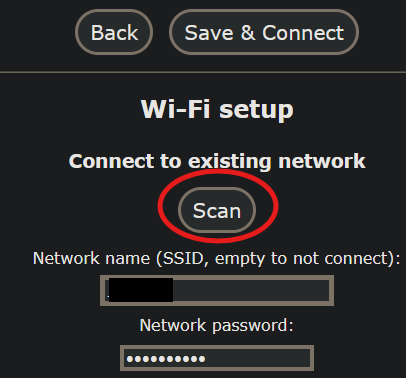
- Select Wi-Fi Setup.

- Add your M-1 to your Wi-Fi network by selecting Scan and adding your Wi-Fi credentials.
- Now you can grab the IP address of the M-1 from your router which should be labeled esp32s3 or you can use the WLED Native app to automatically find the device. (Download here: Android / Apple)

- Copy the IP address and paste it into the URL bar of your browser. This will take you to the Apollo M-1 dashboard.

- Now find your GIF of choice and save it to your computer.

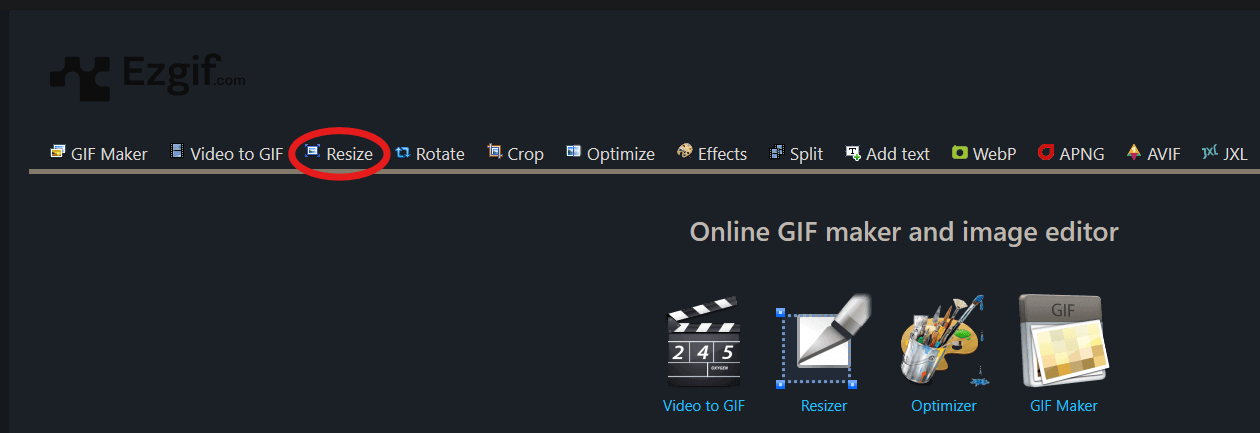
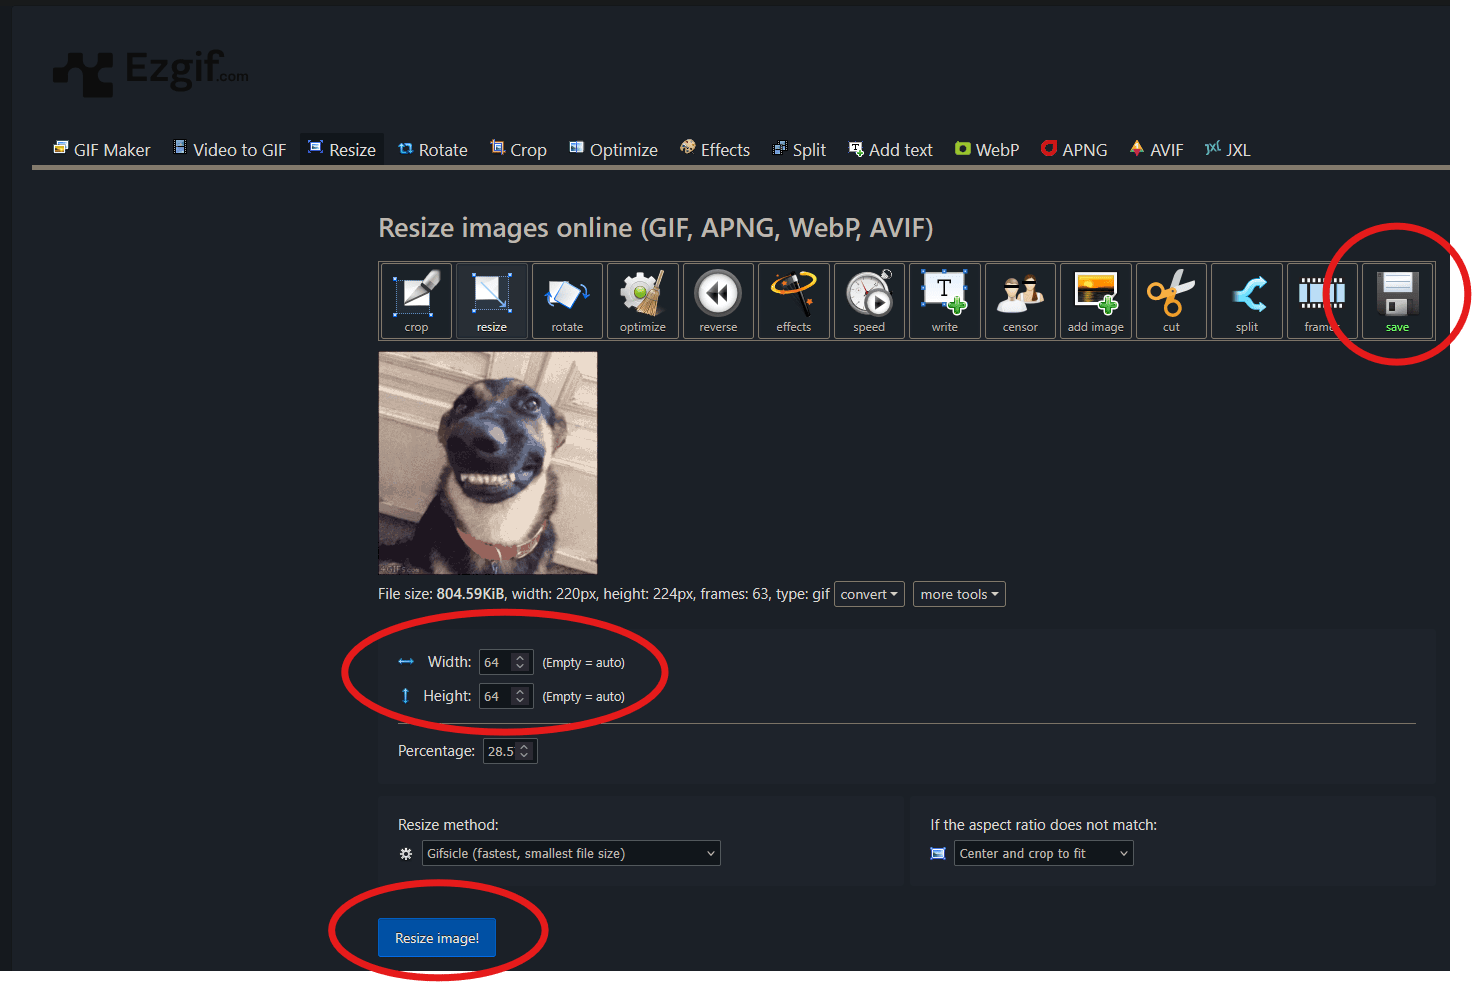
- Now we need to go to https://ezgif.com/ and select Resize.
-
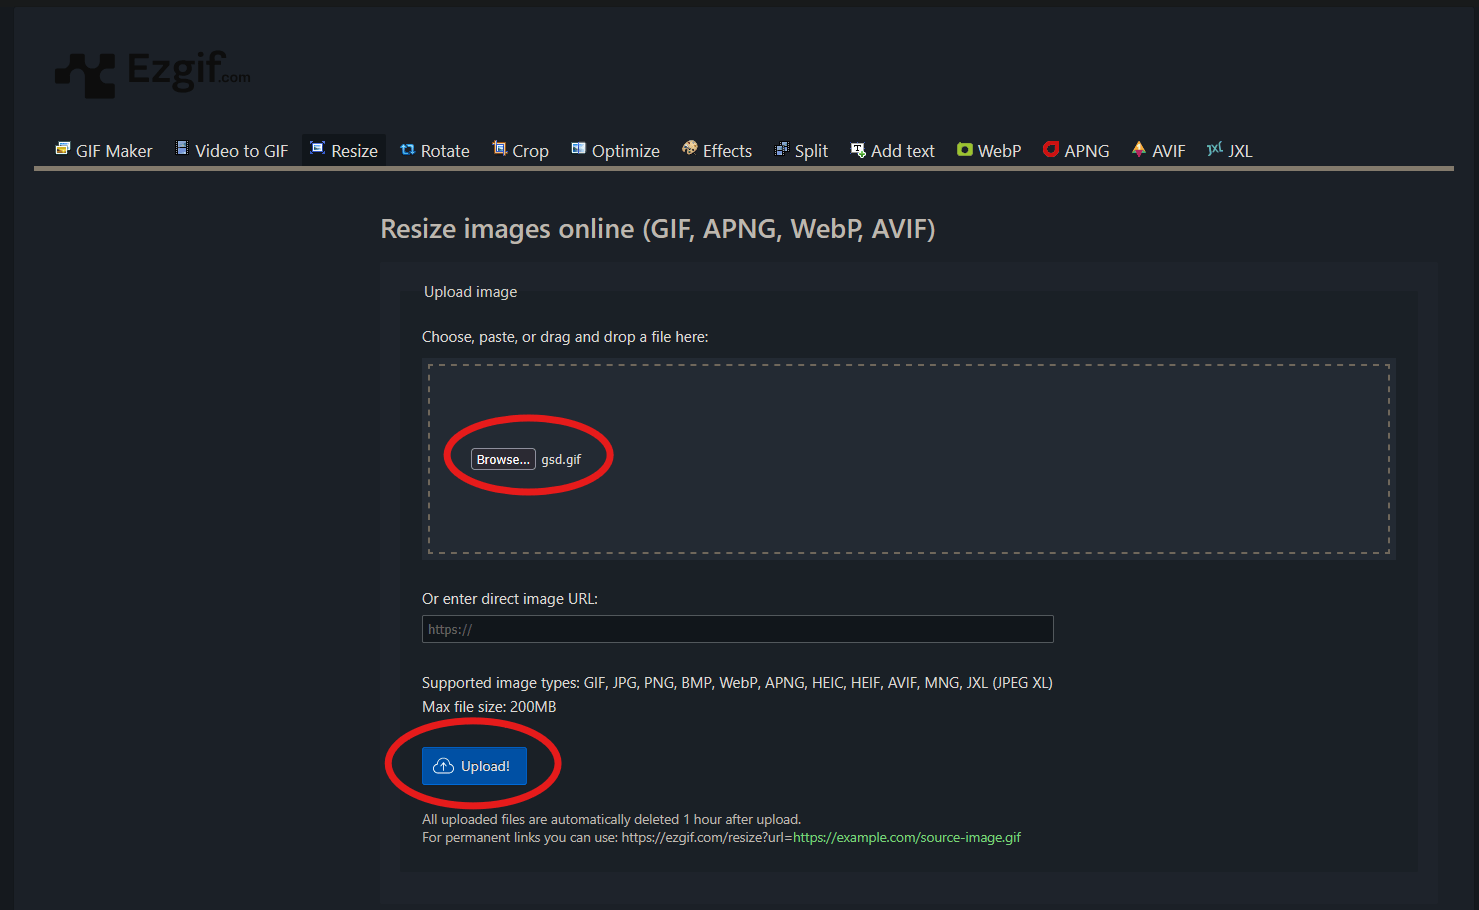
Select Browse and Upload your GIF.
-
Change the Width and Height to 64x64, select resize and save the GIF (use an easy name since we will be using it later).
-
Now go back to the Apollo M-1 IP address and select config.
-
Select File System.
-
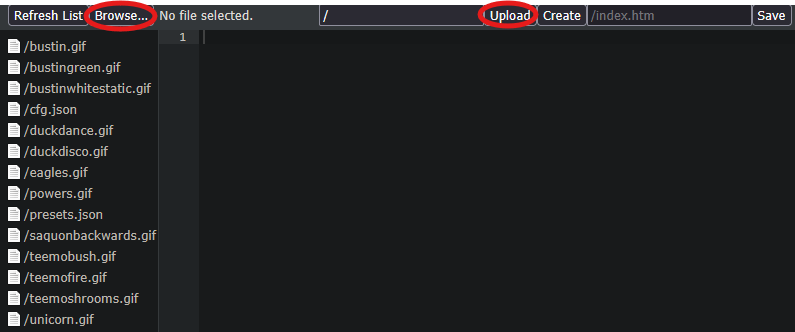
Select Browse, choose your GIF and then select Upload.
-
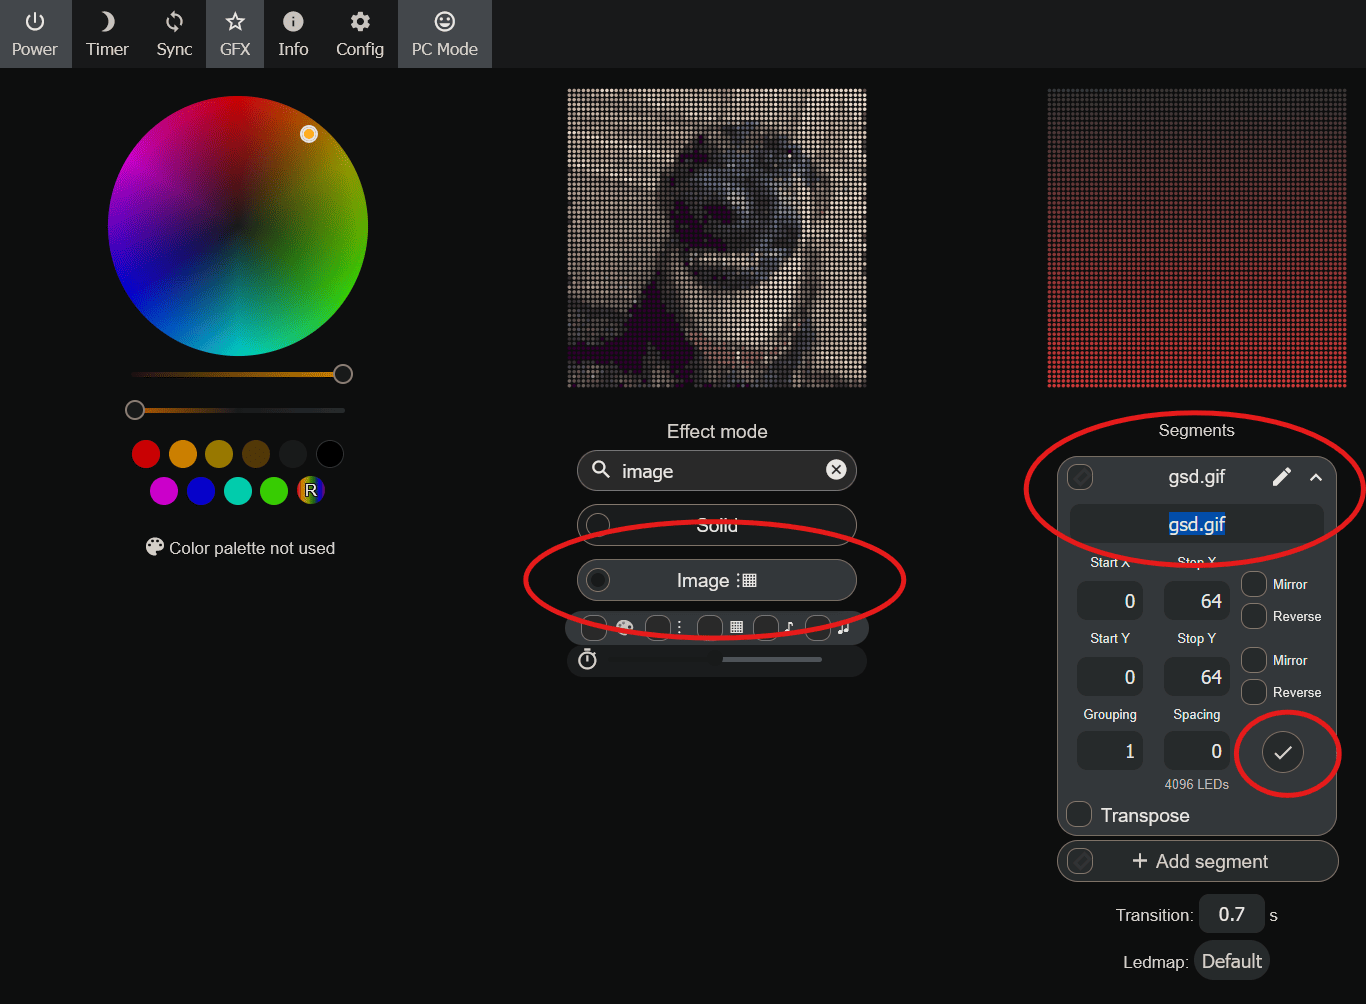
Now go back to your Apollo M-1 IP address, select the Image effect, use the pencil to rename the effect EXACTLY the same as your GIF file (example: gsd.gif) and select the check mark to save it.
-
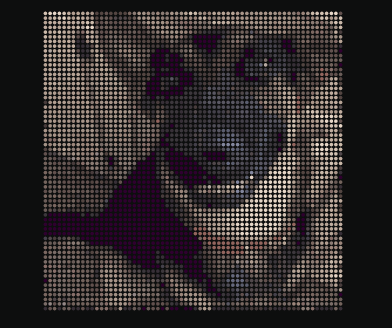
Now you should see your GIF playing on the Apollo M-1!
-
Not finished yet though! Select Preset, type in a name and save it to the device.

-
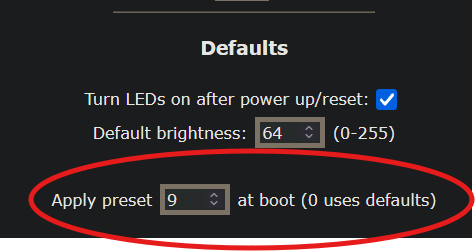
Now you can play it whenever you would like and you can even set it as the boot effect (Config > LED Preferences > Change Apply Preset to the preset number you just made).