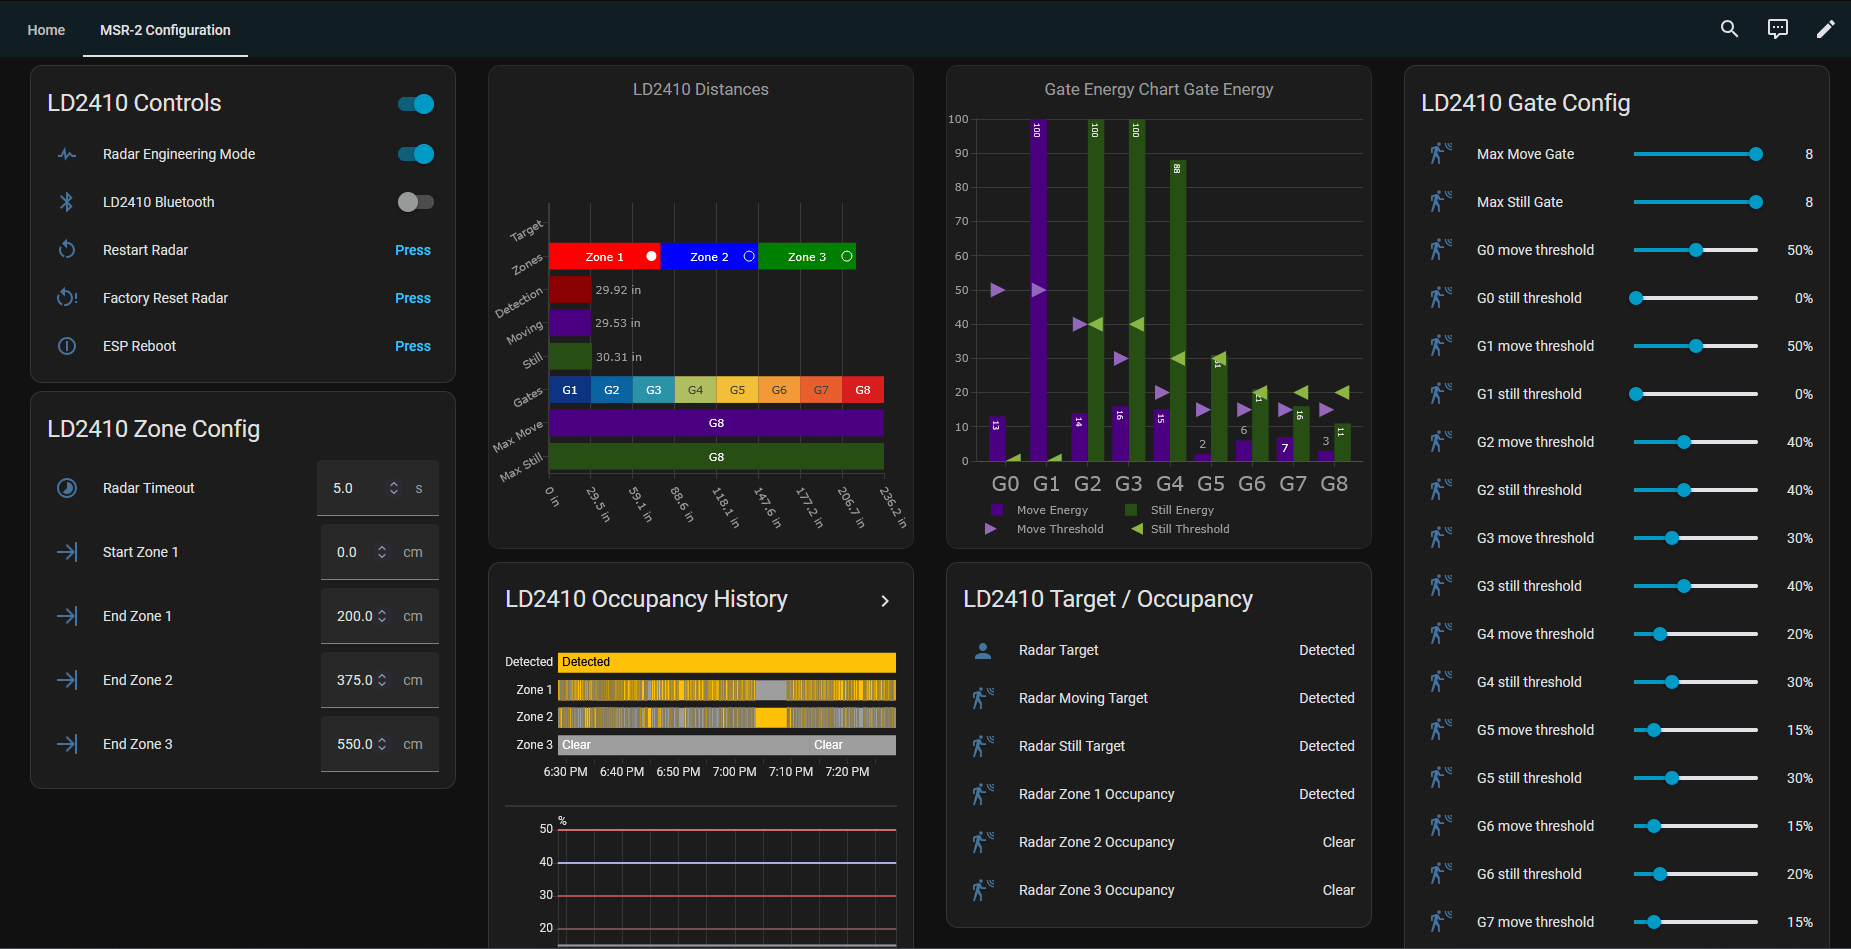
MSR-2 Tuning Dashboard
Huge shoutout to discord user MirkoP for creating this!
We all owe a huge thanks to MirkoP from discord/github for creating and sharing this with everyone! Source here.
This guide will create a beautiful and helpful dashboard to simplify configuration of your MSR-2 sensor. You can easily view the current gate and zone thresholds which will help tune your sensor for your environment!
1. First make sure you have HACS installed - if not, download it here and install it.
2. Install the Streamline Card in HACS here which is required for the steps below.
3. Install the Plotly Graph Card in HACS here which is also required for the steps below.
4. Head to your Home Assistant dashboard and Take control of your dashboard by clicking Edit Dashboard in the top right then the 3 dots from the Edit Dashboard menu and click Take control. (this step is only necessary for new Home Assistant users).
5. Use the YAML generator below and enter in your device name such as apollo_msr_2_m4c4dd and then click Generate YAML. It will copy the YAML for you to use in the next step!
Create backups to restore to before moving forward!
Back up your Home Assistant instance and back up a copy of the Raw configuration editor mentioned below before you make any changes just to be safe!
6. Click Edit dashboard in the top right then click the 3 dots from the Edit Dashboard menu and click Raw configuration editor. Navigate to the end of the document and paste the code from the YAML generator at the very bottom of the Raw configuration editor. Click Save in the top right.
This file is used by Home Assistant and must be carefully edited.
Home Assistant depends on this file to function correctly - it is what displays your dashboard "views". Only make the changes exactly as outlined below. Do not add extra spaces or modify anything beyond what is specified in the instructions.
7. You should now have a new dashboard view called MSR-2 Configuration and you should be ready to configure your sensor!