(Better) HLK Radar Tool App
Configure zones
Ensure that the LD2450 firmware version is V2.02.23090617 or later for proper integration functionality.
The newer version of the firmware includes an "auto calibrate" function so you might want to test it out!
The HLK-LD2450 mmWave sensor is used in the MTR-1. Click Here for the datasheet.
With the app installed, you'll turn on the radar's Bluetooth, connect to it from the HLKRadarTool app, and set up your zones.
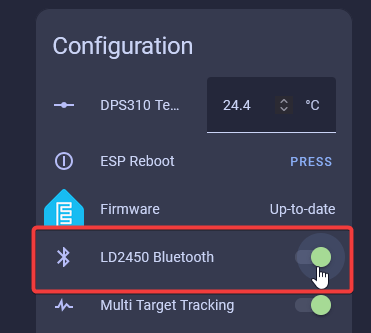
1. Head to the ESPHome integration page (Settings → Devices & services → ESPHome) then select your MTR-1 and scroll down until you see LD2450 Bluetooth.

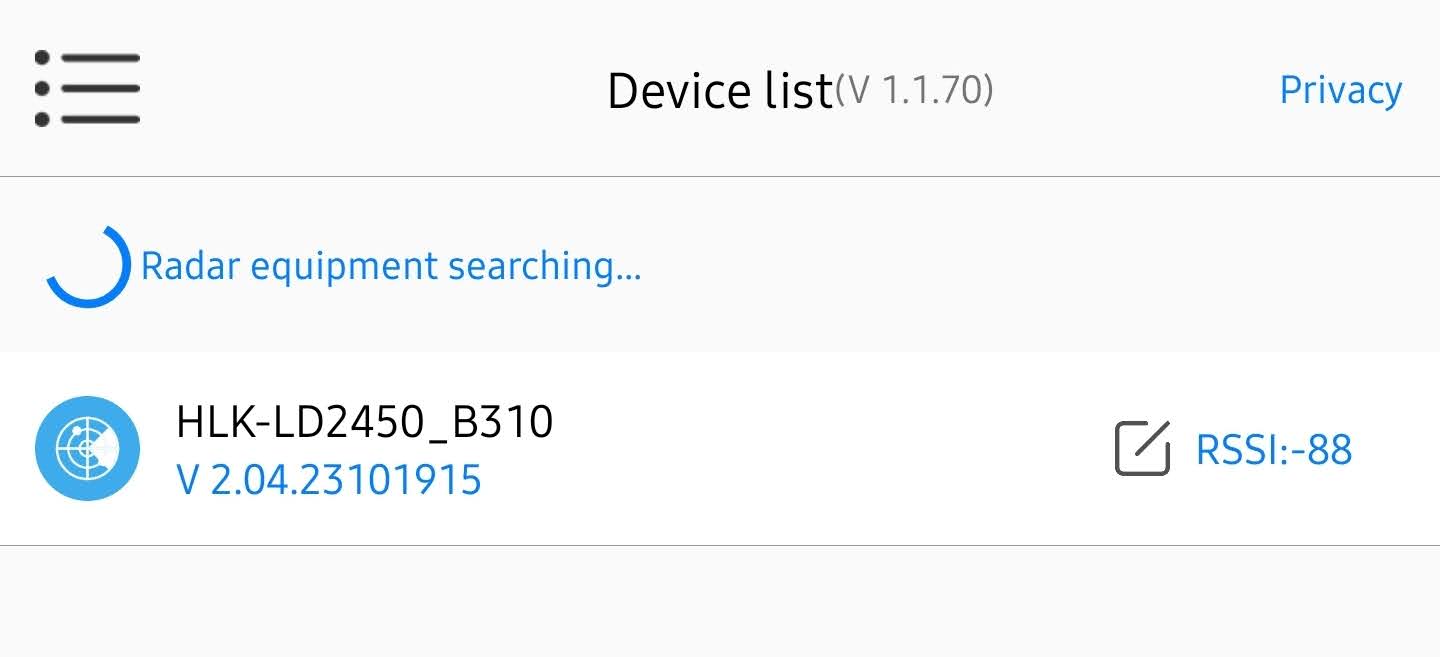
2. Open the HLKRadarTool App and select your device.
You need to be close to your device!
The LD2450 mmWave sensor is a very tiny sensor with no external antenna, which means it cannot connect to Bluetooth devices unless they are very close. Sometimes this means you need to be within a few feet of the sensor to connect directly to it!
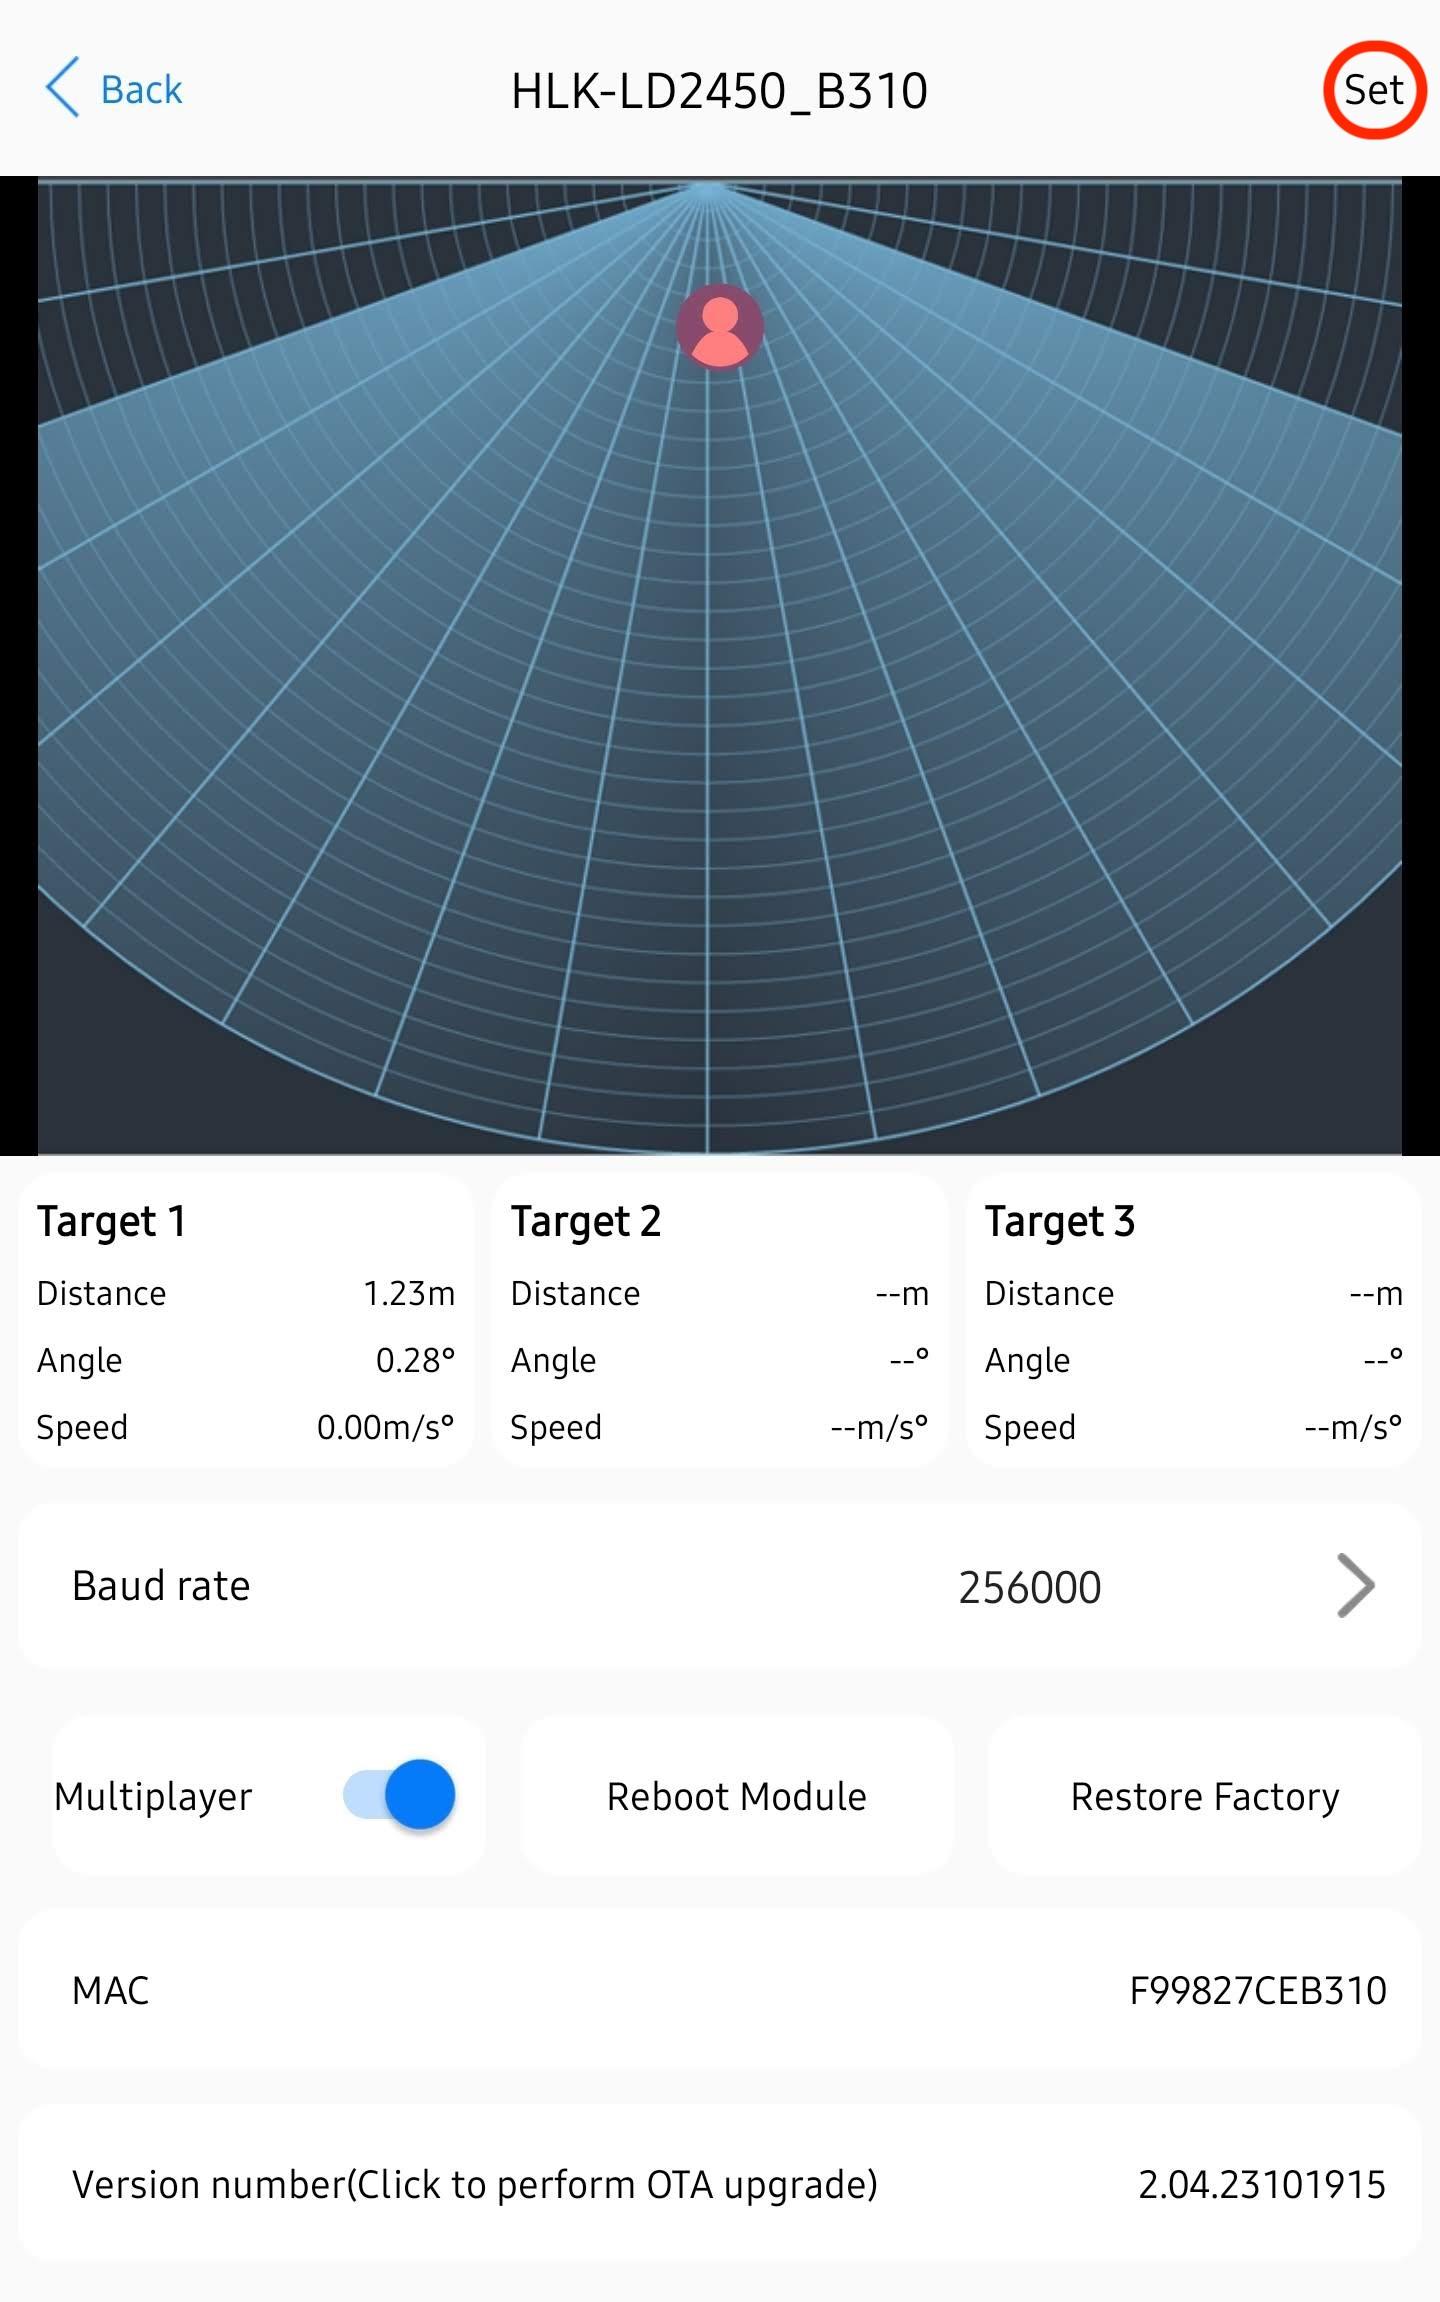
3. Select Set in the top right.
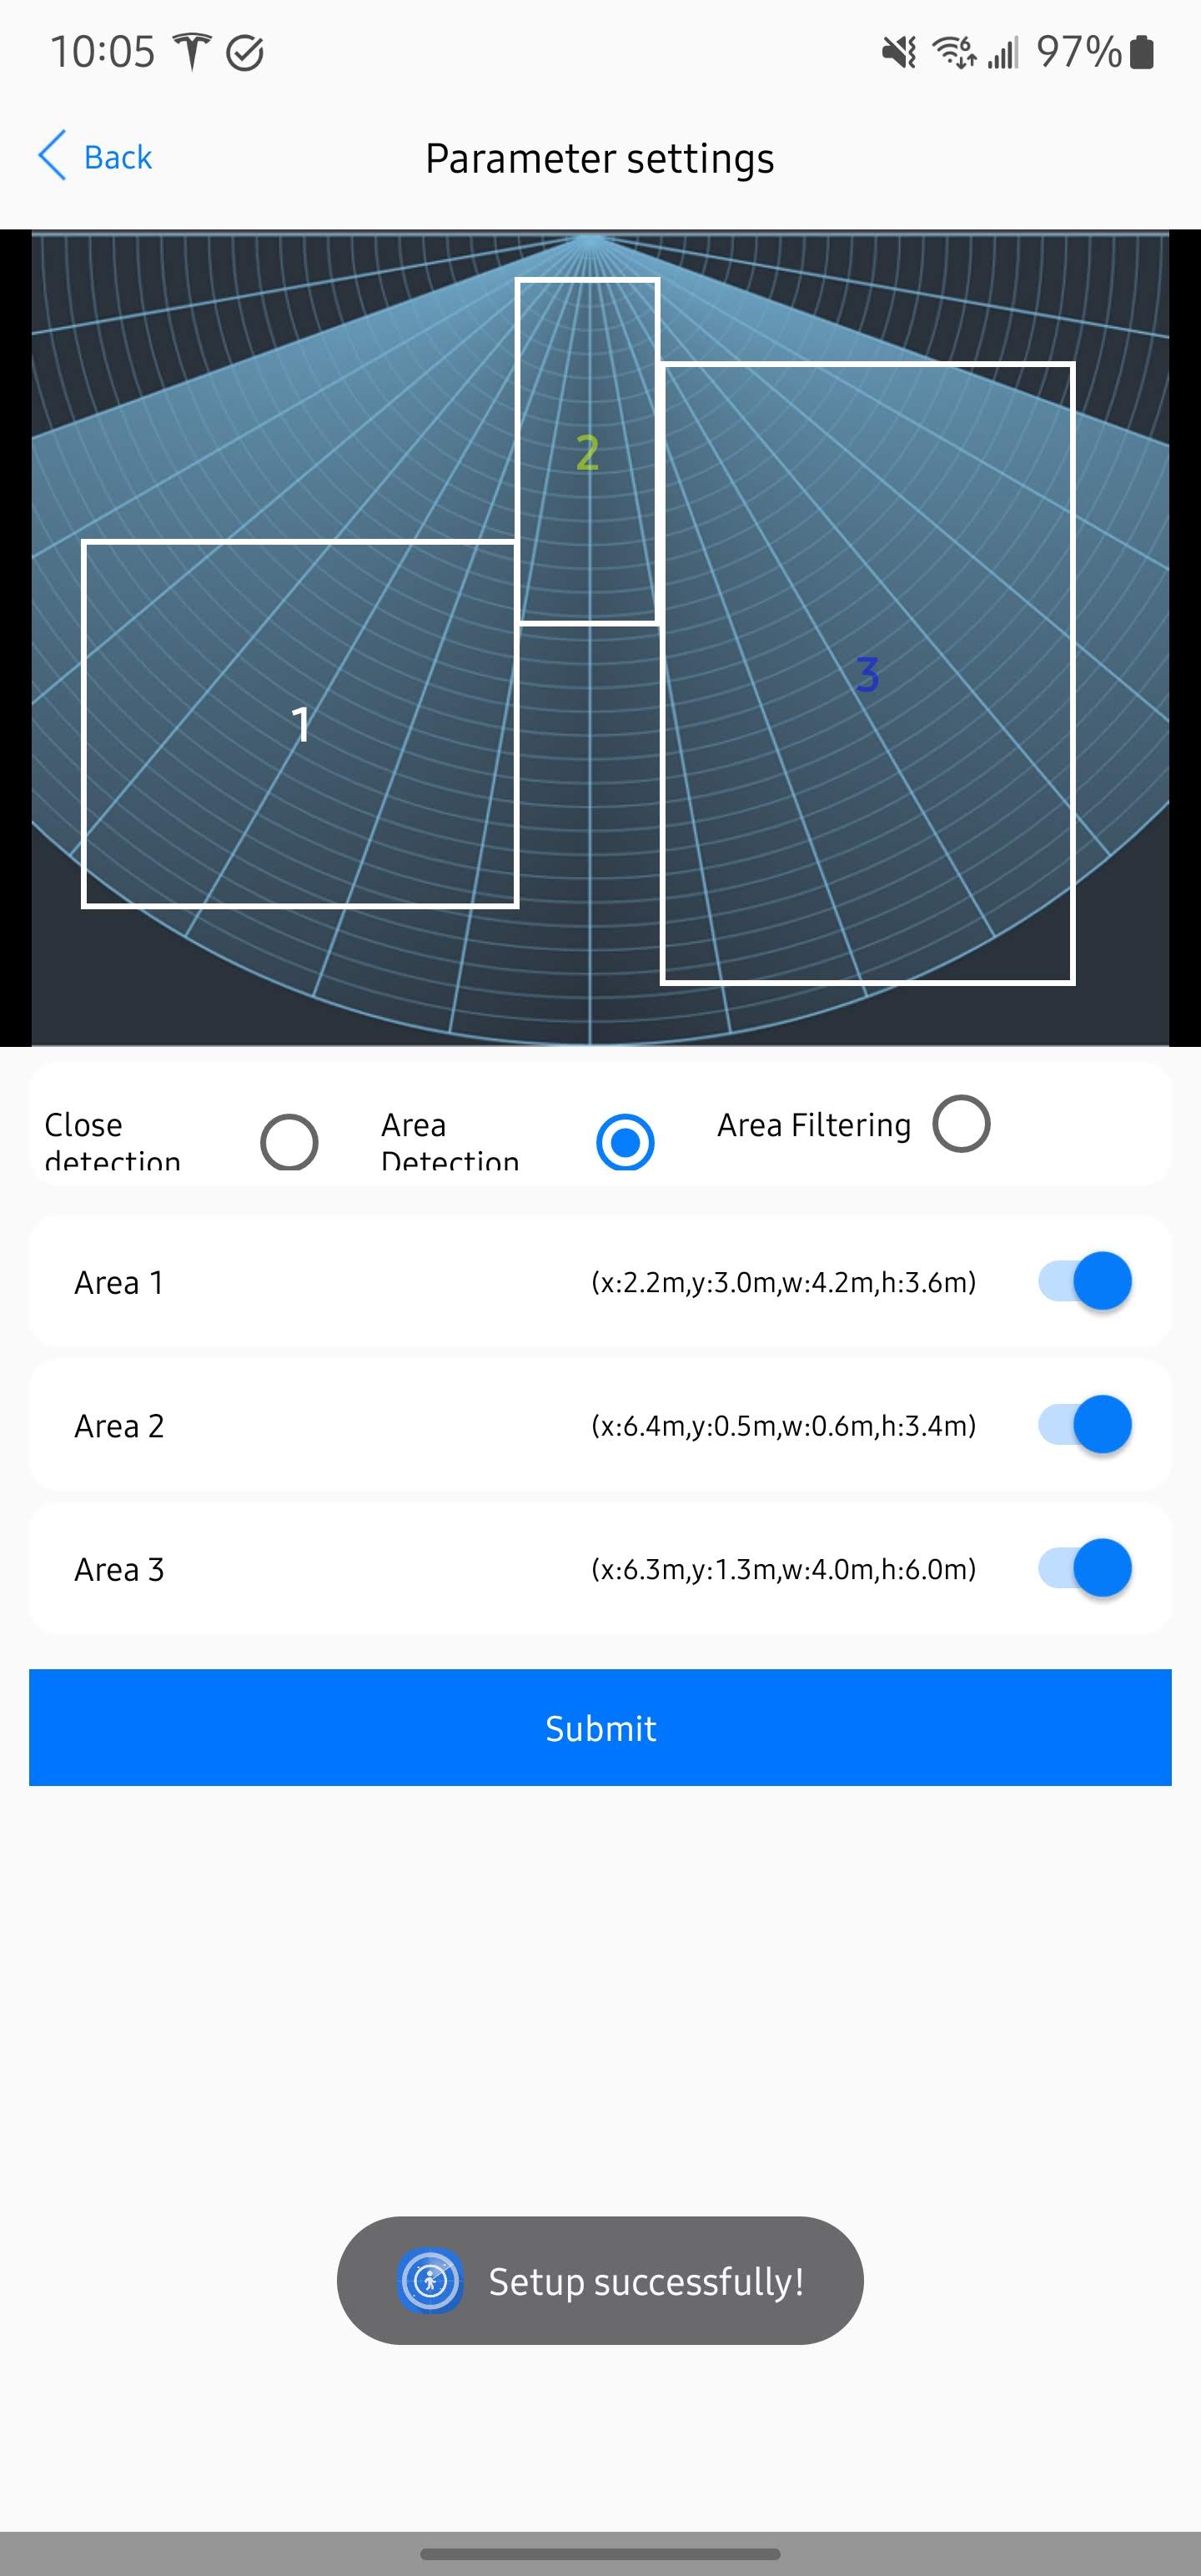
4. Select Area Detection, then toggle Area 1, 2, or 3 and you will see a box with the corresponding number pop up. Then you can press and hold the box to move it and resize it. When your zones are set then select Submit and you should see Setup successfully.
There are three ways to use your MTR-1!
You can use any of these three choices to control your MTR-1 differently. The most common option is Area Detection, which lets you set up three areas and track three targets within them.
Close detection (Disabled in Home Assistant): zone detection is off
Area Detection (Detection): only detects targets inside your zones
Area Filtering (Filter): ignores targets inside your zones
Close detection lets you use the sensor as a basic presence sensor, and Area Filtering lets you filter out an area and detect everything else, which is useful to avoid a fan!
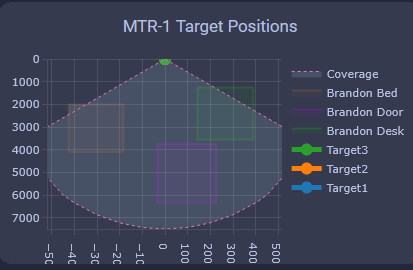
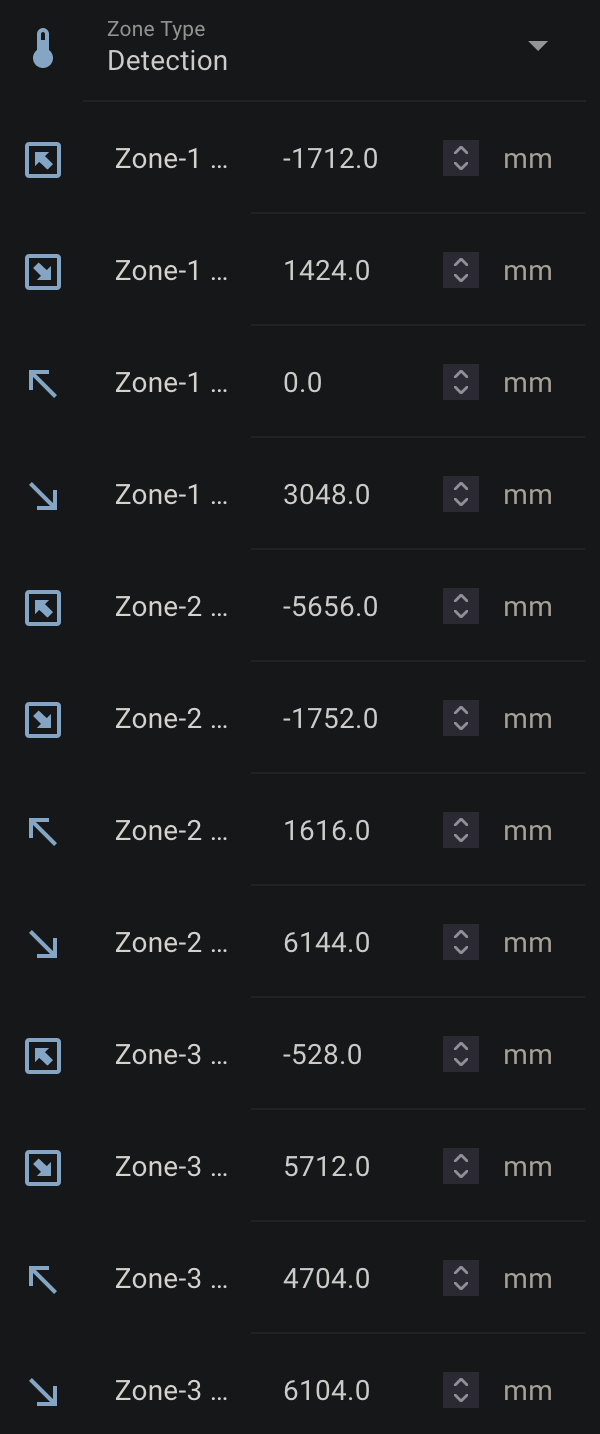
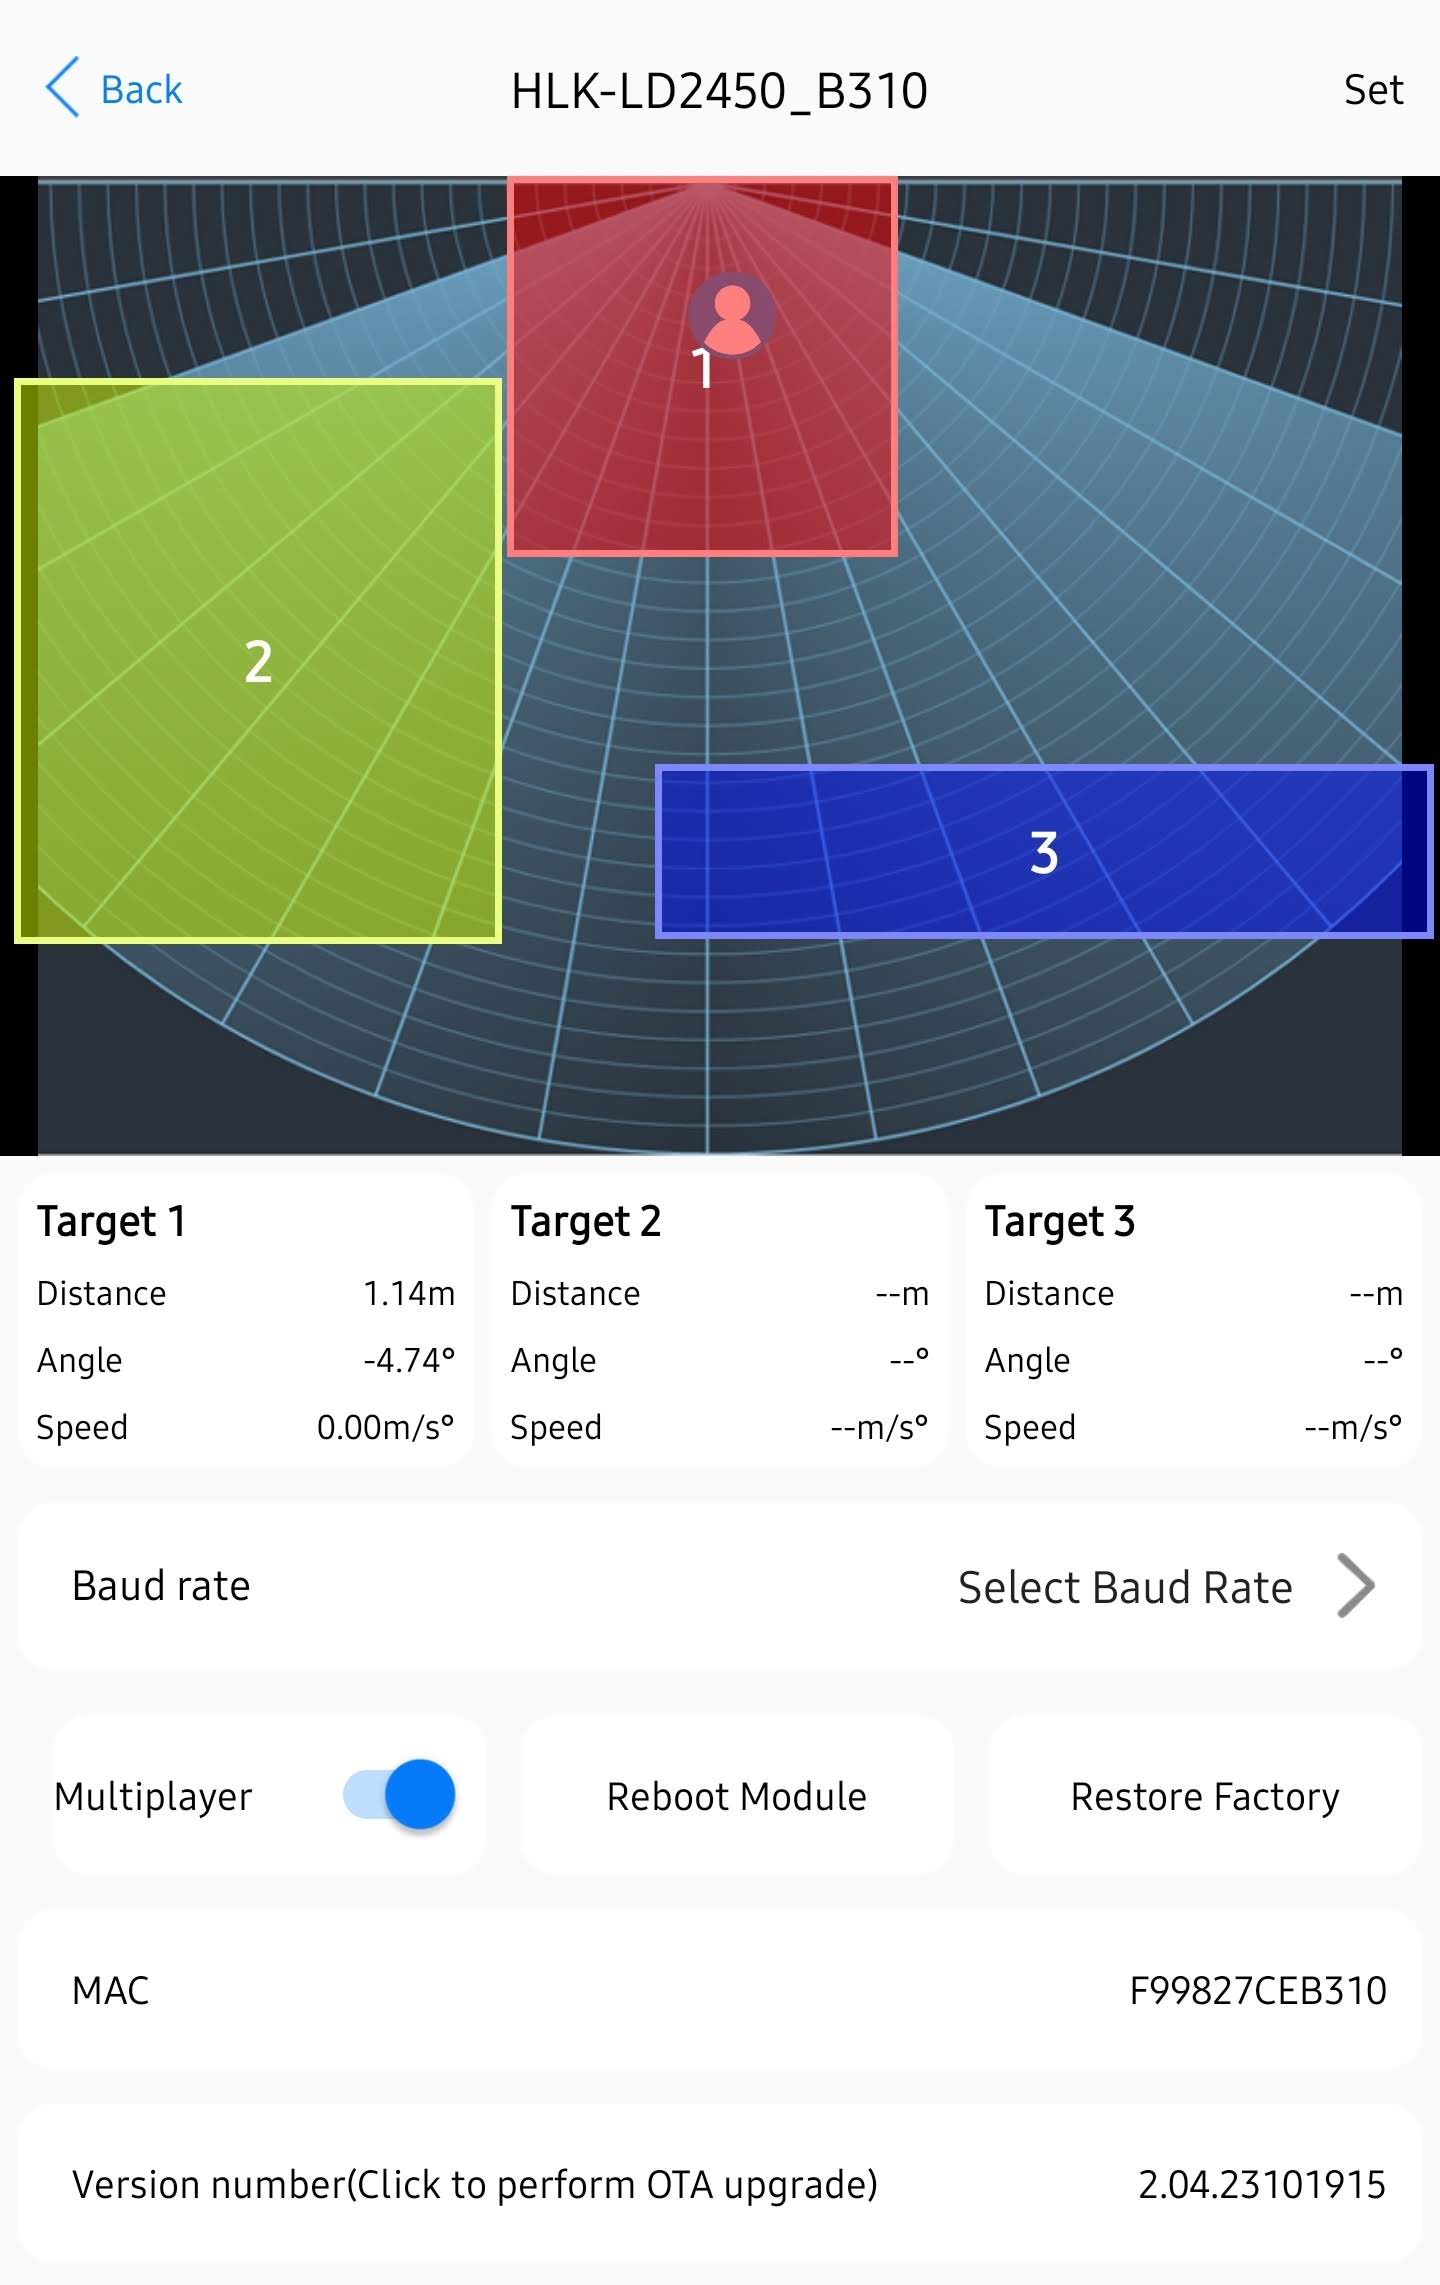
5. If set up correctly the zones should be saved as different colors. You can double-check that the settings are saved by looking at your HA entities (picture below). You should be all set!
Helpful Hints to understand zones better!
-
X1 must always be less than X2, and Y1 must always be less than Y2.
-
The Y axis is easier since it's never negative.
- The X axis is where you can get tripped up, especially when both values are negative: -3456 is less than -2345.
- The Plotly chart will still render the rectangles even if the X1/X2 and Y1/Y2 values are reversed.
- The zones cannot overlap.
Dashboard card setup
Next, you'll add a Plotly card to a Home Assistant dashboard so you can see your sensor's targets and zones.
1. Install HACS.
2. Download Plotly inside HACS.

3. Enter your device’s full name and optionally customize the names of the three zones using the tool below. Then click Generate YAML and Copy YAML.
If you're unsure of your device name, go to Settings → Devices & services → ESPHome, select your device, and look for the full name. Unless you’ve renamed it, it will likely be something like "apollo_mtr_1_c64a28", with six random characters at the end.
4. Head to a dashboard view and click the pencil icon to edit dashboard then click one of the large "+" signs, type in manual, and click on it.
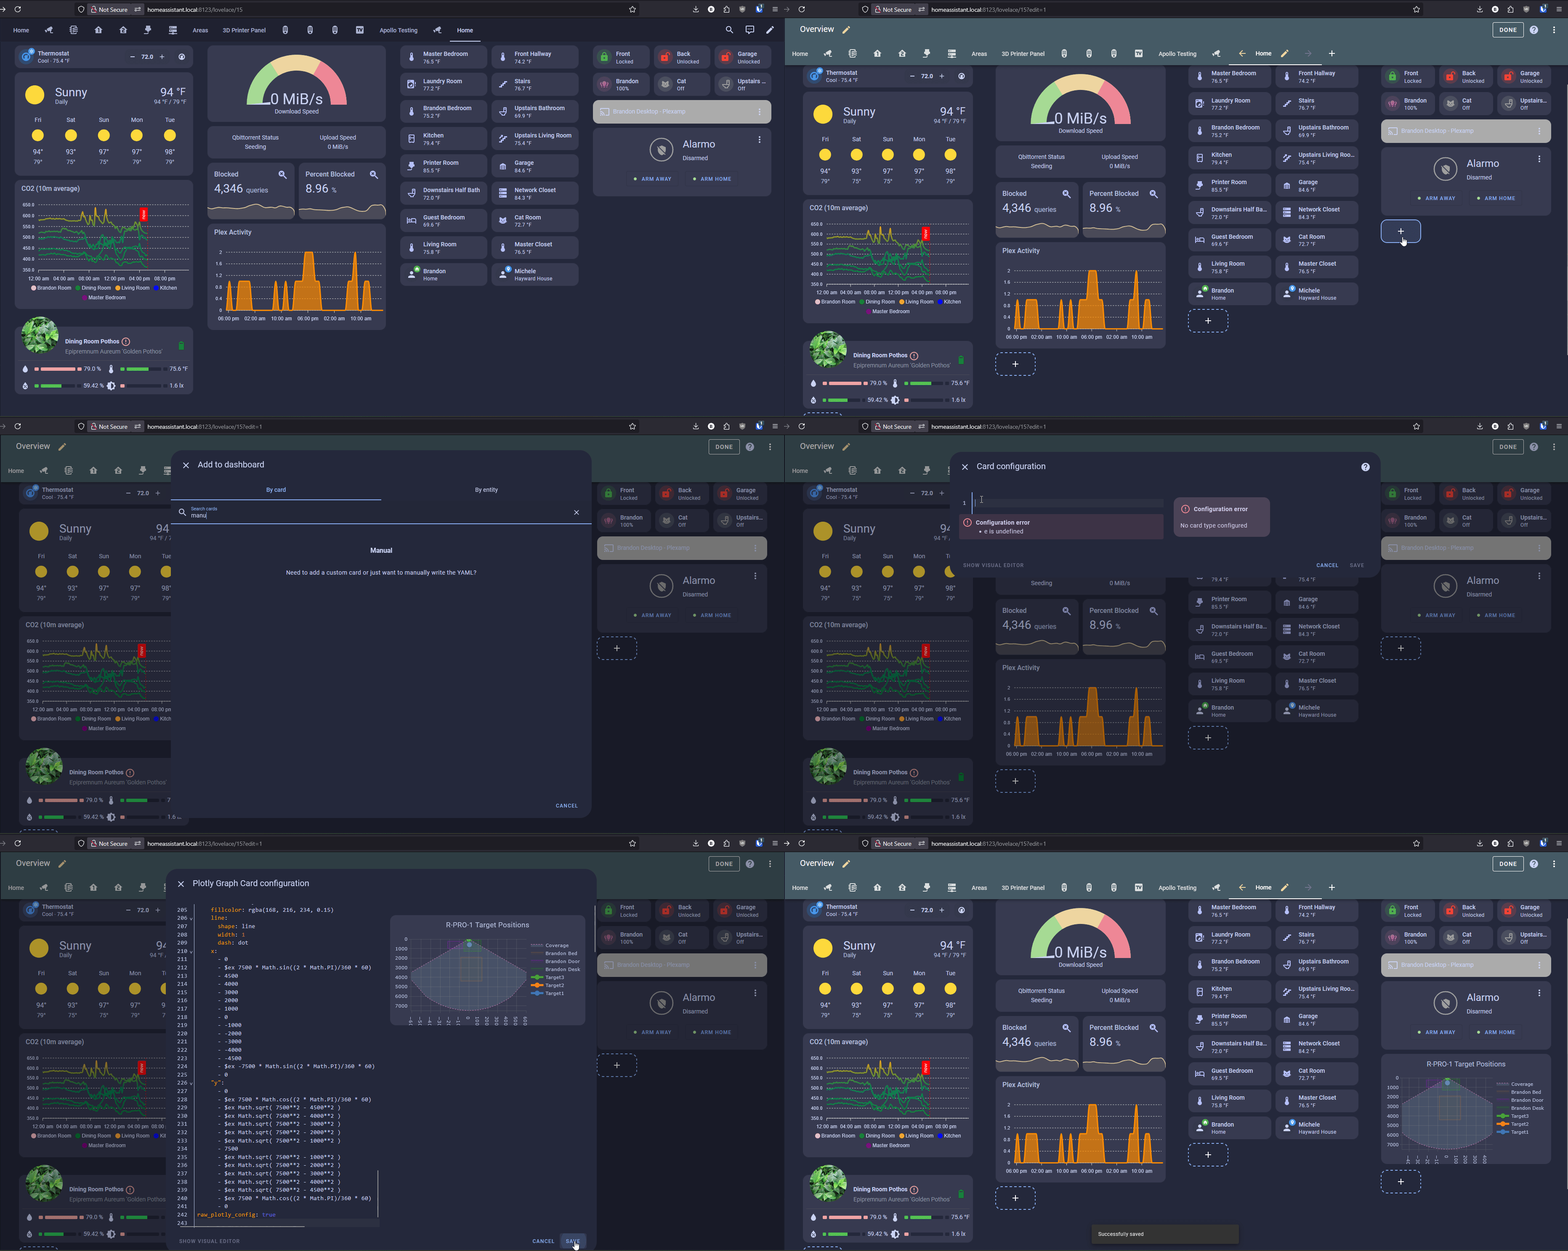
Shown with an R PRO-1 card; the MTR-1 steps are the same.
5. Delete any text in the custom card then paste the YAML you copied above and click save when finished. You should now have a custom card that looks exactly like the card below!