Skip to content

Switching to Beta branch with ESPHome Device Builder

1. In Home Assistant open the ESPHome Device Builder.

Open your Home Assistant instance and show the dashboard of an app.

Make sure you are running the latest version of ESPHome

You should be fully up to date with the ESPHome Device Builder before updating our sensors for ideal performance and ease of troubleshooting!

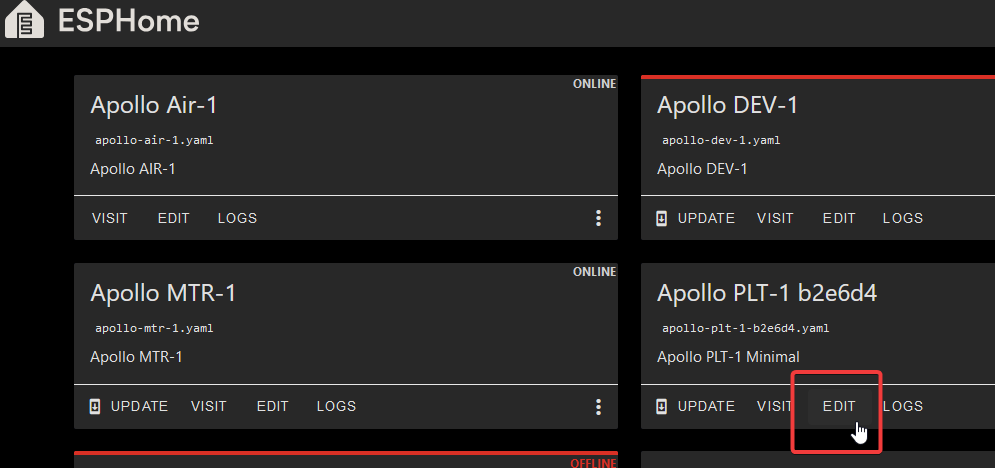
2. Find the sensor you want to edit and click the "EDIT".

This is code and requires you to follow the directions carefully.

Editing the YAML here means even a space matters. Follow the guide just as shown and ask questions if you need help!

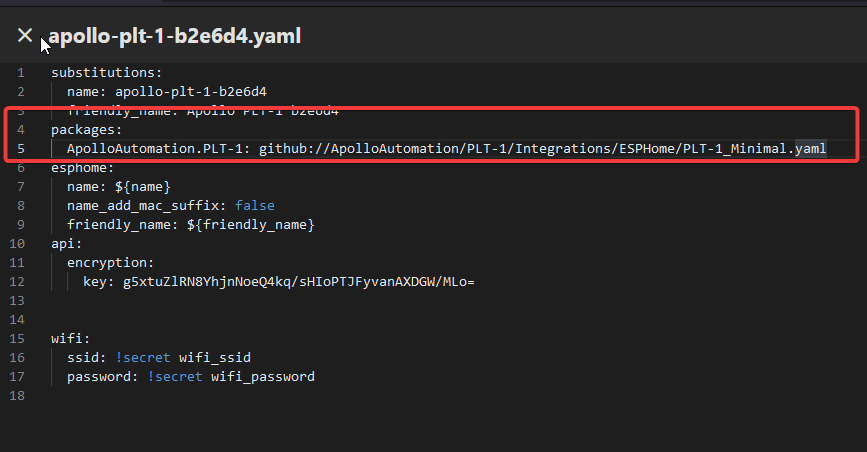
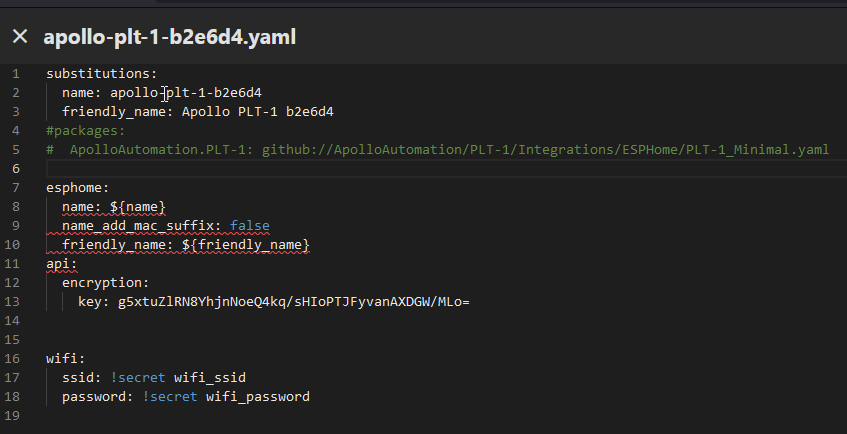
3. Look for the line that starts with packages and the line below it and put a # in front of each line as shown in the second image below.

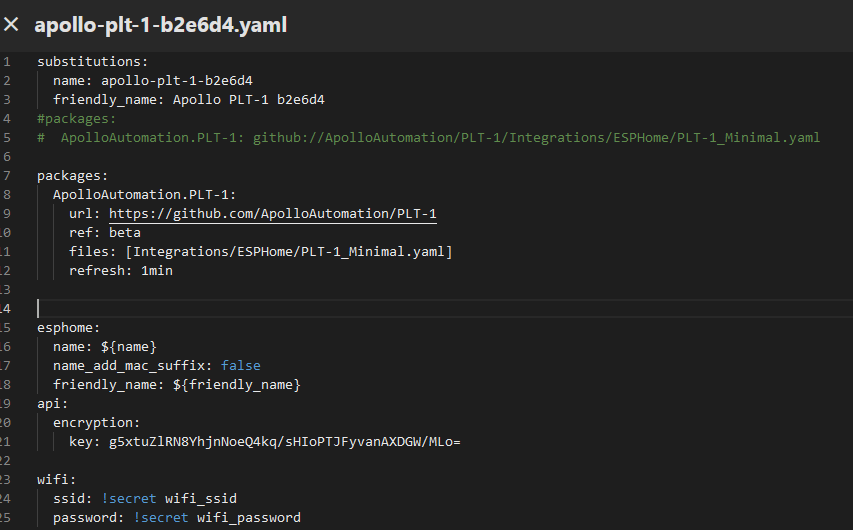
4. Select your product below, copy the code, and paste it below the two lines you just commented out.

packages:
  ApolloAutomation.AIR-1:
    url: https://github.com/ApolloAutomation/AIR-1
    ref: beta
    files: [Integrations/ESPHome/AIR-1.yaml]
    refresh: 1min
packages:
  ApolloAutomation.BTN-1:
    url: https://github.com/ApolloAutomation/BTN-1
    ref: beta
    files: [Integrations/ESPHome/BTN-1_Minimal.yaml]
    refresh: 1min
packages:
  ApolloAutomation.MSR-2:
    url: https://github.com/ApolloAutomation/MSR-2
    ref: beta
    files: [Integrations/ESPHome/MSR-2.yaml]
    refresh: 1min
packages:
  ApolloAutomation.MTR-1:
    url: https://github.com/ApolloAutomation/MTR-1
    ref: beta
    files: [Integrations/ESPHome/MTR-1.yaml]
    refresh: 1min

PLT-1:

packages:
  ApolloAutomation.PLT-1:
    url: https://github.com/ApolloAutomation/PLT-1
    ref: beta
    files: [Integrations/ESPHome/PLT-1_Minimal.yaml]
    refresh: 1min

PLT-1B:

packages:
  ApolloAutomation.PLT-1:
    url: https://github.com/ApolloAutomation/PLT-1
    ref: beta
    files: [Integrations/ESPHome/PLT-1B_Minimal.yaml]
    refresh: 1min
packages:
  ApolloAutomation.PUMP-1:
    url: https://github.com/ApolloAutomation/PUMP-1
    ref: beta
    files: [Integrations/ESPHome/PUMP-1_Minimal.yaml]
    refresh: 1min

Ethernet:

packages:
  ApolloAutomation.R_PRO-1:
    url: https://github.com/ApolloAutomation/R_PRO-1
    ref: beta
    files: [Integrations/ESPHome/R_PRO-1_ETH.yaml]
    refresh: 1min

WiFi:

packages:
  ApolloAutomation.R_PRO-1:
    url: https://github.com/ApolloAutomation/R_PRO-1
    ref: beta
    files: [Integrations/ESPHome/R_PRO-1_W.yaml]
    refresh: 1min

TEMP-1:

packages:
  ApolloAutomation.TEMP-1:
    url: https://github.com/ApolloAutomation/TEMP-1
    ref: beta
    files: [Integrations/ESPHome/TEMP-1_Minimal_R2.yaml]
    refresh: 1min

TEMP-1B:

packages:
  ApolloAutomation.TEMP-1:
    url: https://github.com/ApolloAutomation/TEMP-1
    ref: beta
    files: [Integrations/ESPHome/TEMP-1B_Minimal_R2.yaml]
    refresh: 1min

Do not change the name or friendly_name!

Changing the name can cause the install to fail due to mDNS issues. If you want to rename your device, follow this guide instead.

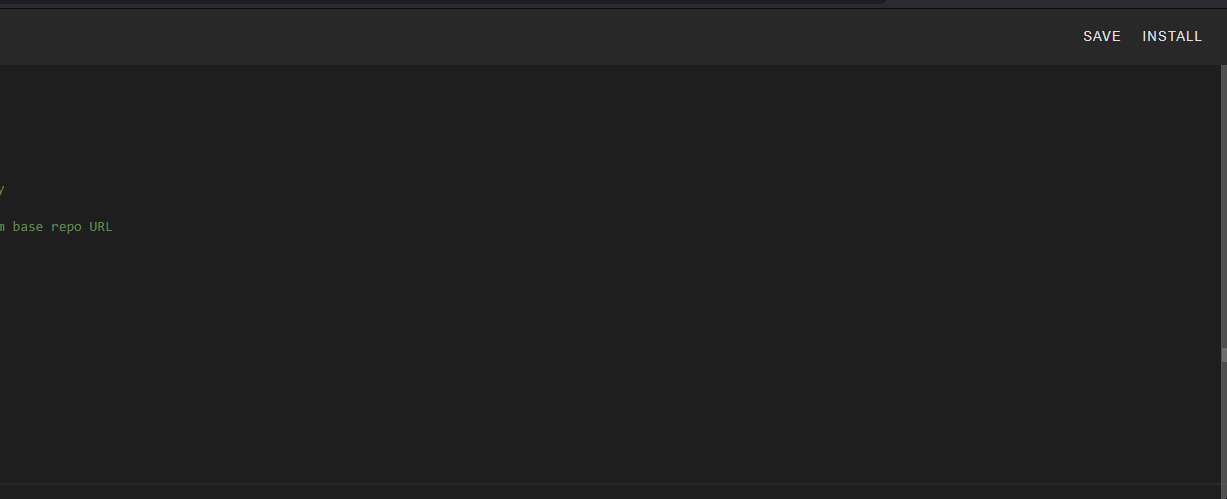
5. Click save then install in the top right and click Wirelessly when prompted.

6. Once you see "INFO OTA successful" you are done. Click "STOP" in the bottom right to exit.