
Bluetooth Tracking
Apple iPhone/iWatch
Alternative HACS Integration: iPhone Detect
https://community.home-assistant.io/t/implement-espresense-fuctionality-in-home-assistant-taking-advantage-of-ble-proxy-of-esphome/524019/6
Thanks to user Jacob Pfeifer!
Ok, so looks like I've got signal strength tracking working for Apple watches by getting the mac address from the home assistant private ble device integration. Here's a quick write-up if anyone else is interested. The end of the doc has a complete configuration file example.
# Tracking an Apple Watch in esphome
Using esphome on an Apollo msr-1 to track an Apple Watch

## Acknowledgements:
The following github repo was used as a starting point for this configuration: https://github.com/dalehumby/ESPHome-Apple-Watch-detection

## RSSI Tracking
1.) Setup your apple watch in the "Private BLE Device" integration by following the instructions on the integration page: https://www.home-assistant.io/integrations/private_ble_device/

2.) Create a text sensor in the esphome config that grabs the apple watch current mac address from home assistant:
```yaml
text_sensor:
  - platform: homeassistant
    name: "Apple Watch Current MAC Address"
    id: apple_watch_mac
    entity_id: device_tracker.your_apple_watch_home_assistant_id
    attribute: current_address
```

3.)  Create a template sensor for storing and transmitting the rssi value:
```yaml
sensor:
  - platform: template
    id: apple_watch_rssi
    name: "Apple Watch RSSI"
    device_class: signal_strength
    unit_of_measurement: dBm
    accuracy_decimals: 0
    filters:
      - exponential_moving_average:
          alpha: 0.3
          send_every: 1
```

4.) Create a custom ble tracker that uses the mac address from home assistant to match the device:
```yaml
esp32_ble_tracker:
  scan_parameters:
    interval: 1.2s
    window: 500ms
    active: false
  on_ble_advertise:
    - then:
      - lambda: |-
          for (auto data : x.get_manufacturer_datas()) {
            if(x.address_str() == id(apple_watch_mac).state) {
              id(apple_watch_rssi).publish_state(x.get_rssi());
            }
          }
```

5) Ensure the power save mode for wifi is set to light (msr-1 defaults to using none which does not work with bluetooth tracking):
```yaml
wifi:
  power_save_mode: light
```

At this point if you install the changes on the device you should be successfully tracking the rssi for your apple watch. If you want you can optionally add some configuration for a basic presence detection sensor by doing the following:

## OPTIONAL PRESENCE DETECTION SECTION

6) Create configuration values for detection signal strength:
```yaml
number:
  - platform: template
    name: "RSSI Presence Level"
    id: rssi_present
    icon: "mdi:arrow-collapse-right"
    optimistic: true
    min_value: -100
    max_value: -35
    initial_value: -60
    step: 1
    entity_category: CONFIG
    restore_value: true
    update_interval: never
  - platform: template
    name: "RSSI Absence Level"
    id: rssi_not_present
    icon: "mdi:arrow-collapse-right"
    optimistic: true
    min_value: -100
    max_value: -35
    initial_value: -70
    step: 1
    entity_category: CONFIG
    restore_value: true
    update_interval: never
```

7) Create a sensor for storing and filtering the presence value:
```yaml
sensor:
  - platform: template
    id: room_presence_debounce
    filters:
      - sliding_window_moving_average:
          window_size: 3
          send_every: 1
```

8) Create a sensor for transmitting the filtered presence state:
```yaml
binary_sensor:
  - platform: template
    id: room_presence
    name: "Apple Watch Presence"
    device_class: occupancy
    lambda: |-
      if (id(room_presence_debounce).state > 0.99) {
        return true;
      } else if (id(room_presence_debounce).state < 0.01) {
        return false;
      } else {
        return id(room_presence).state;
      }
```

9) Update the rssi value to set the presence value when it receives a new rssi value:
```yaml
sensor:
  - platform: template
    id: apple_watch_rssi
    name: "Apple Watch RSSI"
    device_class: signal_strength
    unit_of_measurement: dBm
    accuracy_decimals: 0
    filters:
      - exponential_moving_average:
          alpha: 0.3
          send_every: 1
    on_value:
      then:
        - lambda: |-
            if (id(apple_watch_rssi).state > id(rssi_present).state) {
              id(room_presence_debounce).publish_state(1);
            } else if (id(apple_watch_rssi).state < id(rssi_not_present).state) {
              id(room_presence_debounce).publish_state(0);
            }
        - script.execute: presence_timeout  # Publish 0 if no rssi received
```

Now once you install the esphome changes you should be able to go to the device and set db values for the presence detection and also should see a presence sensor state.

## COMPLETE CONFIGURATION
A complete example of a configuration:
```yaml
substitutions:
  name: apollo-msr-1-6c7a64
  friendly_name: Living Room Multisensor
  roomname: Living Room
  yourname: Jacob

packages:
  ApolloAutomation.MSR-1: github://ApolloAutomation/MSR-1/Integrations/ESPHome/MSR-1.yaml
esphome:
  name: ${name}
  name_add_mac_suffix: false
  friendly_name: ${friendly_name}
api:
  encryption:
    key: xxxxxxxxxxxxxxxxxxxxxxxxxxxxxxxxxxxxxxxxxx


esp32_ble_tracker:
  scan_parameters:
    interval: 1.2s
    window: 500ms
    active: false
  on_ble_advertise:
    - then:
      - lambda: |-
          for (auto data : x.get_manufacturer_datas()) {
            if(x.address_str() == id(jacobs_watch_mac).state) {
              id(apple_watch_rssi).publish_state(x.get_rssi());
            }
          }
text_sensor:
  - platform: homeassistant
    name: "Apple Watch Current MAC Address"
    id: jacobs_watch_mac
    entity_id: device_tracker.jacob_s_apple_watch
    attribute: current_address

sensor:
  - platform: template
    id: apple_watch_rssi
    name: "$yourname Apple Watch $roomname RSSI"
    device_class: signal_strength
    unit_of_measurement: dBm
    accuracy_decimals: 0
    filters:
      - exponential_moving_average:
          alpha: 0.3
          send_every: 1
    on_value:
      then:
        - lambda: |-
            if (id(apple_watch_rssi).state > id(rssi_present).state) {
              id(room_presence_debounce).publish_state(1);
            } else if (id(apple_watch_rssi).state < id(rssi_not_present).state) {
              id(room_presence_debounce).publish_state(0);
            }
        - script.execute: presence_timeout  # Publish 0 if no rssi received

  - platform: template
    id: room_presence_debounce
    filters:
      - sliding_window_moving_average:
          window_size: 3
          send_every: 1


binary_sensor:
  - platform: template
    id: room_presence
    name: "$yourname $roomname Presence"
    device_class: occupancy
    lambda: |-
      if (id(room_presence_debounce).state > 0.99) {
        return true;
      } else if (id(room_presence_debounce).state < 0.01) {
        return false;
      } else {
        return id(room_presence).state;
      }

script:
  # Publish event every 30 seconds when no rssi received
  id: presence_timeout
  mode: restart
  then:
    - delay: 30s
    - lambda: |-
        id(room_presence_debounce).publish_state(0);
    - script.execute: presence_timeout

number:
  - platform: template
    name: "RSSI Presence Level"
    id: rssi_present
    icon: "mdi:arrow-collapse-right"
    optimistic: true
    min_value: -100
    max_value: -35
    initial_value: -60
    step: 1
    entity_category: CONFIG
    restore_value: true
    update_interval: never
  - platform: template
    name: "RSSI Absence Level"
    id: rssi_not_present
    icon: "mdi:arrow-collapse-right"
    optimistic: true
    min_value: -100
    max_value: -35
    initial_value: -70
    step: 1
    entity_category: CONFIG
    restore_value: true
    update_interval: never

wifi:
  power_save_mode: light
  ssid: !secret wifi_ssid
  password: !secret wifi_password
```
Android
Helpful links:
ESP32 Bluetooth Low Energy Tracker Hub
iBeacon support for ble_presence
ESP32 Bluetooth Low Energy Beacon
iBeacon Region
- Install the iBeacon integration in HA
iBeacon Install Guide - Install the Home Assistant App on your device
Android
Apple - Navigate to the HA settings
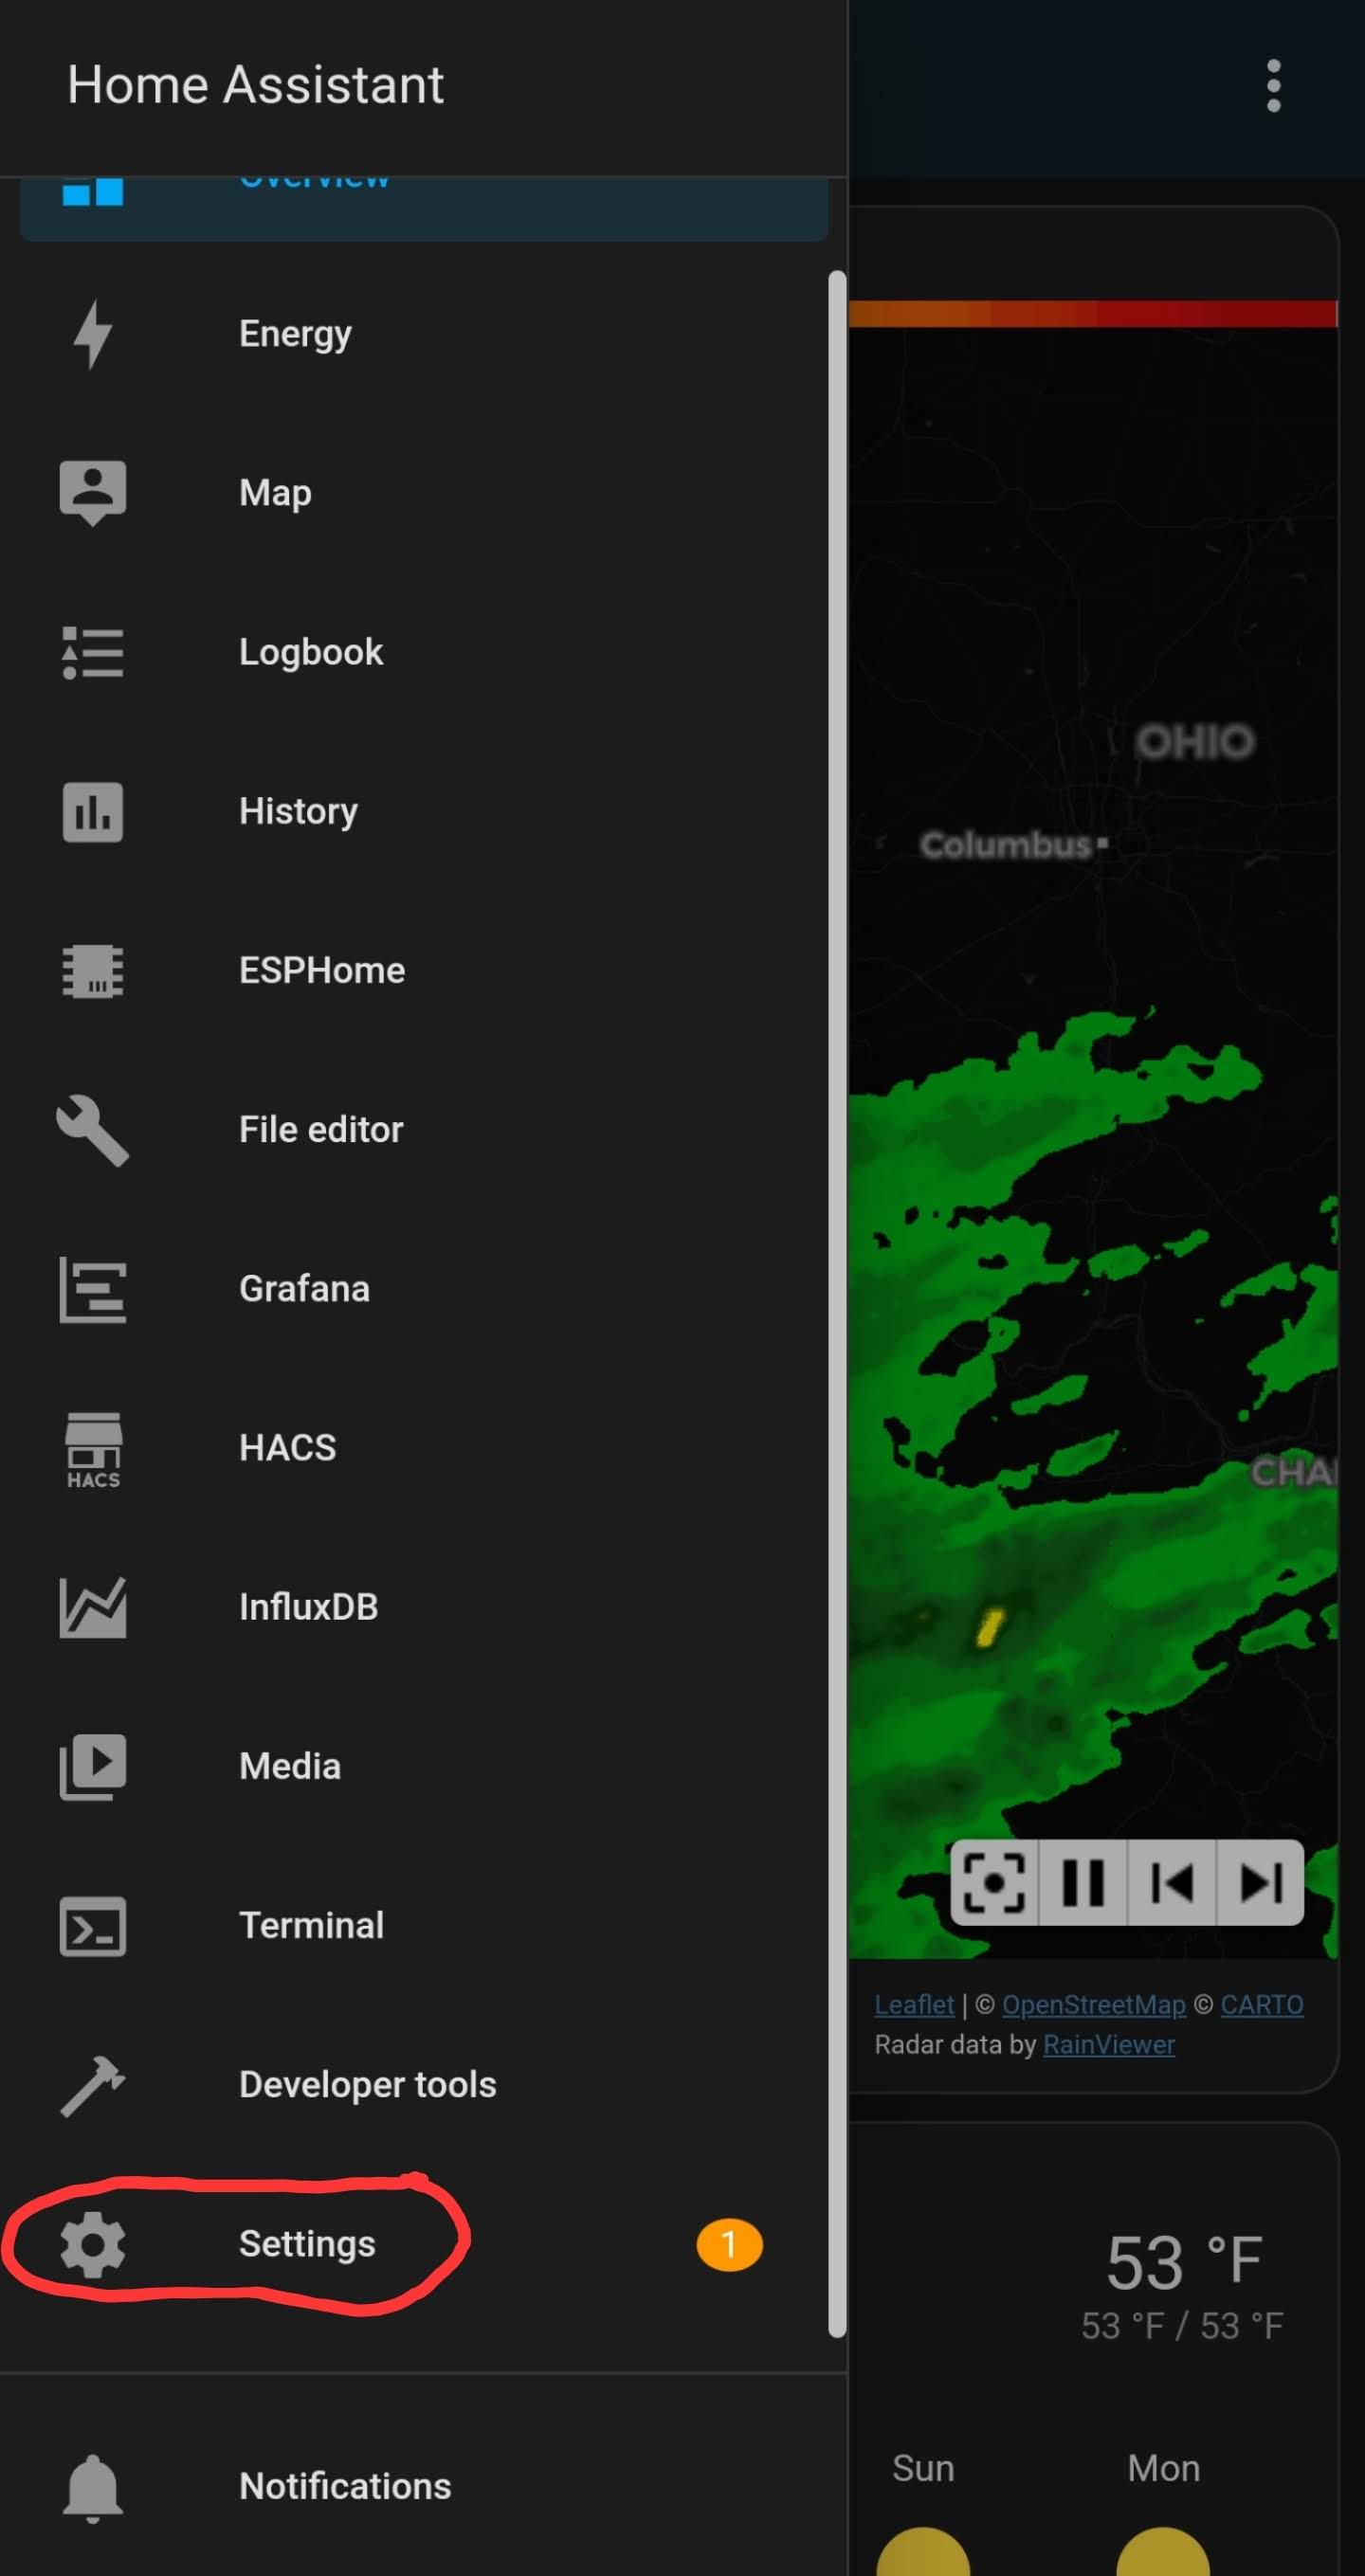
- Select Companion app
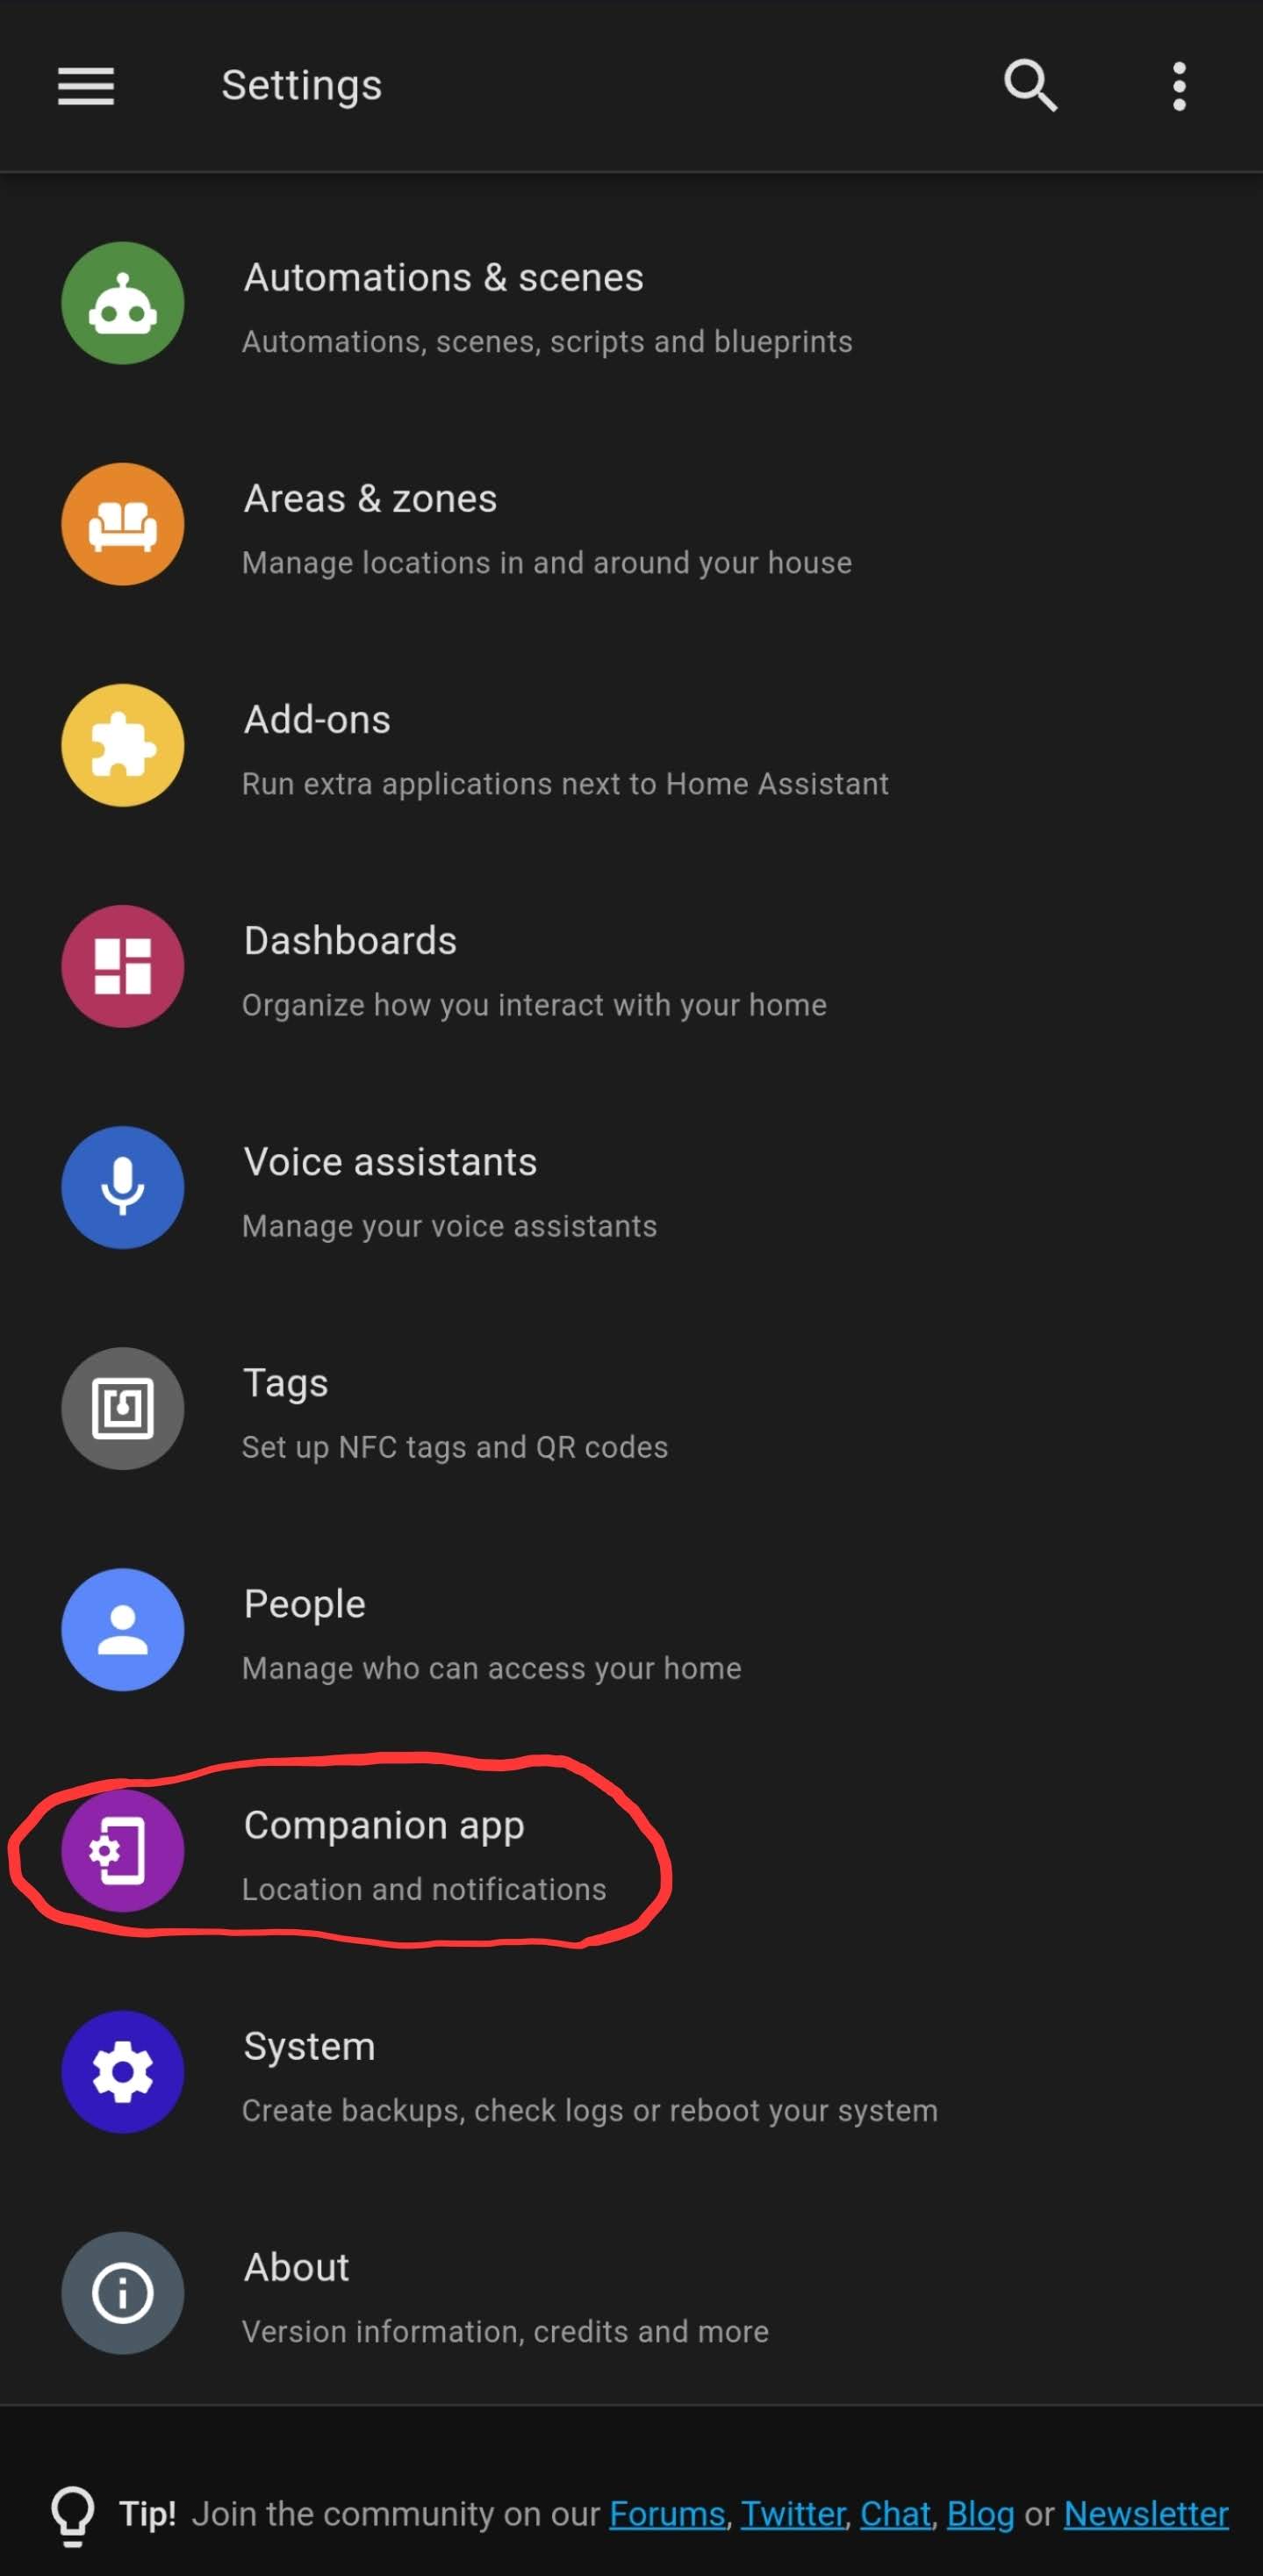
- Select Manage sensors
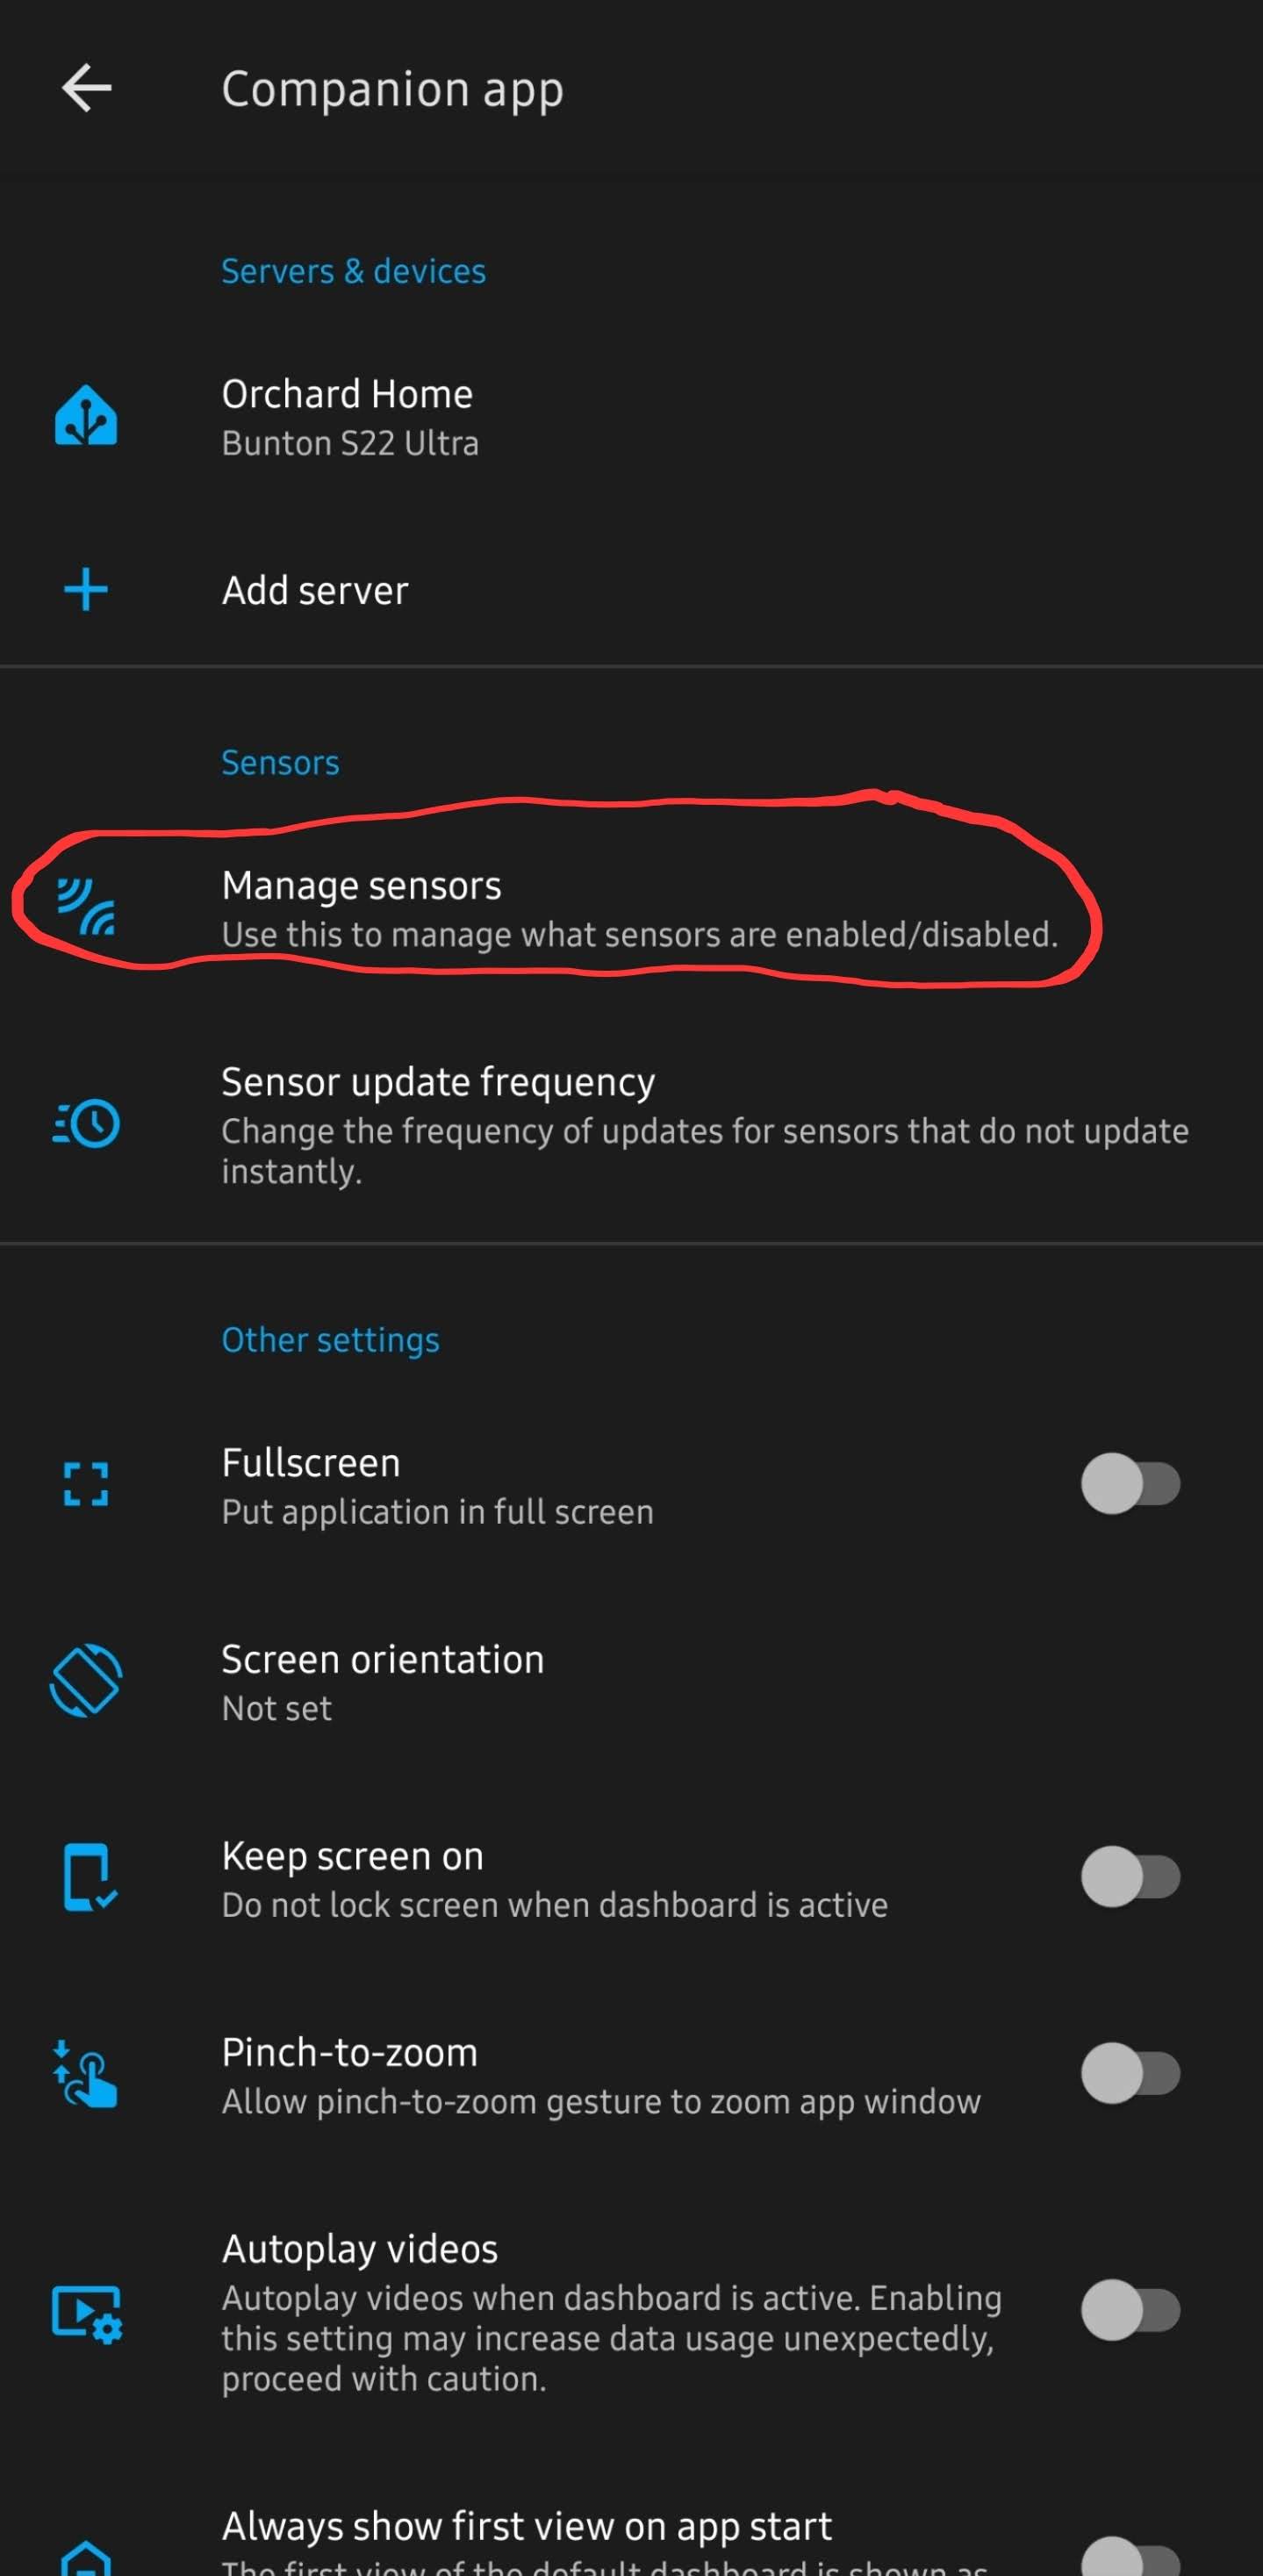
- Turn on the "BLE Transmitter"
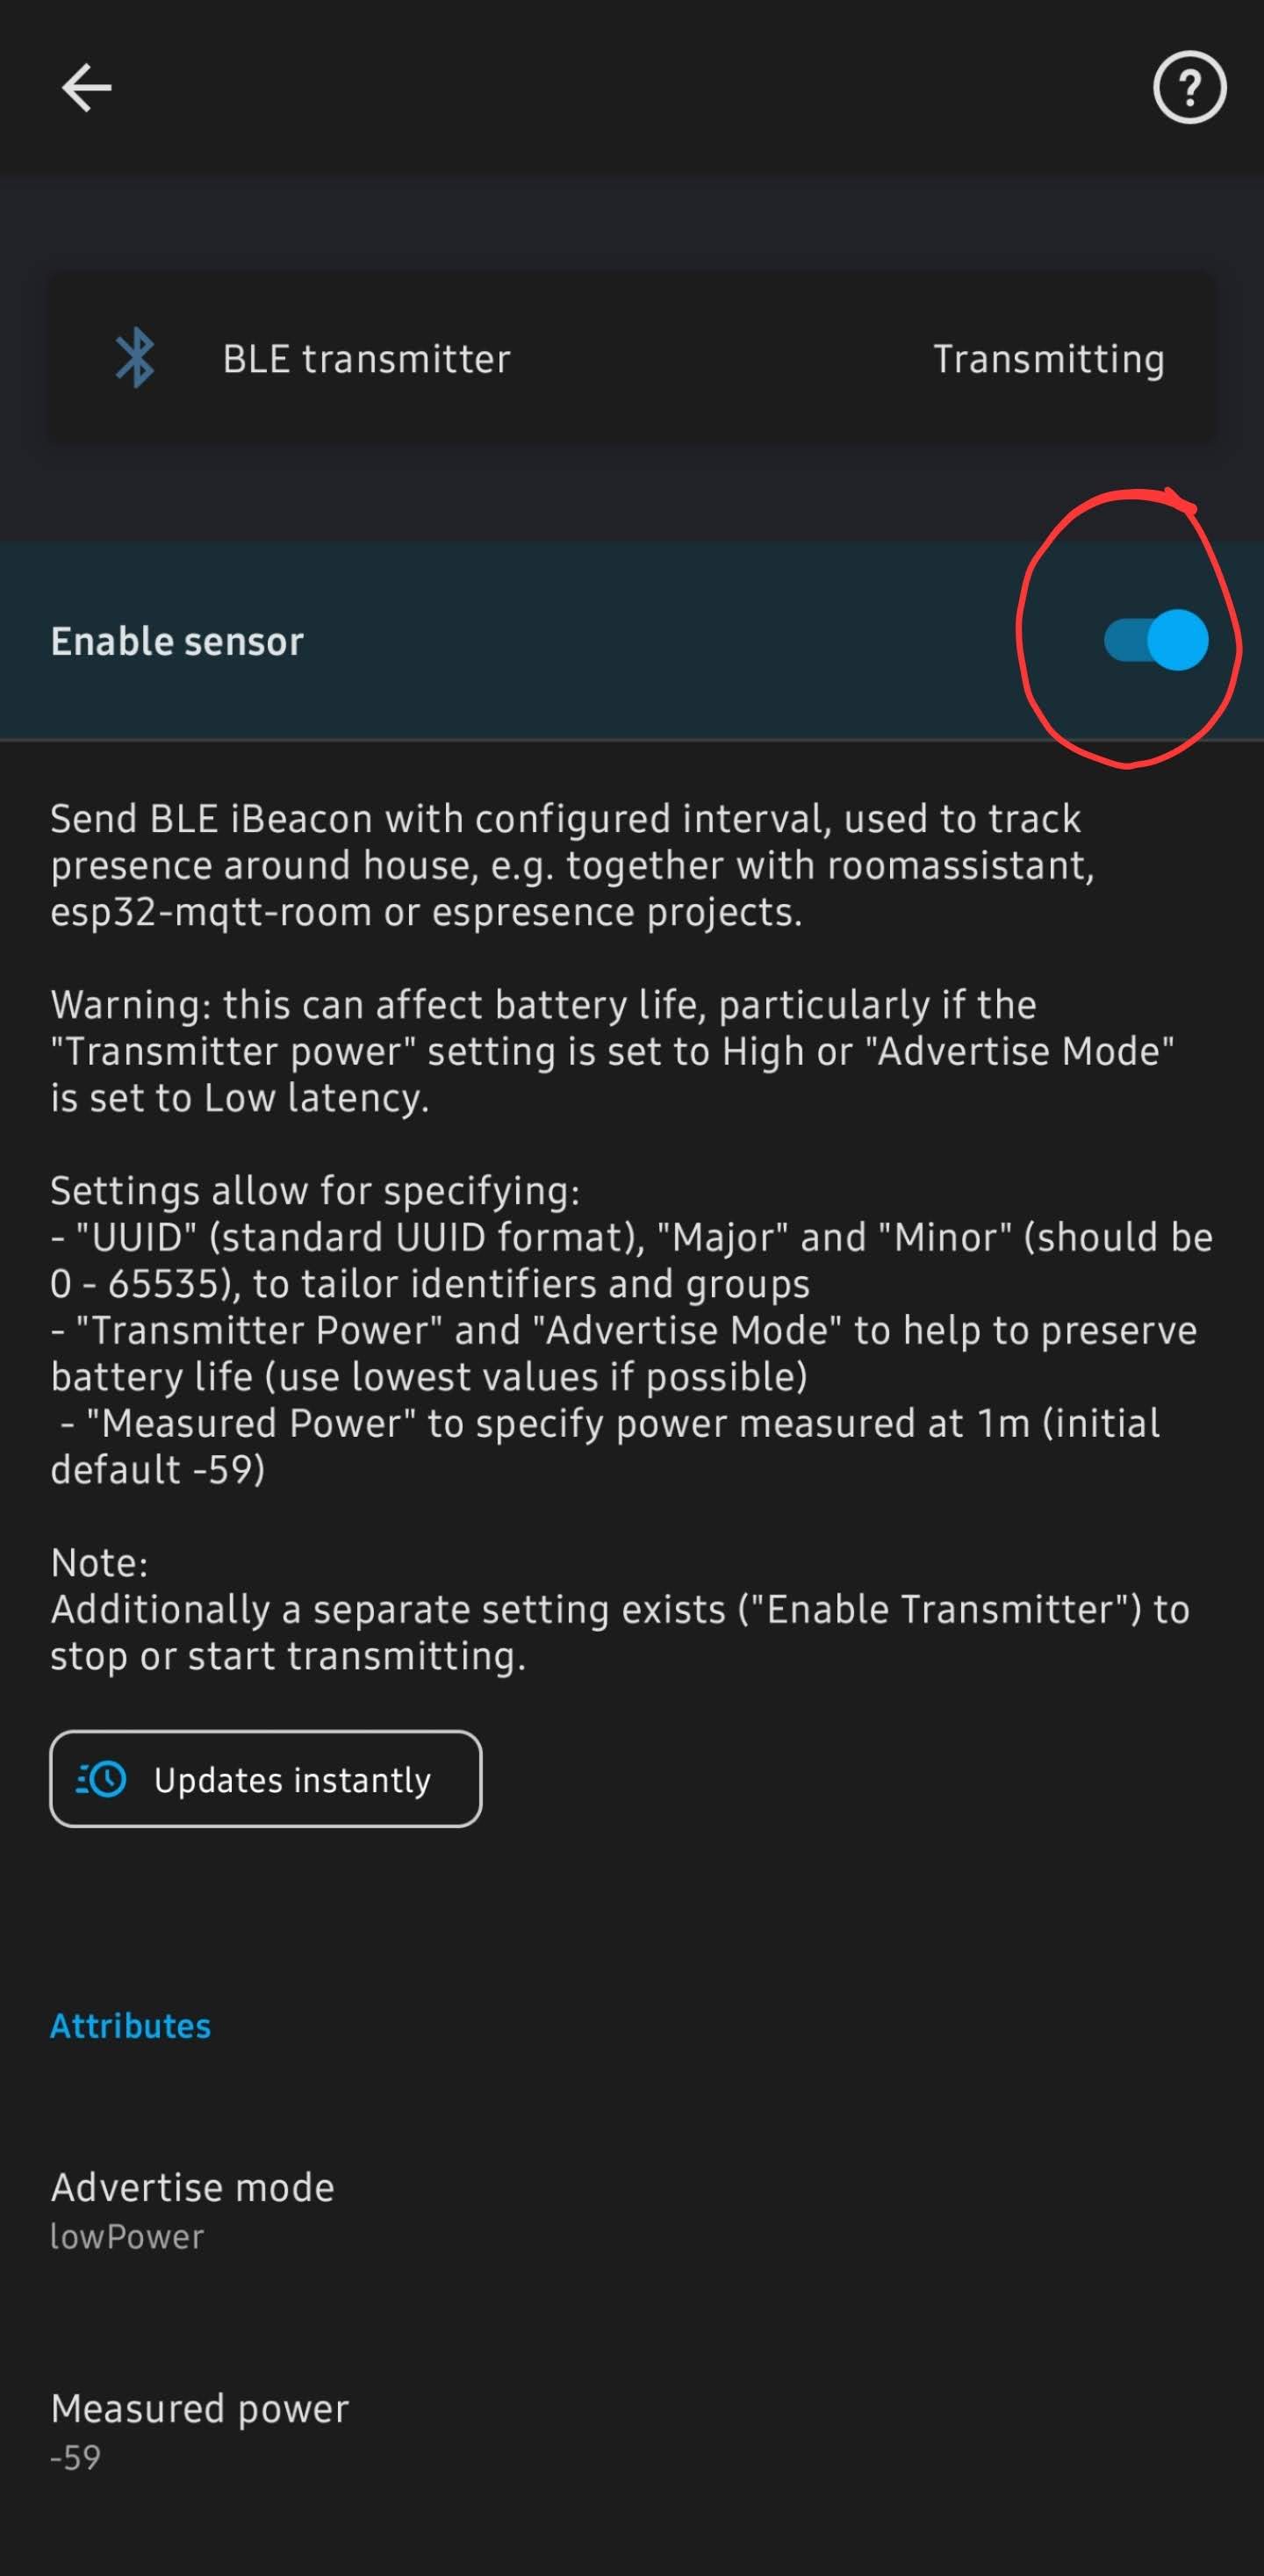
- After opening BLE transmitter and turning it on, then scroll down to get the iBeacon unique ID
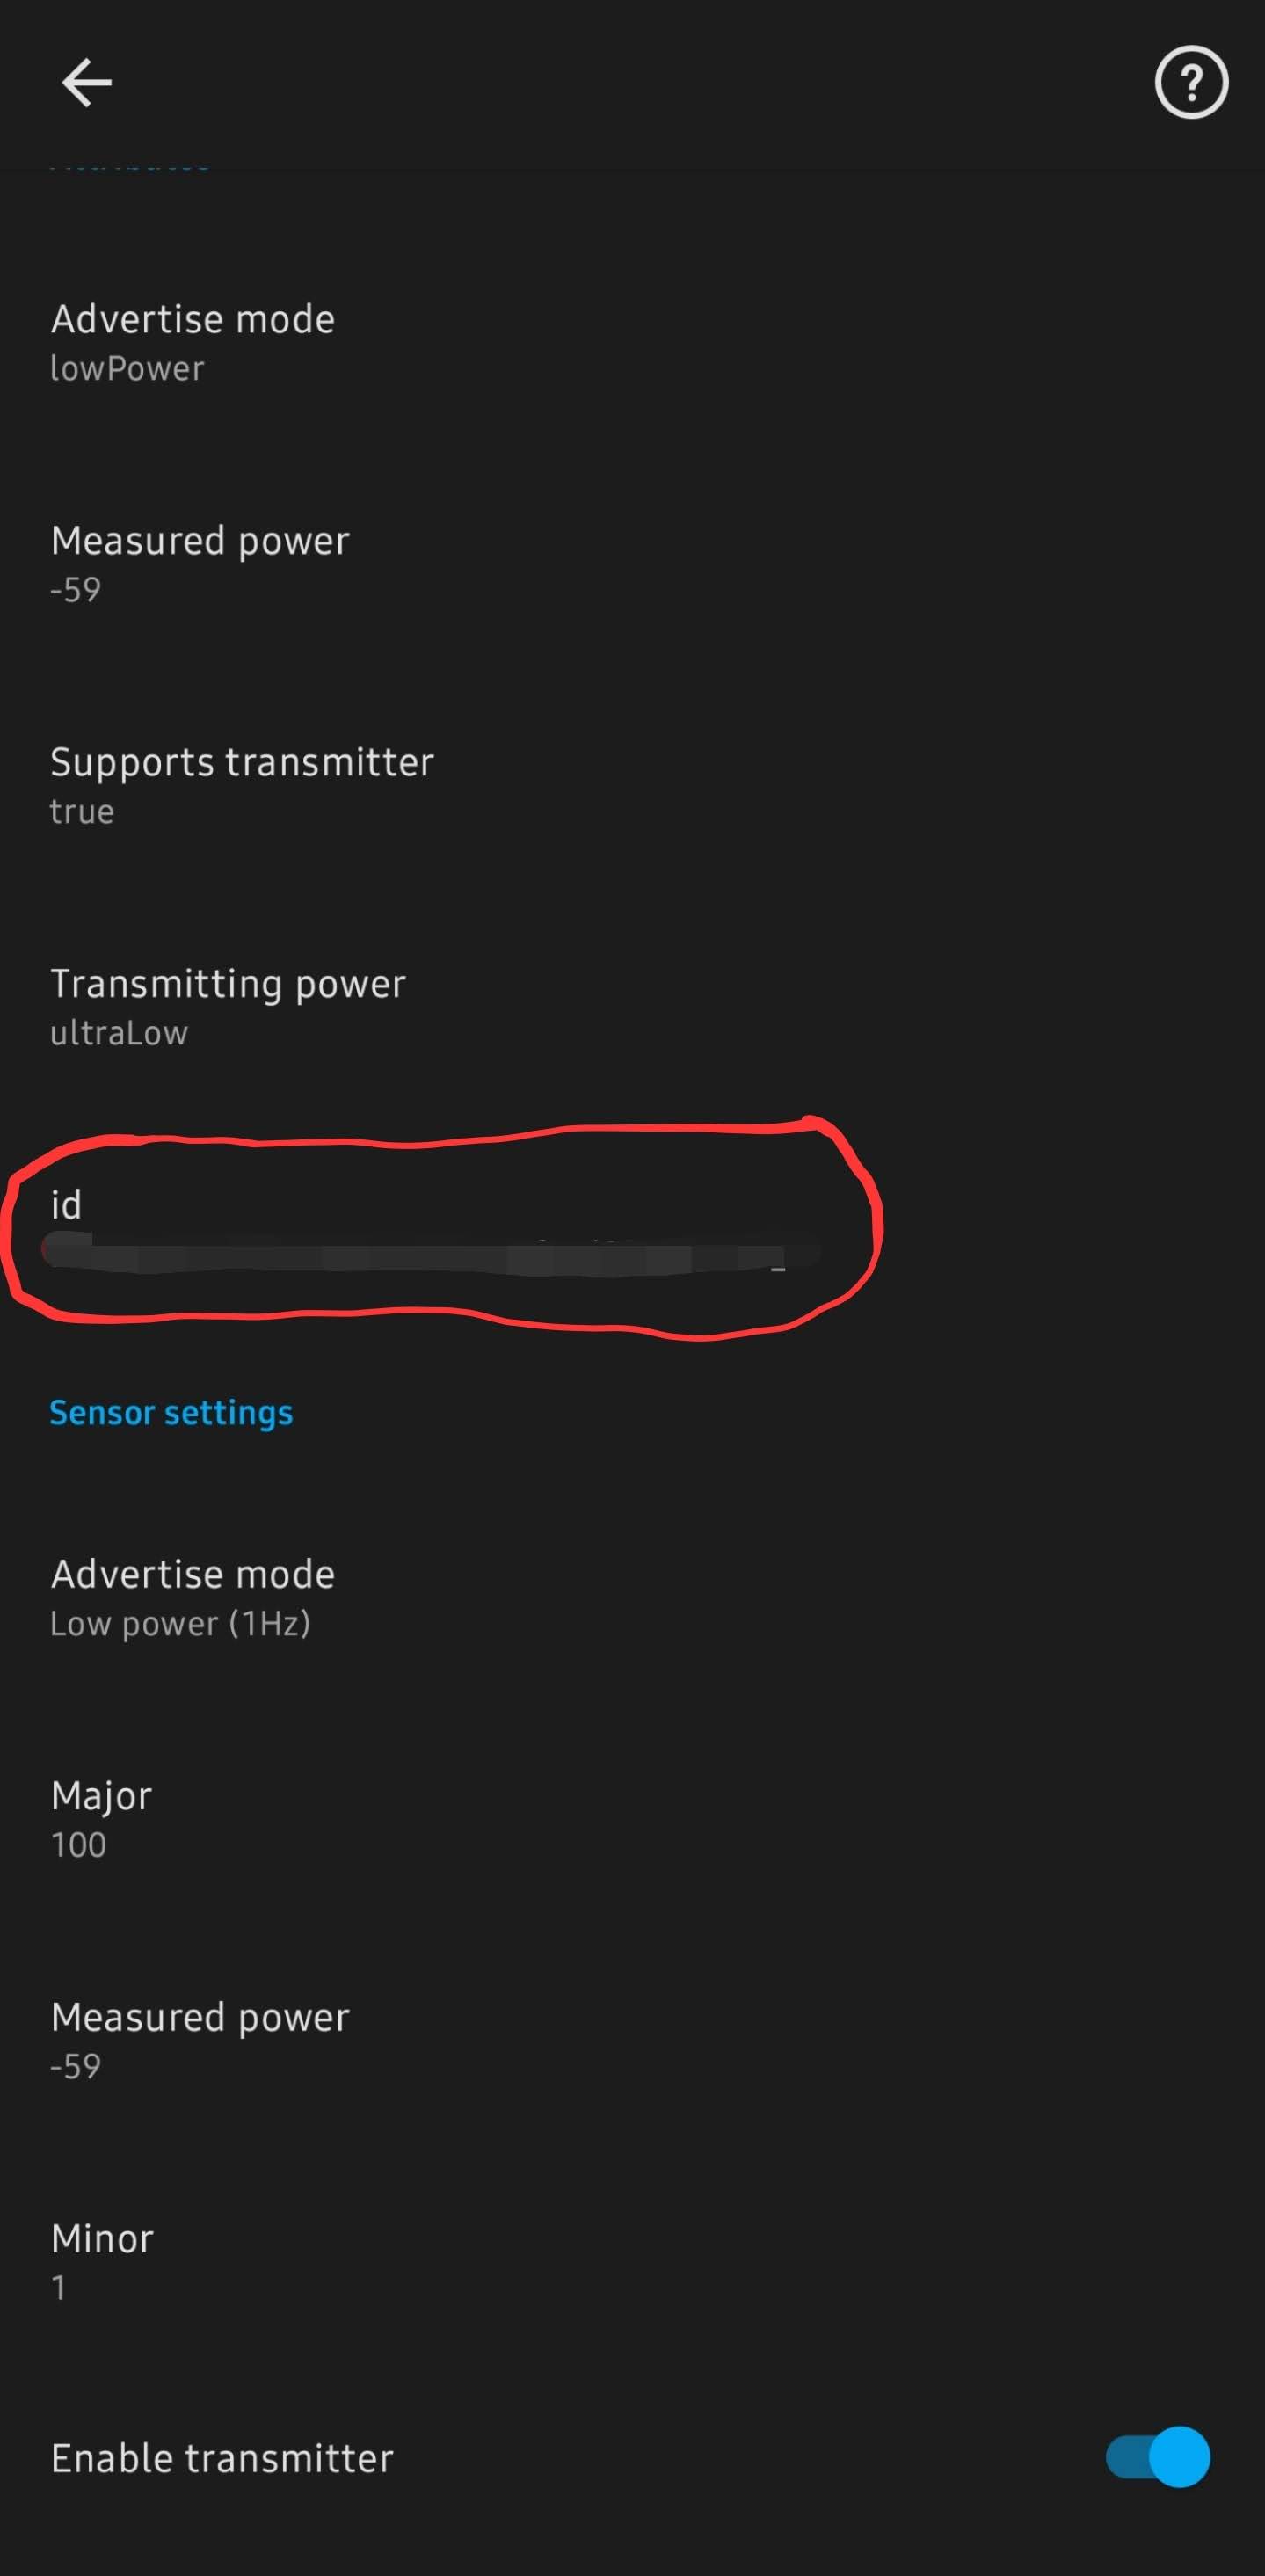
- Add it to the ESPHome yaml config for the MSR-1
- Be sure to add "power_save_mode: LIGHT" to the wifi section
# Example config.yaml wifi: ssid: !secret wifi_ssid password: !secret wifi_password power_save_mode: LIGHT esp32_ble_tracker: binary_sensor: - platform: ble_presence ibeacon_uuid: '77a6438d-ea95-4522-b46c-cb2b4412076f' ibeacon_major: 100 ibeacon_minor: 1 name: "Jane's Phone" - Should be all set!


No Comments