General Tips
MSR-1
(Picture from Smart Home Scene)
Light Sensor (LTR-390UV)
- When mounting the MSR-1 be sure to position the device so that the two large holes are not covered
- This allows more light to enter and will ensure better accuracy
- The onboard RGB LED will trigger the light sensor
- Be cognizant of this when making automations based on light/LUX
Mounting
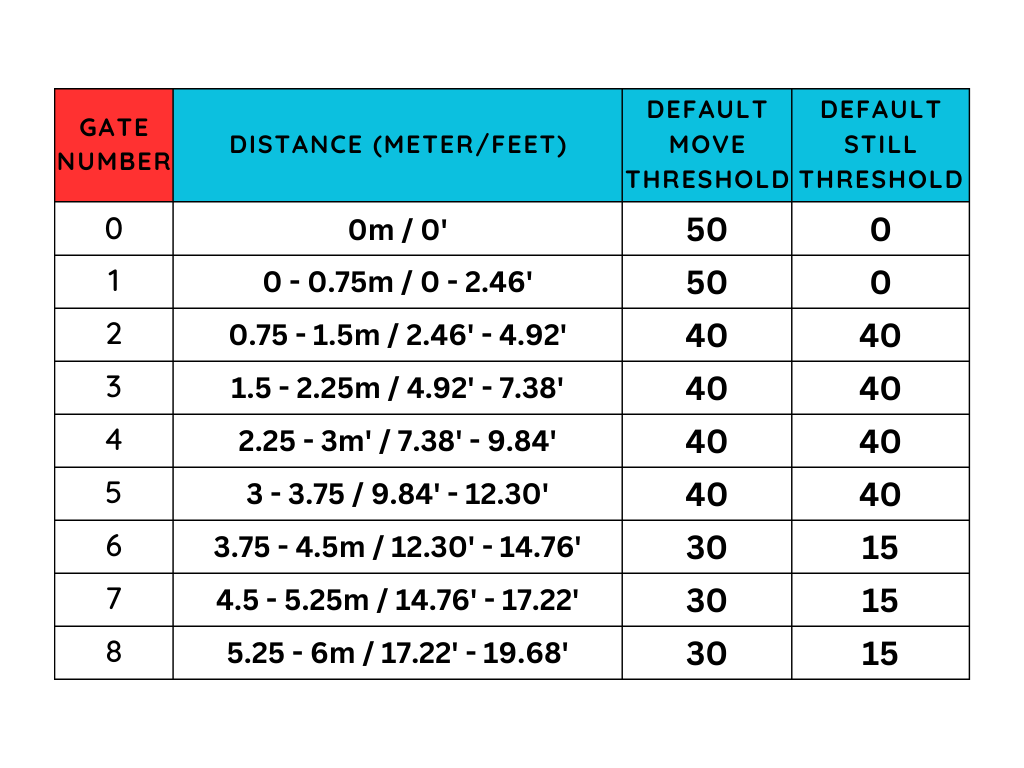
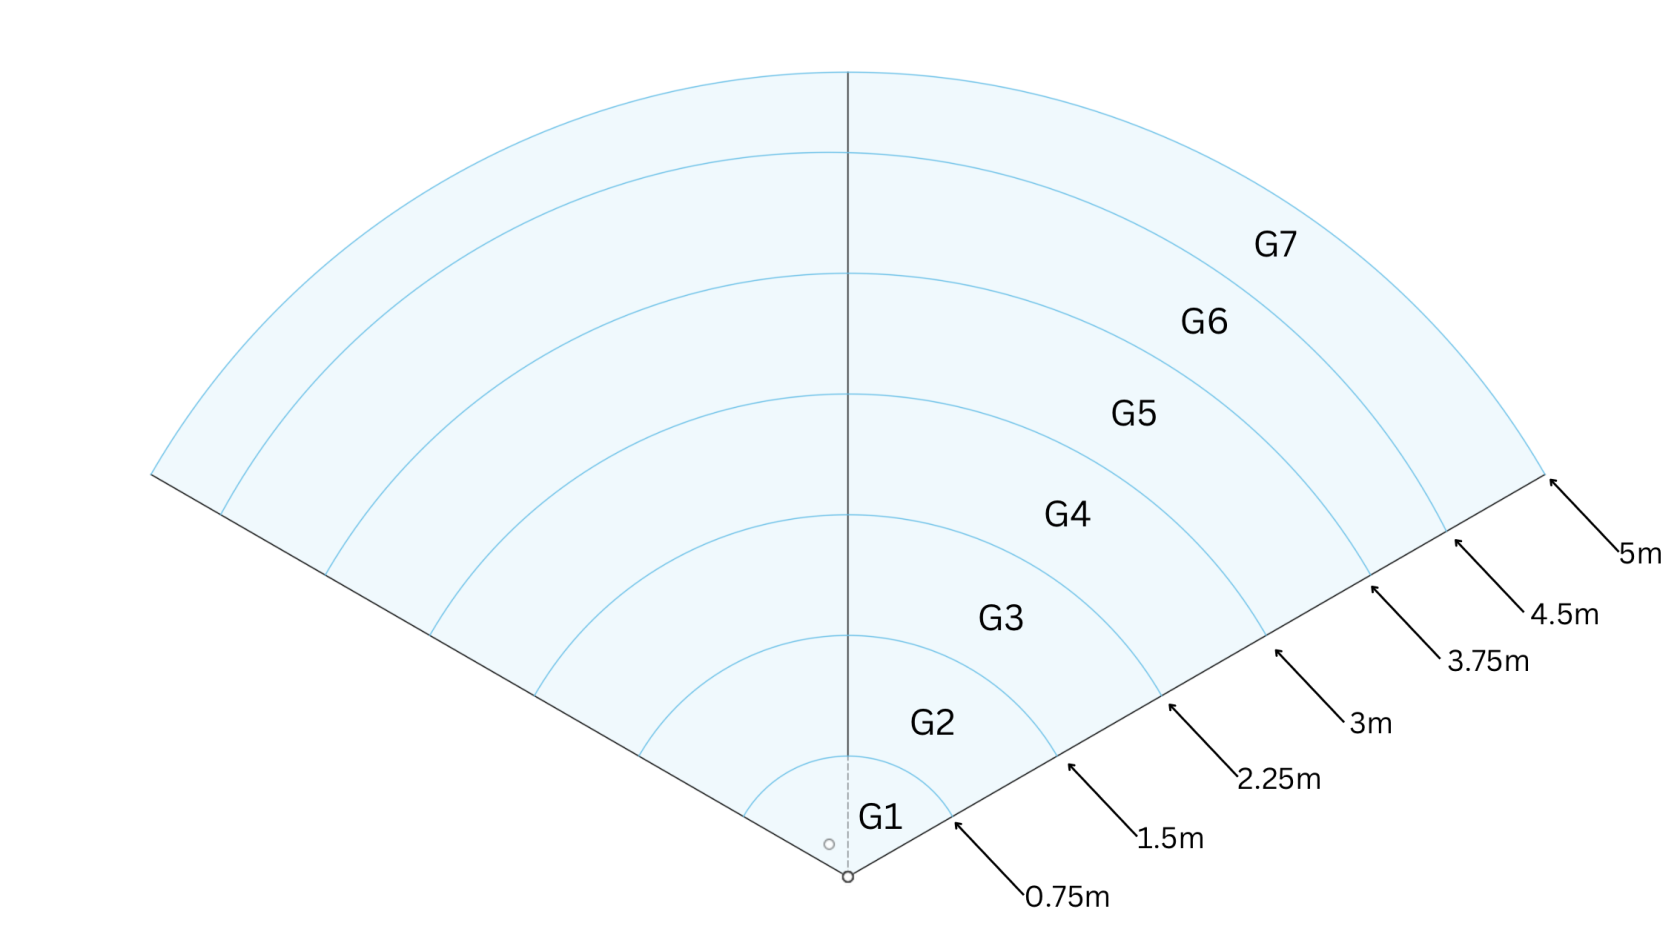
Gate and FOV Visualization
- FOV angle -60 to 60
- Gate images above are using a Radar Distance Resolution of 0.75m
-
Gates are pre-defined by the radar module and are in meters (m)
-
Zones are user-configurable and are in centimeters (cm)

Increased ESP Temperature
If you are experiencing higher than normal ESP temperatures ~140+ degrees F then changing the wifi power save mode option might help decrease the temperature. Here is the link to the ESPHome WiFi Component Power Save Mode.
Power Save Mode
The WiFi interface of all ESPs offer three power save modes to reduce the amount of power spent on WiFi. While some options can reduce the power usage of the ESP, they generally also decrease the reliability of the WiFi connection, with frequent disconnections from the router in the highest power saving mode.
NONE (least power saving, Default for ESP8266)
LIGHT (Default for ESP32)
HIGH (most power saving)
wifi:
  # ...
  power_save_mode: none
The code above can be added to the devices .yaml through the ESPHome addon edit button.
(Thank you for the suggestion, Brian!)
(Referenced from ESPHome website)


No Comments