Examples
- MSR-1 Home Assistant Dashboard Examples
- Using MSR-1 Buzzer
- MSR-1 Automation Guide
- MSR-1 Examples From GitHub
- MSR-1 + Alarmo Home Security Install
MSR-1 Home Assistant Dashboard Examples
Radar Scatter Plot With Apex Charts For MSR-1

type: custom:apexcharts-card
header:
  show: true
  title: MSR-1 Radar Distance
  show_states: true
  colorize_states: true
apex_config:
  legend:
    position: top
    horizontalAlign: center
    offsetX: -80
    offsetY: 0
experimental:
  brush: true
brush:
  selection_span: 4h
graph_span: 24hr
chart_type: scatter
series:
  - entity: sensor.apollo_msr_1_a79e14_radar_detection_distance
    name: Detection
    stroke_width: 1
    color: green
    show:
      in_brush: true
      extremas: true
  - entity: sensor.apollo_msr_1_a79e14_radar_moving_distance
    name: Moving
    stroke_width: 1
  - entity: sensor.apollo_msr_1_a79e14_radar_still_distance
    name: Still
    stroke_width: 1
CO2 Charts
Home Assistant Sensor

graph: line
type: sensor
entity: sensor.apollo_msr_1_a79e38_co2
detail: 2
name: Bedroom CO2
hours_to_show: 24
Custom: Plotly Graph Card

type: custom:plotly-graph
entities:
  - entity: sensor.apollo_msr_1_a79e38_co2
hours_to_show: 24
refresh_interval: 10
title: Bedroom CO2
Home Assistant Guage

type: gauge
entity: sensor.apollo_msr_1_a79e38_co2
needle: true
unit: ppm
min: 0
max: 3000
severity:
  green: 0
  yellow: 1000
  red: 2000
Using MSR-1 Buzzer
This guide will walk you through using the buzzer on your MSR-1. You can also call the below service through automations in Home Assistant.
- Open Home Assistant and navigate to developer tools in the bottom left

2. Click on services
3. Choose your MSR-1's buzzer (You can type in buzzer to find it easier)
4. Put a rtttl tone into the the string box
-
- Mario:
smb:d=4,o=5,b=100:16e6,16e6,32p,8e6,16c6,8e6,8g6,8p,8g,8p,8c6,16p,8g,16p,8e,16p,8a,8b,16a#,8a,16g.,16e6,16g6,8a6,16f6,8g6,8e6,16c6,16d6,8b,16p,8c6,16p,8g,16p,8e,16p,8a,8b,16a#,8a,16g.,16e6,16g6,8a6,16f6,8g6,8e6,16c6,16d6,8b,8p,16g6,16f#6,16f6,16d#6,16p,16e6,16p,16g#,16a,16c6,16p,16a,16c6,16d6,8p,16g6,16f#6,16f6,16d#6,16p,16e6,16p,16c7,16p,16c7,16c7,p,16g6,16f#6,16f6,16d#6,16p,16e6,16p,16g#,16a,16c6,16p,16a,16c6,16d6,8p,16d#6,8p,16d6,8p,16c6 - Cantina:
Cantina:d=4,o=5,b=250:8a,8p,8d6,8p,8a,8p,8d6,8p,8a,8d6,8p,8a,8p,8g#,a,8a,8g#,8a,g,8f#,8g,8f#,f.,8d.,16p,p.,8a,8p,8d6,8p,8a,8p,8d6,8p,8a,8d6,8p,8a,8p,8g#,8a,8p,8g,8p,g.,8f#,8g,8p,8c6,a#,a,g - Huge list: https://picaxe.com/rtttl-ringtones-for-tune-command/
- This is a good site to test rttl tones: https://adamonsoon.github.io/rtttl-play/
- Mario:
5. Click on call service button in bottom right

MSR-1 Automation Guide
MSR-1 Examples From GitHub
https://github.com/ApolloAutomation/MSR-1/tree/main/Examples
MSR-1 + Alarmo Home Security Install
My grandmother wanted a security system that would alert her when there was movement in her home after she had gone to bed. So, I set up three of our Apollo Automation mmWave sensors. These devices, plus the Alarmo add-on, quickly and easily allowed me to install a fully local, private, cloud-free, and no monthly subscription security system. She can arm/disarm it with one button on her Home Assistant dashboard, and it makes her feel much safer. This guide assumes you already have a motion/presence sensor installed on HA.
1. Install HACS
2. Install Alarmo and the Alarmo Card (Pretty Arm and Disarm card for your HA dashboard)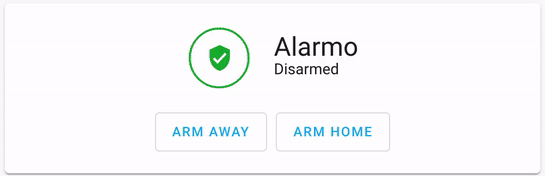

3. Find Alarmo on the left, select the Sensors tab, and toggle on the sensor entities that you would like to use for your alarm system.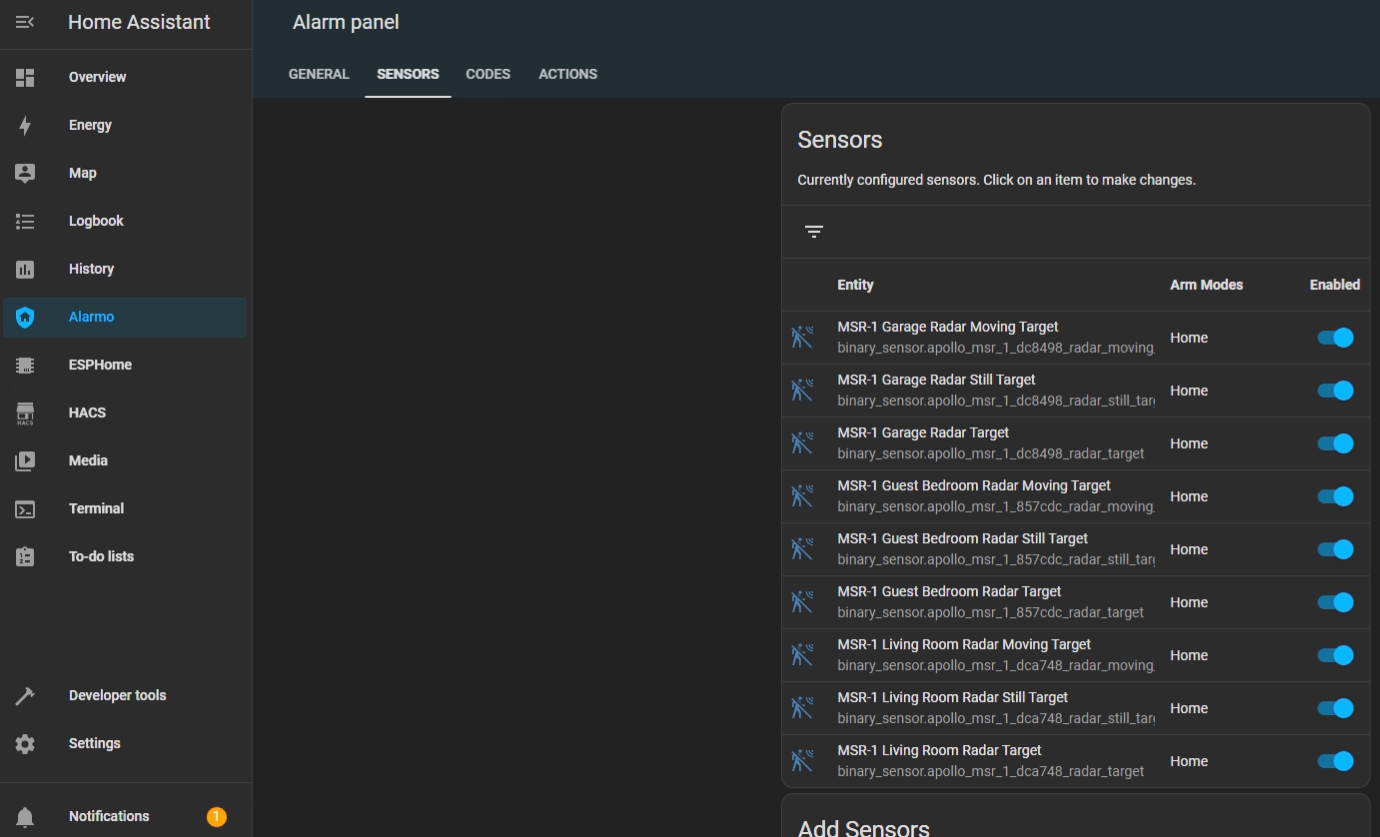
4. Now select the Actions tab and under Condition > Event > Select "Alarm is triggered". You can also select the device you would like to receive a notification on under Task > Target > Select Device (Phone, tablet, etc.)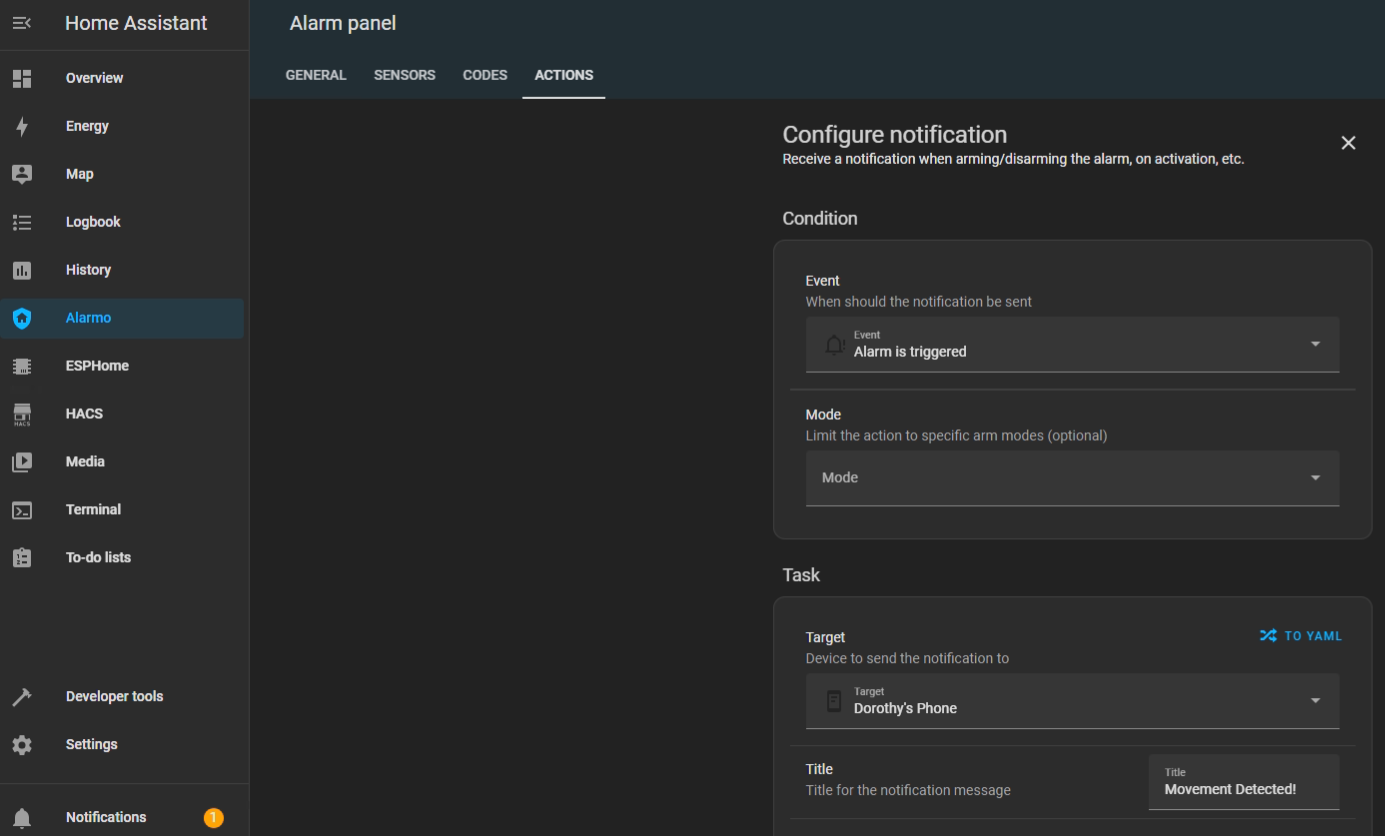
5. You can change the Title, Message, and Name of the alarm notification.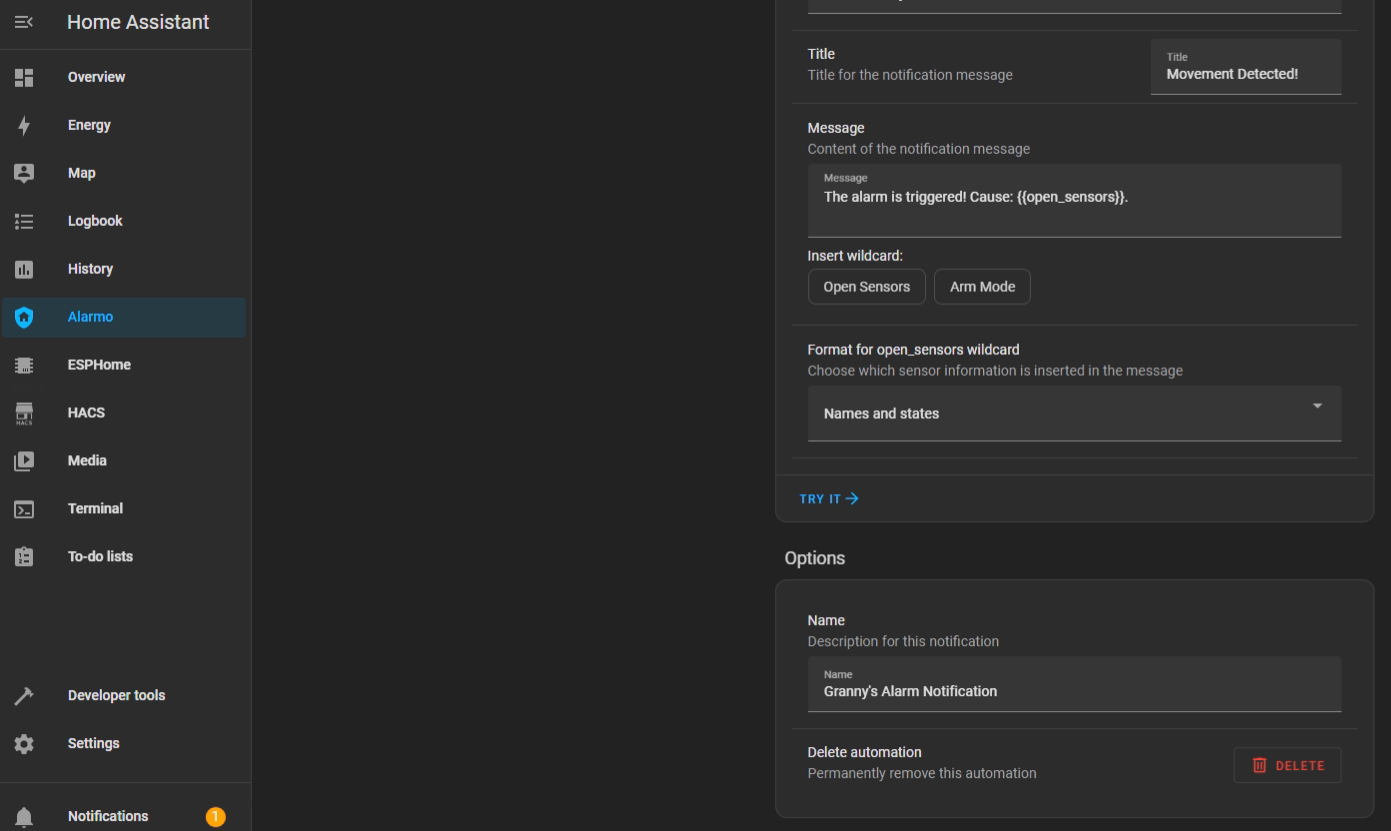
6. After saving that action we can add another one that will turn on our sensor lights and/or make the onboard piezo buzzers play an alarm sound. Uner Entity select your sensors RGB light.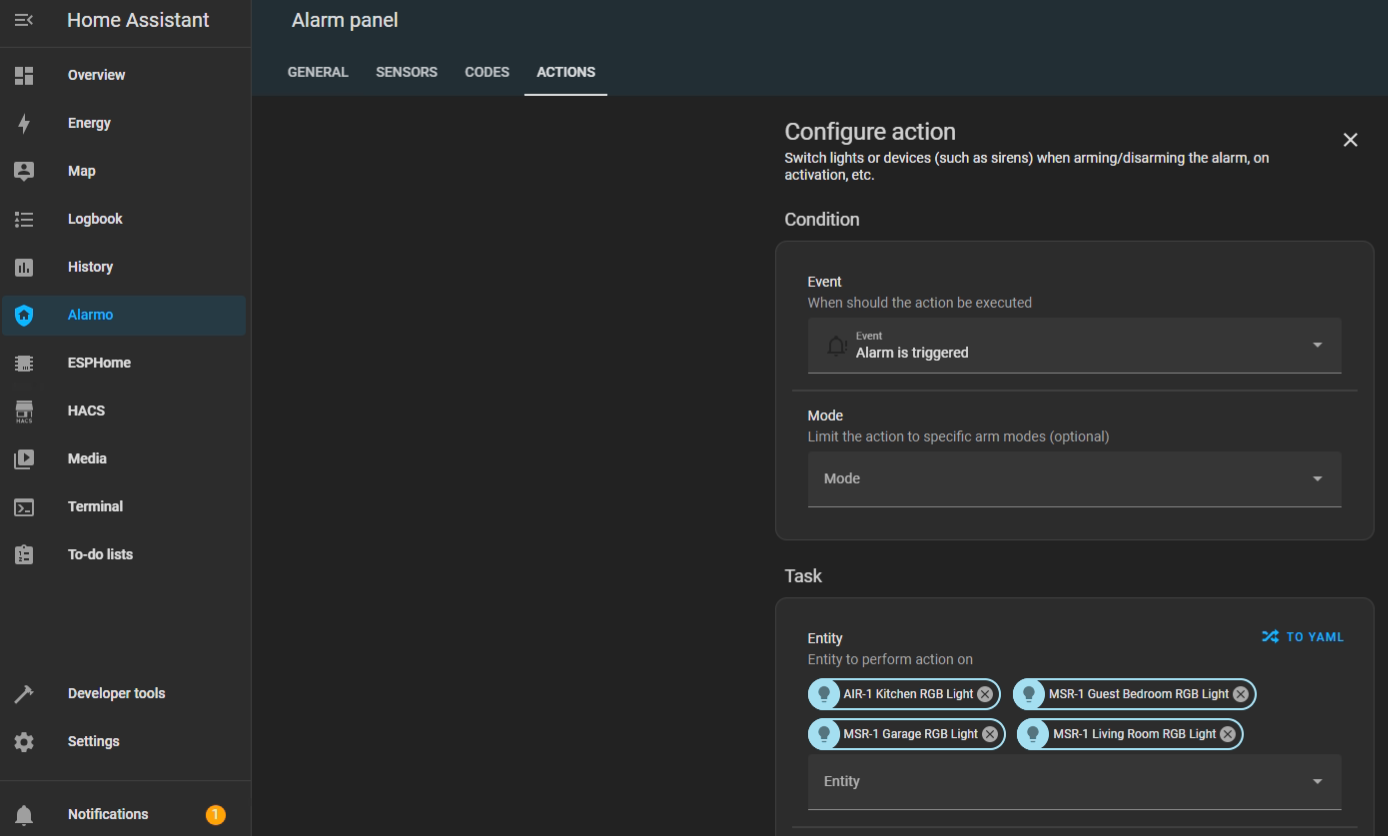
7. Under Action select Turn On and now your sensors RGB lights will turn on when the alarm is triggered.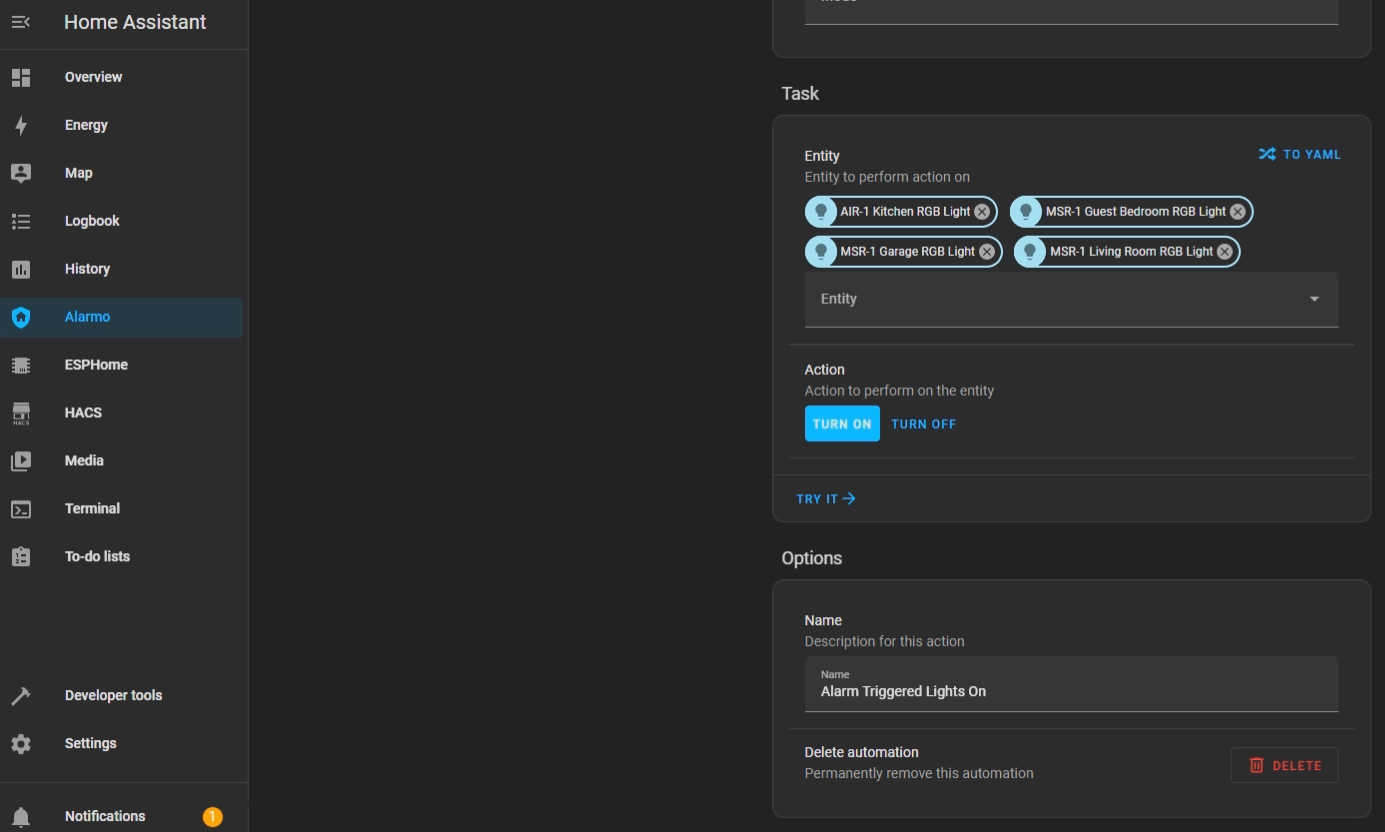
8. And that's it, seriously... Now you can enjoy a free and local security system.
We hope this was helpful and please let us know if there are any questions!