Setup
- Getting Started
- Bluetooth Tracking
- Renaming Apollo Devices
- How To Change The Update Frequency Of Sensors/Force Update
- How To Add Temp And Humidity From SCD40
- Adjusting Wifi Power Save
Getting Started
This will walk you through the process of connecting your new Apollo Automation sensor to Home Assistant through ESPHome. If at any point you get stuck, join our Discord for some help.
Connecting Through Hotspot
To connect through the sensor's onboard hotspot follow the below:
- Plug the sensor into a quality power brick. They require 5v and under an amp so most phone chargers will be fine. ESP devices are sensitive to power fluctuations and users have had some issues with really cheap power bricks. If your device is restarting or unavailable please try a different power brick.
- On your phone or PC, open the wifi settings and connect to "Apollo MSR-1 Hotspot", it might take a minute for the wifi network to show up
- Once connected it should automatically open a dashboard for your sensor
- If this does not automatically open the dashboard, please open your web browser and go to http://192.168.4.1
- Select the wifi network that you would like your sensor to connect to
- Input the wifi password. After connecting, the sensor's dashboard will automatically close. You've successfully connected your sensor, please check out the "Connecting Sensor To Home Assistant" section for the next steps.
Connecting To ESPHome Addon
You can connect to the ESPHome addon in Home Assistant to easily update your device. If you don't have ESPHome addon installed you can follow the steps here: Installing ESPHome Dashboard
Make sure to fill out your Wi-Fi details in the SECRETS section by clicking on the SECRETS Image below.

# Your Wi-Fi SSID and password - keep the quotes and just replace the name and password between the quotes!
wifi_ssid: "your-wifi-ssid-here"
wifi_password: "your-wifi-pass-here"-
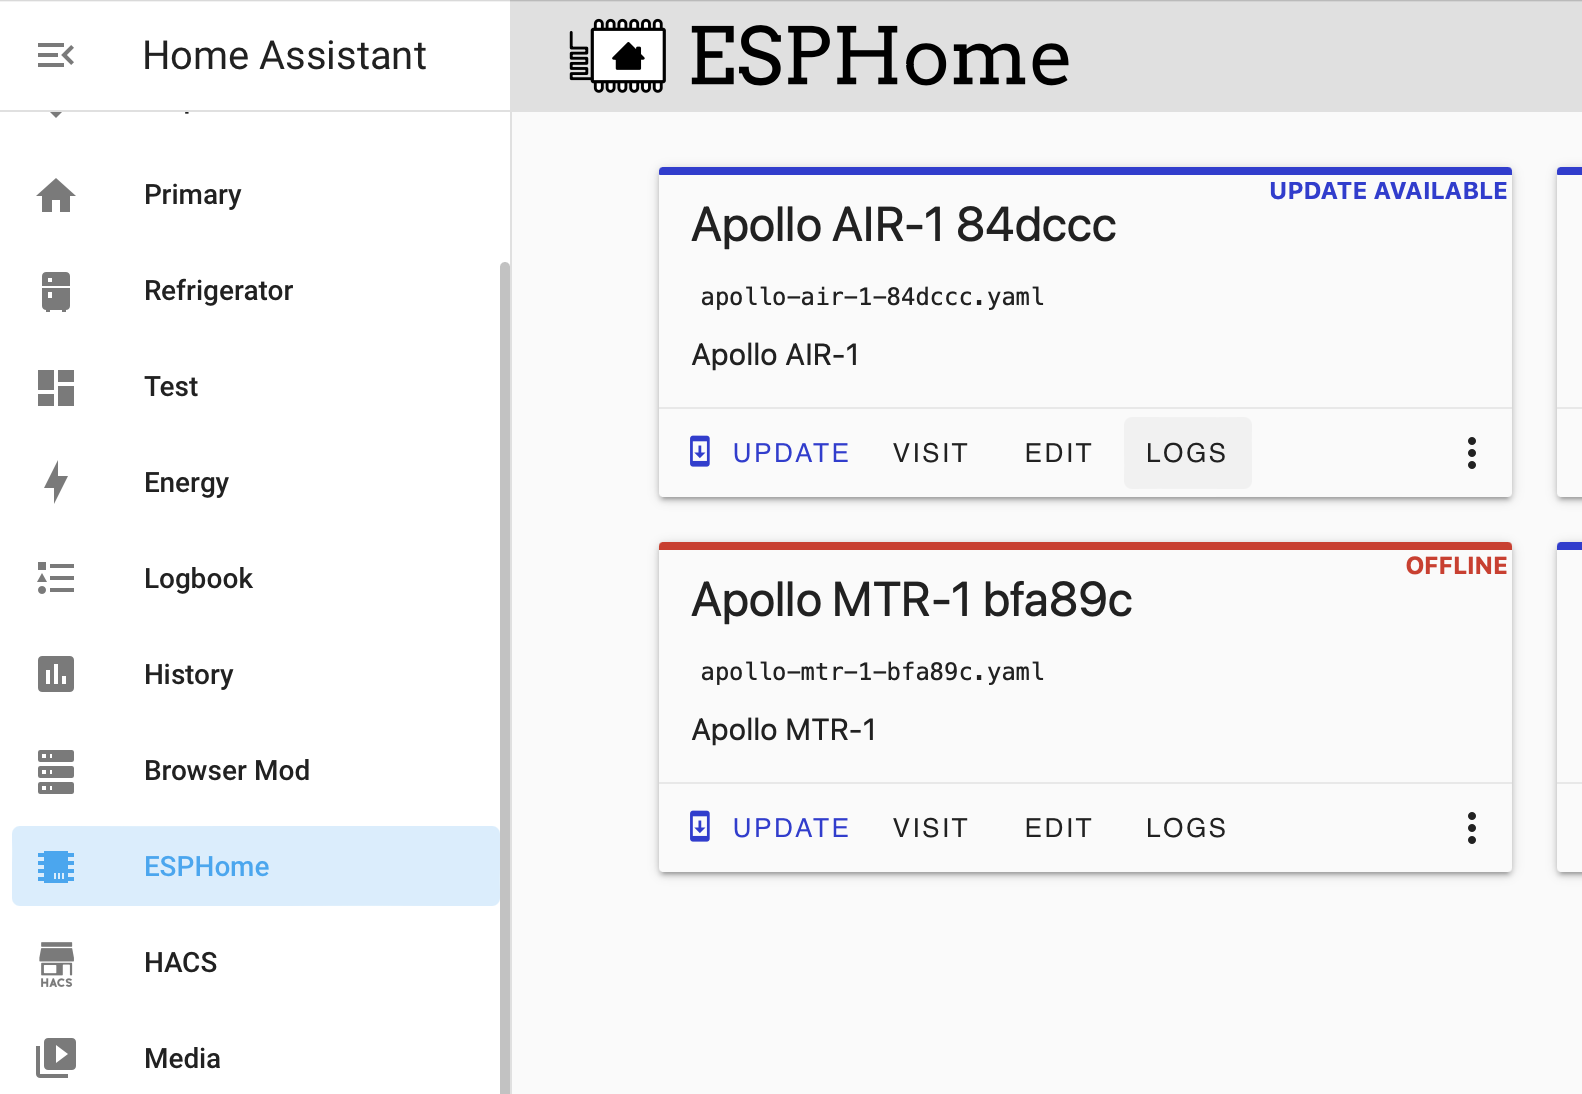
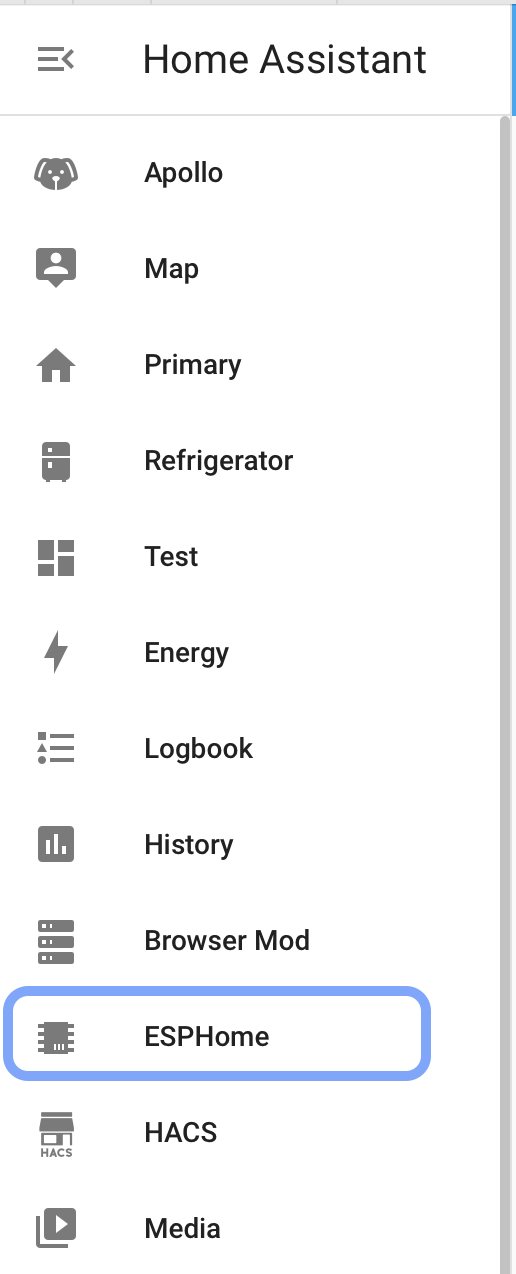
- Once installed you'll have the addon's icon on the left side of your HA instance:

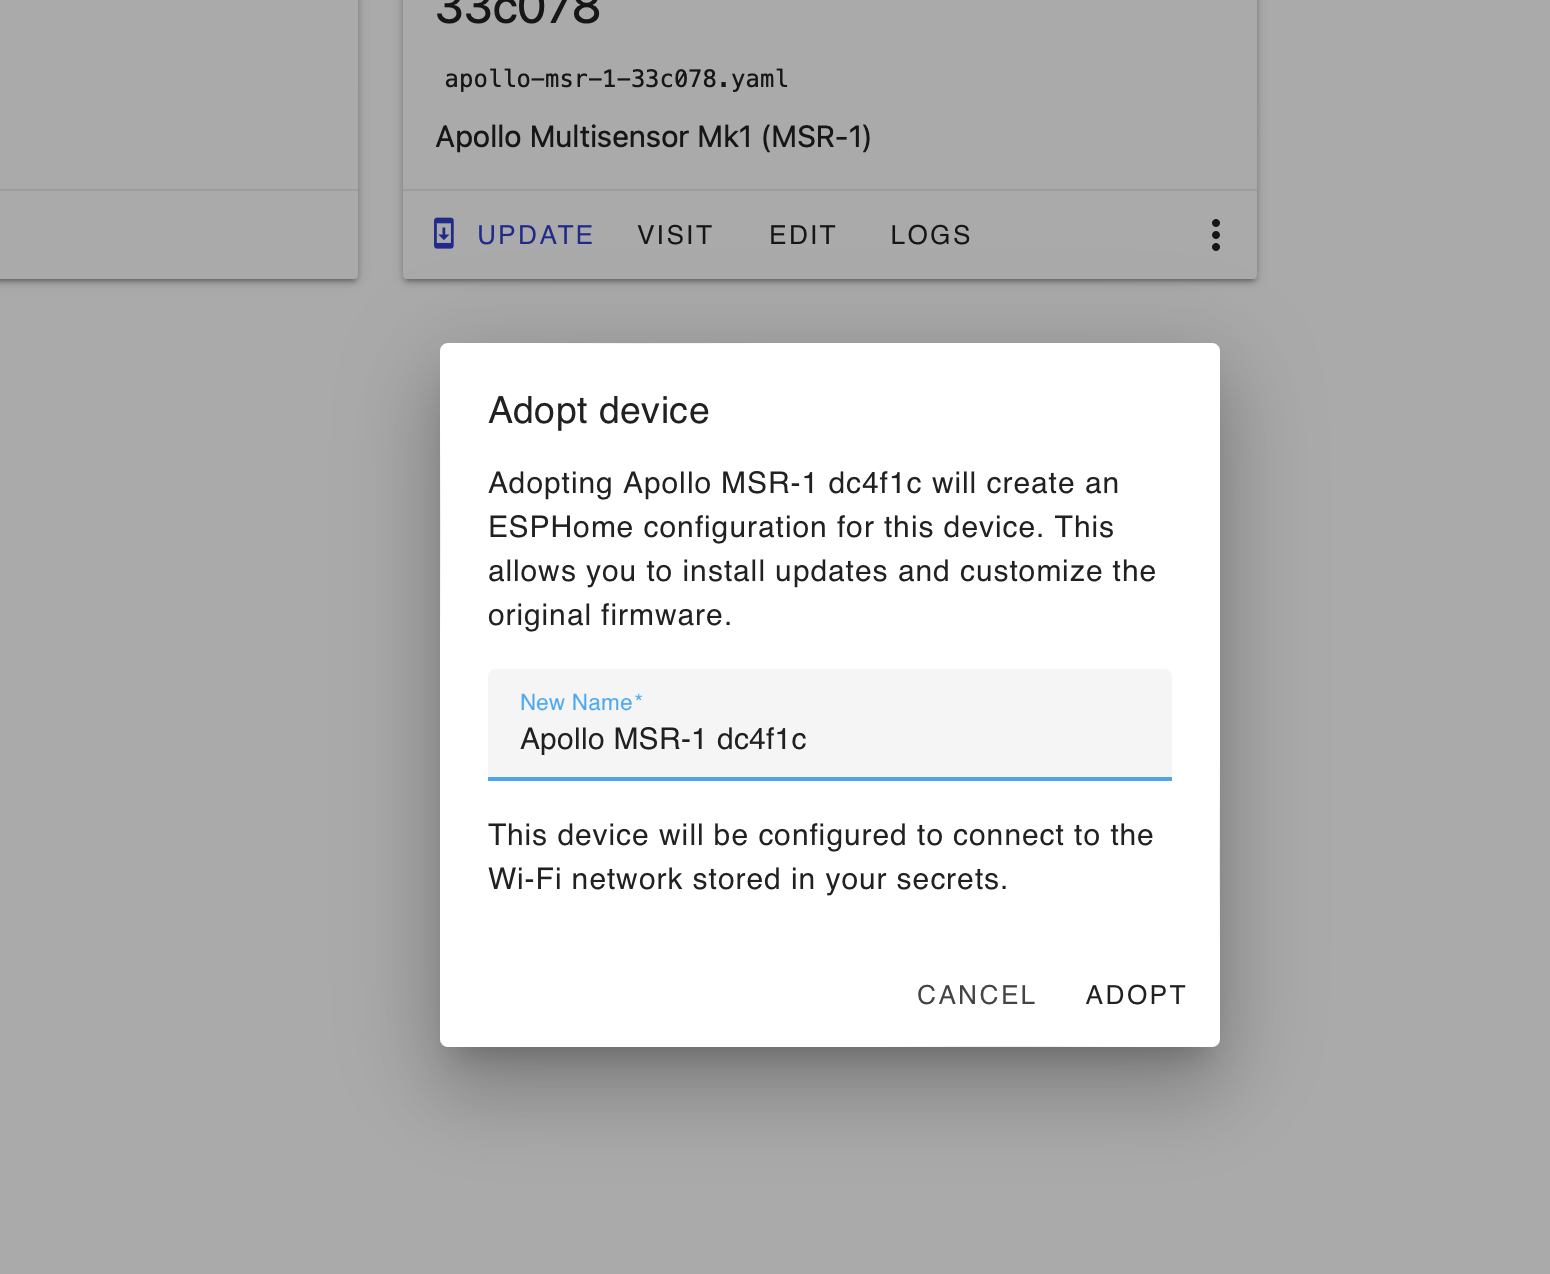
- Click on adopt for your sensor

- Then adopt again

Connecting Sensor To Home Assistant
-
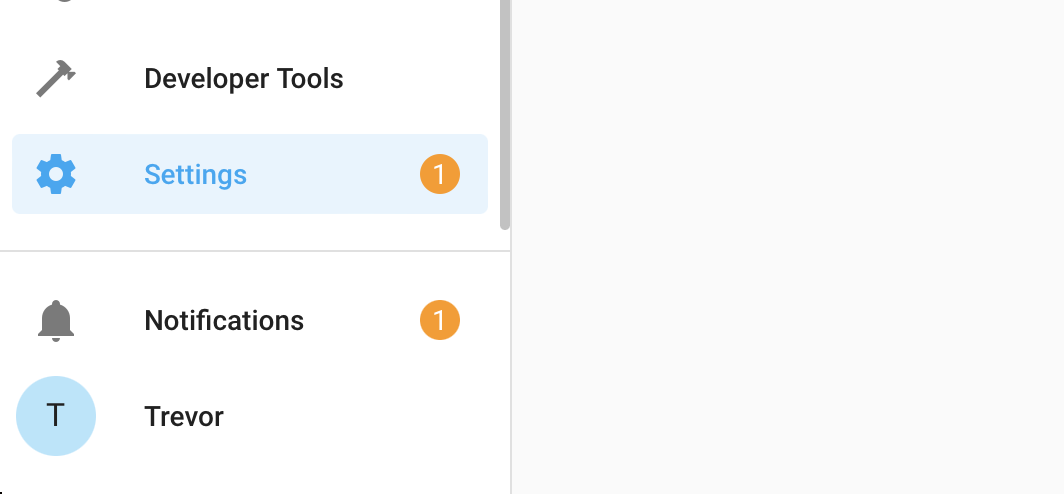
Once you connect your sensor to wifi through the above process, open up Home Assistant. Then in the bottom left click on “Settings”
-
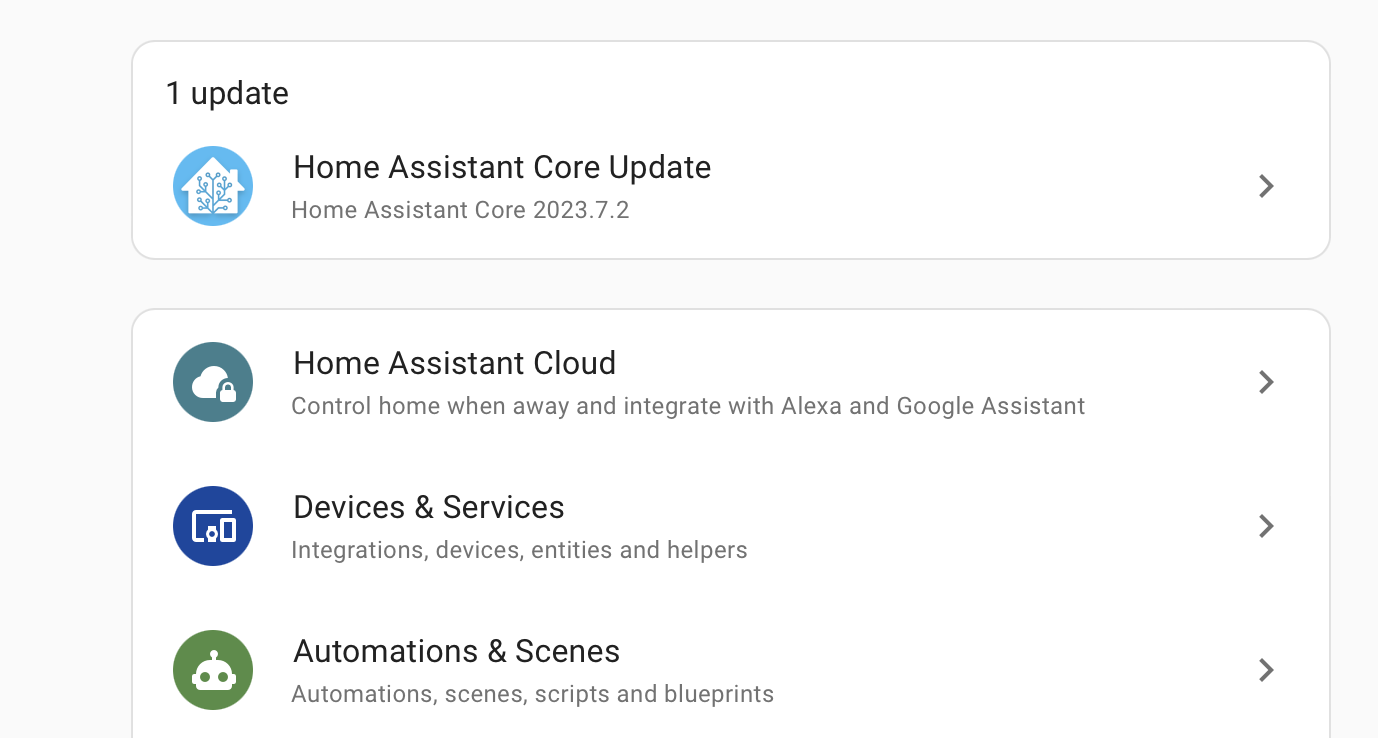
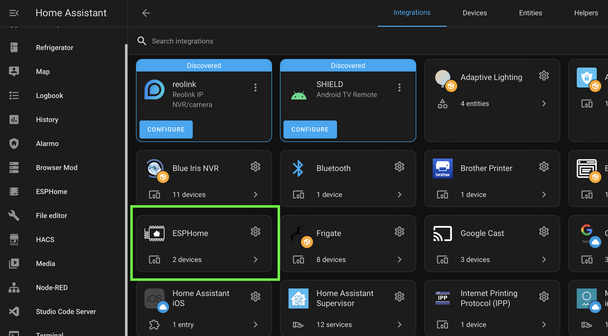
From there click on “Devices And Services”
-
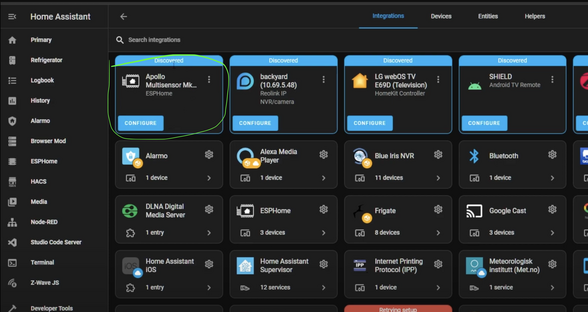
Look for the discovered sensor. It should be named “apollo-msr-mk1” with some random letters and numbers (Those come from the device's mac address). Click on “Configure” and then “Submit”.
-
If you do not see the device as discovered, make sure you have the ESPHome integration installed to Home Assistant you can find their instructions here
-
-
Add the sensor to ESPHome. It will now show up in the ESPHome integration
-
The sensor has now been added to Home Assistant and you can use it as you please. For ideas please visit our ideas section or join our Discord
6. Next steps:
Head on over to the CO2 Calibration page https://wiki.apolloautomation.com/books/general/page/co2-calibration to calibrate your new sensor.Note: This is not necessary if you did not purchase the CO2 sensor addon!
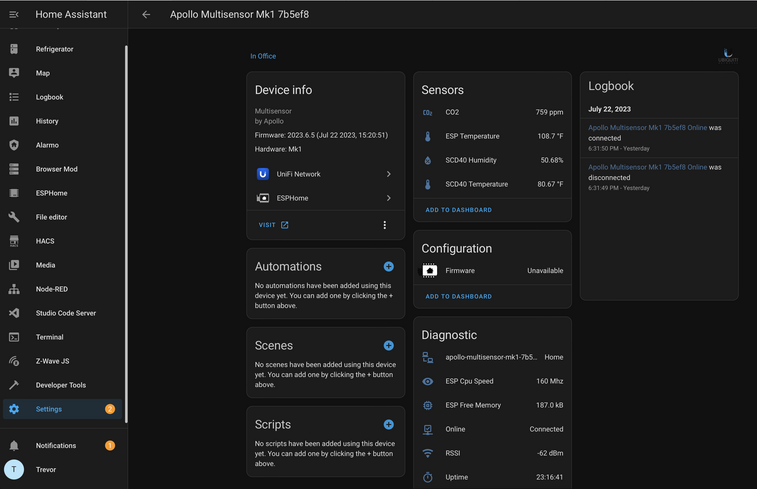
Sensors
You should now have the sensor added! If you have any problems or need help please join our Discord and post in the #support channel. Or just join to check out product development and community spotlights. Our team monitors that and can quickly respond there. Or visit our ideas section to find cool ways to display the information
Looking For Ideas On How To Use Your Sensor?
- Graph Co2 Over Time
- Turn The LED Red When C02 Is Over 1000 ppm
- Send You An Alert When Motion Is Detected After 11 pm
Or check out our #show-off channel in the Apollo Discord for community submissions
- Once installed you'll have the addon's icon on the left side of your HA instance:

Bluetooth Tracking
Apple iPhone/iWatch
Alternative HACS Integration: iPhone Detect
https://community.home-assistant.io/t/implement-espresense-fuctionality-in-home-assistant-taking-advantage-of-ble-proxy-of-esphome/524019/6
Thanks to user Jacob Pfeifer!
Ok, so looks like I've got signal strength tracking working for Apple watches by getting the mac address from the home assistant private ble device integration. Here's a quick write-up if anyone else is interested. The end of the doc has a complete configuration file example.
# Tracking an Apple Watch in esphome
Using esphome on an Apollo msr-1 to track an Apple Watch

## Acknowledgements:
The following github repo was used as a starting point for this configuration: https://github.com/dalehumby/ESPHome-Apple-Watch-detection

## RSSI Tracking
1.) Setup your apple watch in the "Private BLE Device" integration by following the instructions on the integration page: https://www.home-assistant.io/integrations/private_ble_device/

2.) Create a text sensor in the esphome config that grabs the apple watch current mac address from home assistant:
```yaml
text_sensor:
  - platform: homeassistant
    name: "Apple Watch Current MAC Address"
    id: apple_watch_mac
    entity_id: device_tracker.your_apple_watch_home_assistant_id
    attribute: current_address
```

3.)  Create a template sensor for storing and transmitting the rssi value:
```yaml
sensor:
  - platform: template
    id: apple_watch_rssi
    name: "Apple Watch RSSI"
    device_class: signal_strength
    unit_of_measurement: dBm
    accuracy_decimals: 0
    filters:
      - exponential_moving_average:
          alpha: 0.3
          send_every: 1
```

4.) Create a custom ble tracker that uses the mac address from home assistant to match the device:
```yaml
esp32_ble_tracker:
  scan_parameters:
    interval: 1.2s
    window: 500ms
    active: false
  on_ble_advertise:
    - then:
      - lambda: |-
          for (auto data : x.get_manufacturer_datas()) {
            if(x.address_str() == id(apple_watch_mac).state) {
              id(apple_watch_rssi).publish_state(x.get_rssi());
            }
          }
```

5) Ensure the power save mode for wifi is set to light (msr-1 defaults to using none which does not work with bluetooth tracking):
```yaml
wifi:
  power_save_mode: light
```

At this point if you install the changes on the device you should be successfully tracking the rssi for your apple watch. If you want you can optionally add some configuration for a basic presence detection sensor by doing the following:

## OPTIONAL PRESENCE DETECTION SECTION

6) Create configuration values for detection signal strength:
```yaml
number:
  - platform: template
    name: "RSSI Presence Level"
    id: rssi_present
    icon: "mdi:arrow-collapse-right"
    optimistic: true
    min_value: -100
    max_value: -35
    initial_value: -60
    step: 1
    entity_category: CONFIG
    restore_value: true
    update_interval: never
  - platform: template
    name: "RSSI Absence Level"
    id: rssi_not_present
    icon: "mdi:arrow-collapse-right"
    optimistic: true
    min_value: -100
    max_value: -35
    initial_value: -70
    step: 1
    entity_category: CONFIG
    restore_value: true
    update_interval: never
```

7) Create a sensor for storing and filtering the presence value:
```yaml
sensor:
  - platform: template
    id: room_presence_debounce
    filters:
      - sliding_window_moving_average:
          window_size: 3
          send_every: 1
```

8) Create a sensor for transmitting the filtered presence state:
```yaml
binary_sensor:
  - platform: template
    id: room_presence
    name: "Apple Watch Presence"
    device_class: occupancy
    lambda: |-
      if (id(room_presence_debounce).state > 0.99) {
        return true;
      } else if (id(room_presence_debounce).state < 0.01) {
        return false;
      } else {
        return id(room_presence).state;
      }
```

9) Update the rssi value to set the presence value when it receives a new rssi value:
```yaml
sensor:
  - platform: template
    id: apple_watch_rssi
    name: "Apple Watch RSSI"
    device_class: signal_strength
    unit_of_measurement: dBm
    accuracy_decimals: 0
    filters:
      - exponential_moving_average:
          alpha: 0.3
          send_every: 1
    on_value:
      then:
        - lambda: |-
            if (id(apple_watch_rssi).state > id(rssi_present).state) {
              id(room_presence_debounce).publish_state(1);
            } else if (id(apple_watch_rssi).state < id(rssi_not_present).state) {
              id(room_presence_debounce).publish_state(0);
            }
        - script.execute: presence_timeout  # Publish 0 if no rssi received
```

Now once you install the esphome changes you should be able to go to the device and set db values for the presence detection and also should see a presence sensor state.

## COMPLETE CONFIGURATION
A complete example of a configuration:
```yaml
substitutions:
  name: apollo-msr-1-6c7a64
  friendly_name: Living Room Multisensor
  roomname: Living Room
  yourname: Jacob

packages:
  ApolloAutomation.MSR-1: github://ApolloAutomation/MSR-1/Integrations/ESPHome/MSR-1.yaml
esphome:
  name: ${name}
  name_add_mac_suffix: false
  friendly_name: ${friendly_name}
api:
  encryption:
    key: xxxxxxxxxxxxxxxxxxxxxxxxxxxxxxxxxxxxxxxxxx


esp32_ble_tracker:
  scan_parameters:
    interval: 1.2s
    window: 500ms
    active: false
  on_ble_advertise:
    - then:
      - lambda: |-
          for (auto data : x.get_manufacturer_datas()) {
            if(x.address_str() == id(jacobs_watch_mac).state) {
              id(apple_watch_rssi).publish_state(x.get_rssi());
            }
          }
text_sensor:
  - platform: homeassistant
    name: "Apple Watch Current MAC Address"
    id: jacobs_watch_mac
    entity_id: device_tracker.jacob_s_apple_watch
    attribute: current_address

sensor:
  - platform: template
    id: apple_watch_rssi
    name: "$yourname Apple Watch $roomname RSSI"
    device_class: signal_strength
    unit_of_measurement: dBm
    accuracy_decimals: 0
    filters:
      - exponential_moving_average:
          alpha: 0.3
          send_every: 1
    on_value:
      then:
        - lambda: |-
            if (id(apple_watch_rssi).state > id(rssi_present).state) {
              id(room_presence_debounce).publish_state(1);
            } else if (id(apple_watch_rssi).state < id(rssi_not_present).state) {
              id(room_presence_debounce).publish_state(0);
            }
        - script.execute: presence_timeout  # Publish 0 if no rssi received

  - platform: template
    id: room_presence_debounce
    filters:
      - sliding_window_moving_average:
          window_size: 3
          send_every: 1


binary_sensor:
  - platform: template
    id: room_presence
    name: "$yourname $roomname Presence"
    device_class: occupancy
    lambda: |-
      if (id(room_presence_debounce).state > 0.99) {
        return true;
      } else if (id(room_presence_debounce).state < 0.01) {
        return false;
      } else {
        return id(room_presence).state;
      }

script:
  # Publish event every 30 seconds when no rssi received
  id: presence_timeout
  mode: restart
  then:
    - delay: 30s
    - lambda: |-
        id(room_presence_debounce).publish_state(0);
    - script.execute: presence_timeout

number:
  - platform: template
    name: "RSSI Presence Level"
    id: rssi_present
    icon: "mdi:arrow-collapse-right"
    optimistic: true
    min_value: -100
    max_value: -35
    initial_value: -60
    step: 1
    entity_category: CONFIG
    restore_value: true
    update_interval: never
  - platform: template
    name: "RSSI Absence Level"
    id: rssi_not_present
    icon: "mdi:arrow-collapse-right"
    optimistic: true
    min_value: -100
    max_value: -35
    initial_value: -70
    step: 1
    entity_category: CONFIG
    restore_value: true
    update_interval: never

wifi:
  power_save_mode: light
  ssid: !secret wifi_ssid
  password: !secret wifi_password
```
Android
Helpful links:
ESP32 Bluetooth Low Energy Tracker Hub
iBeacon support for ble_presence
ESP32 Bluetooth Low Energy Beacon
iBeacon Region
- Install the iBeacon integration in HA
iBeacon Install Guide - Install the Home Assistant App on your device
Android
Apple - Navigate to the HA settings
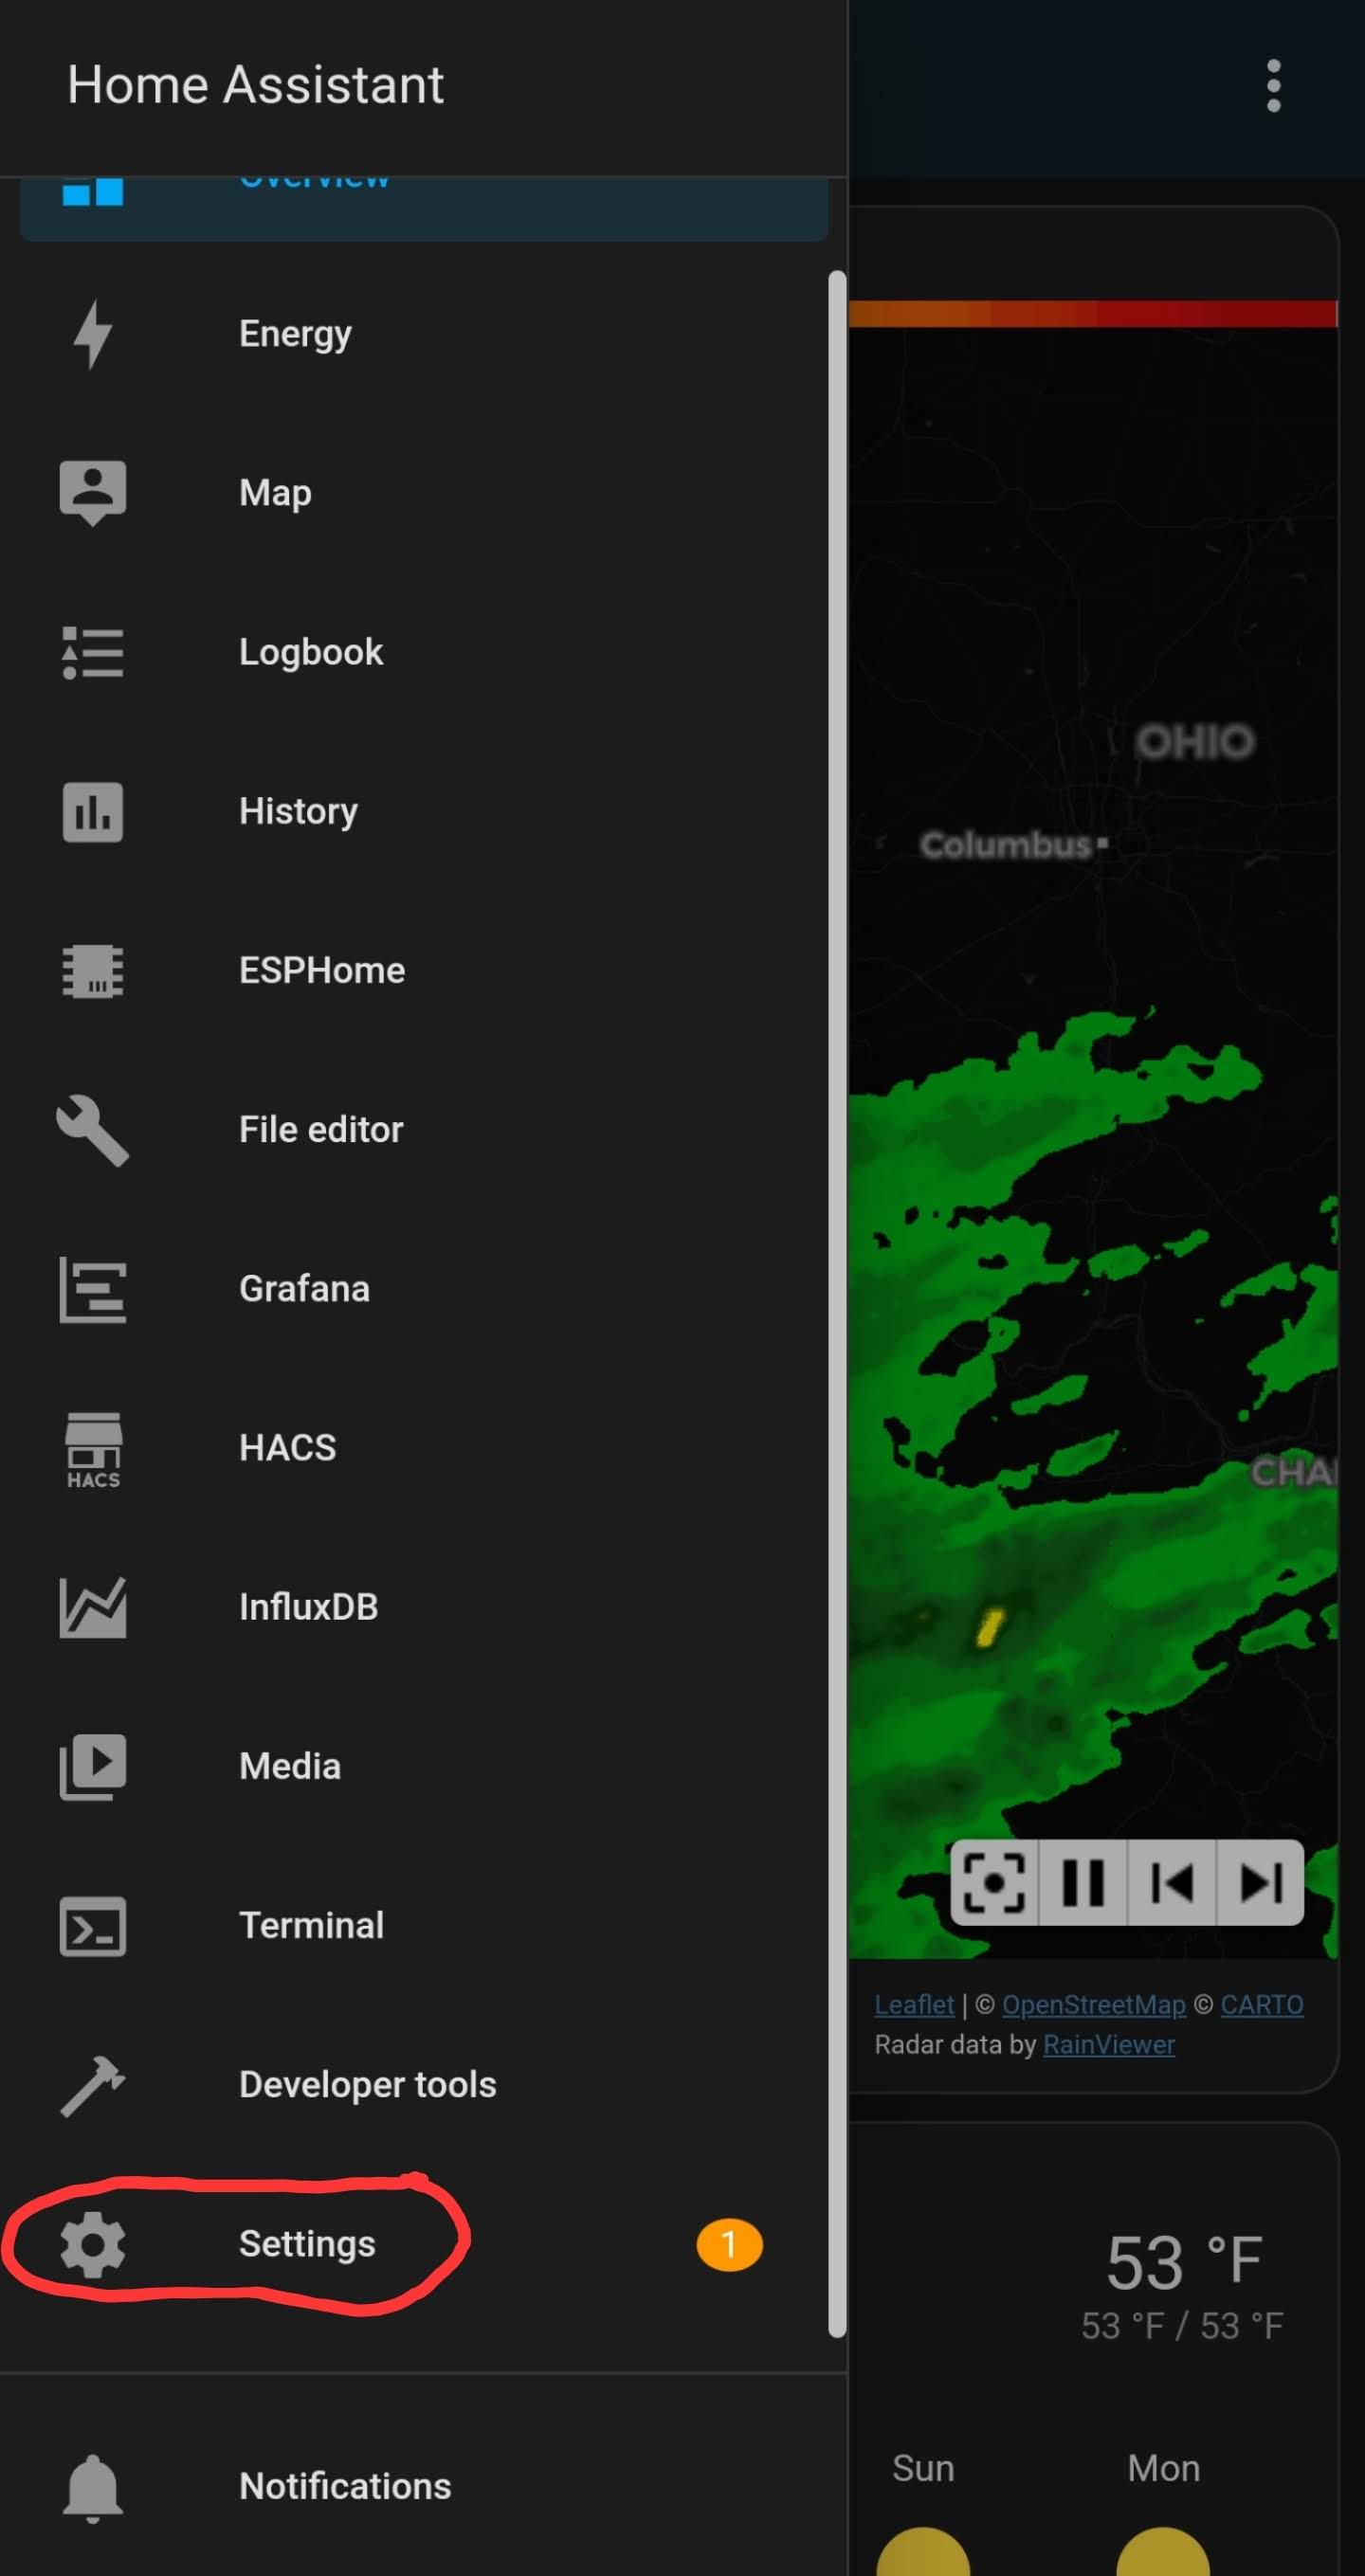
- Select Companion app
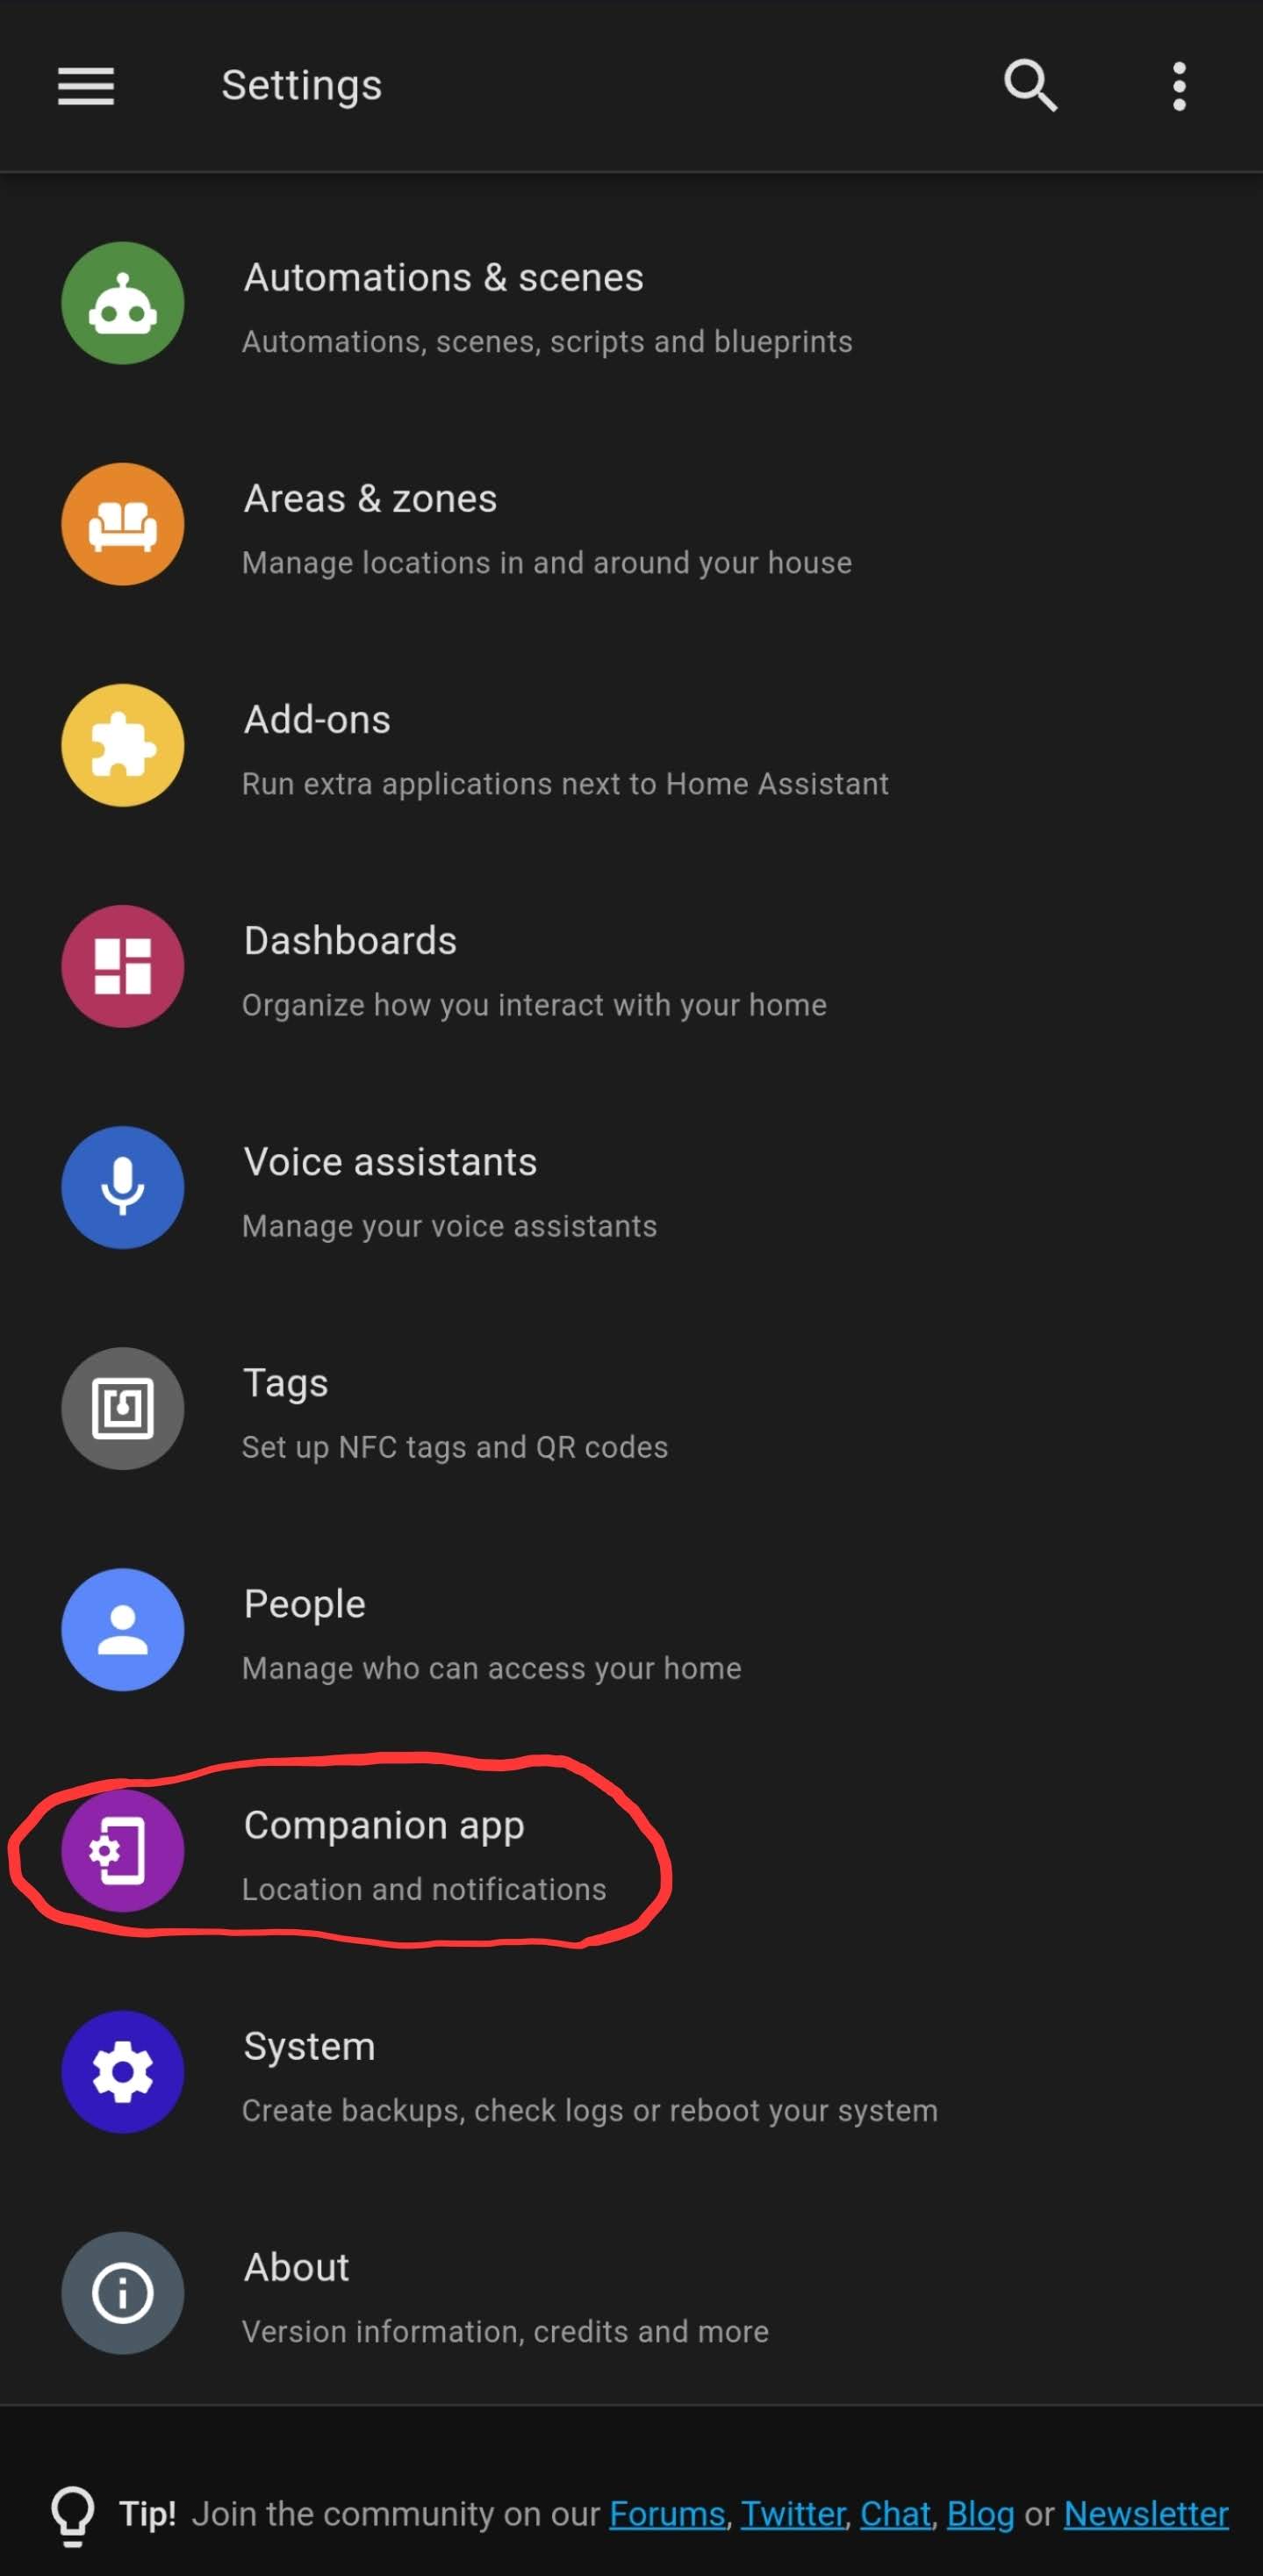
- Select Manage sensors
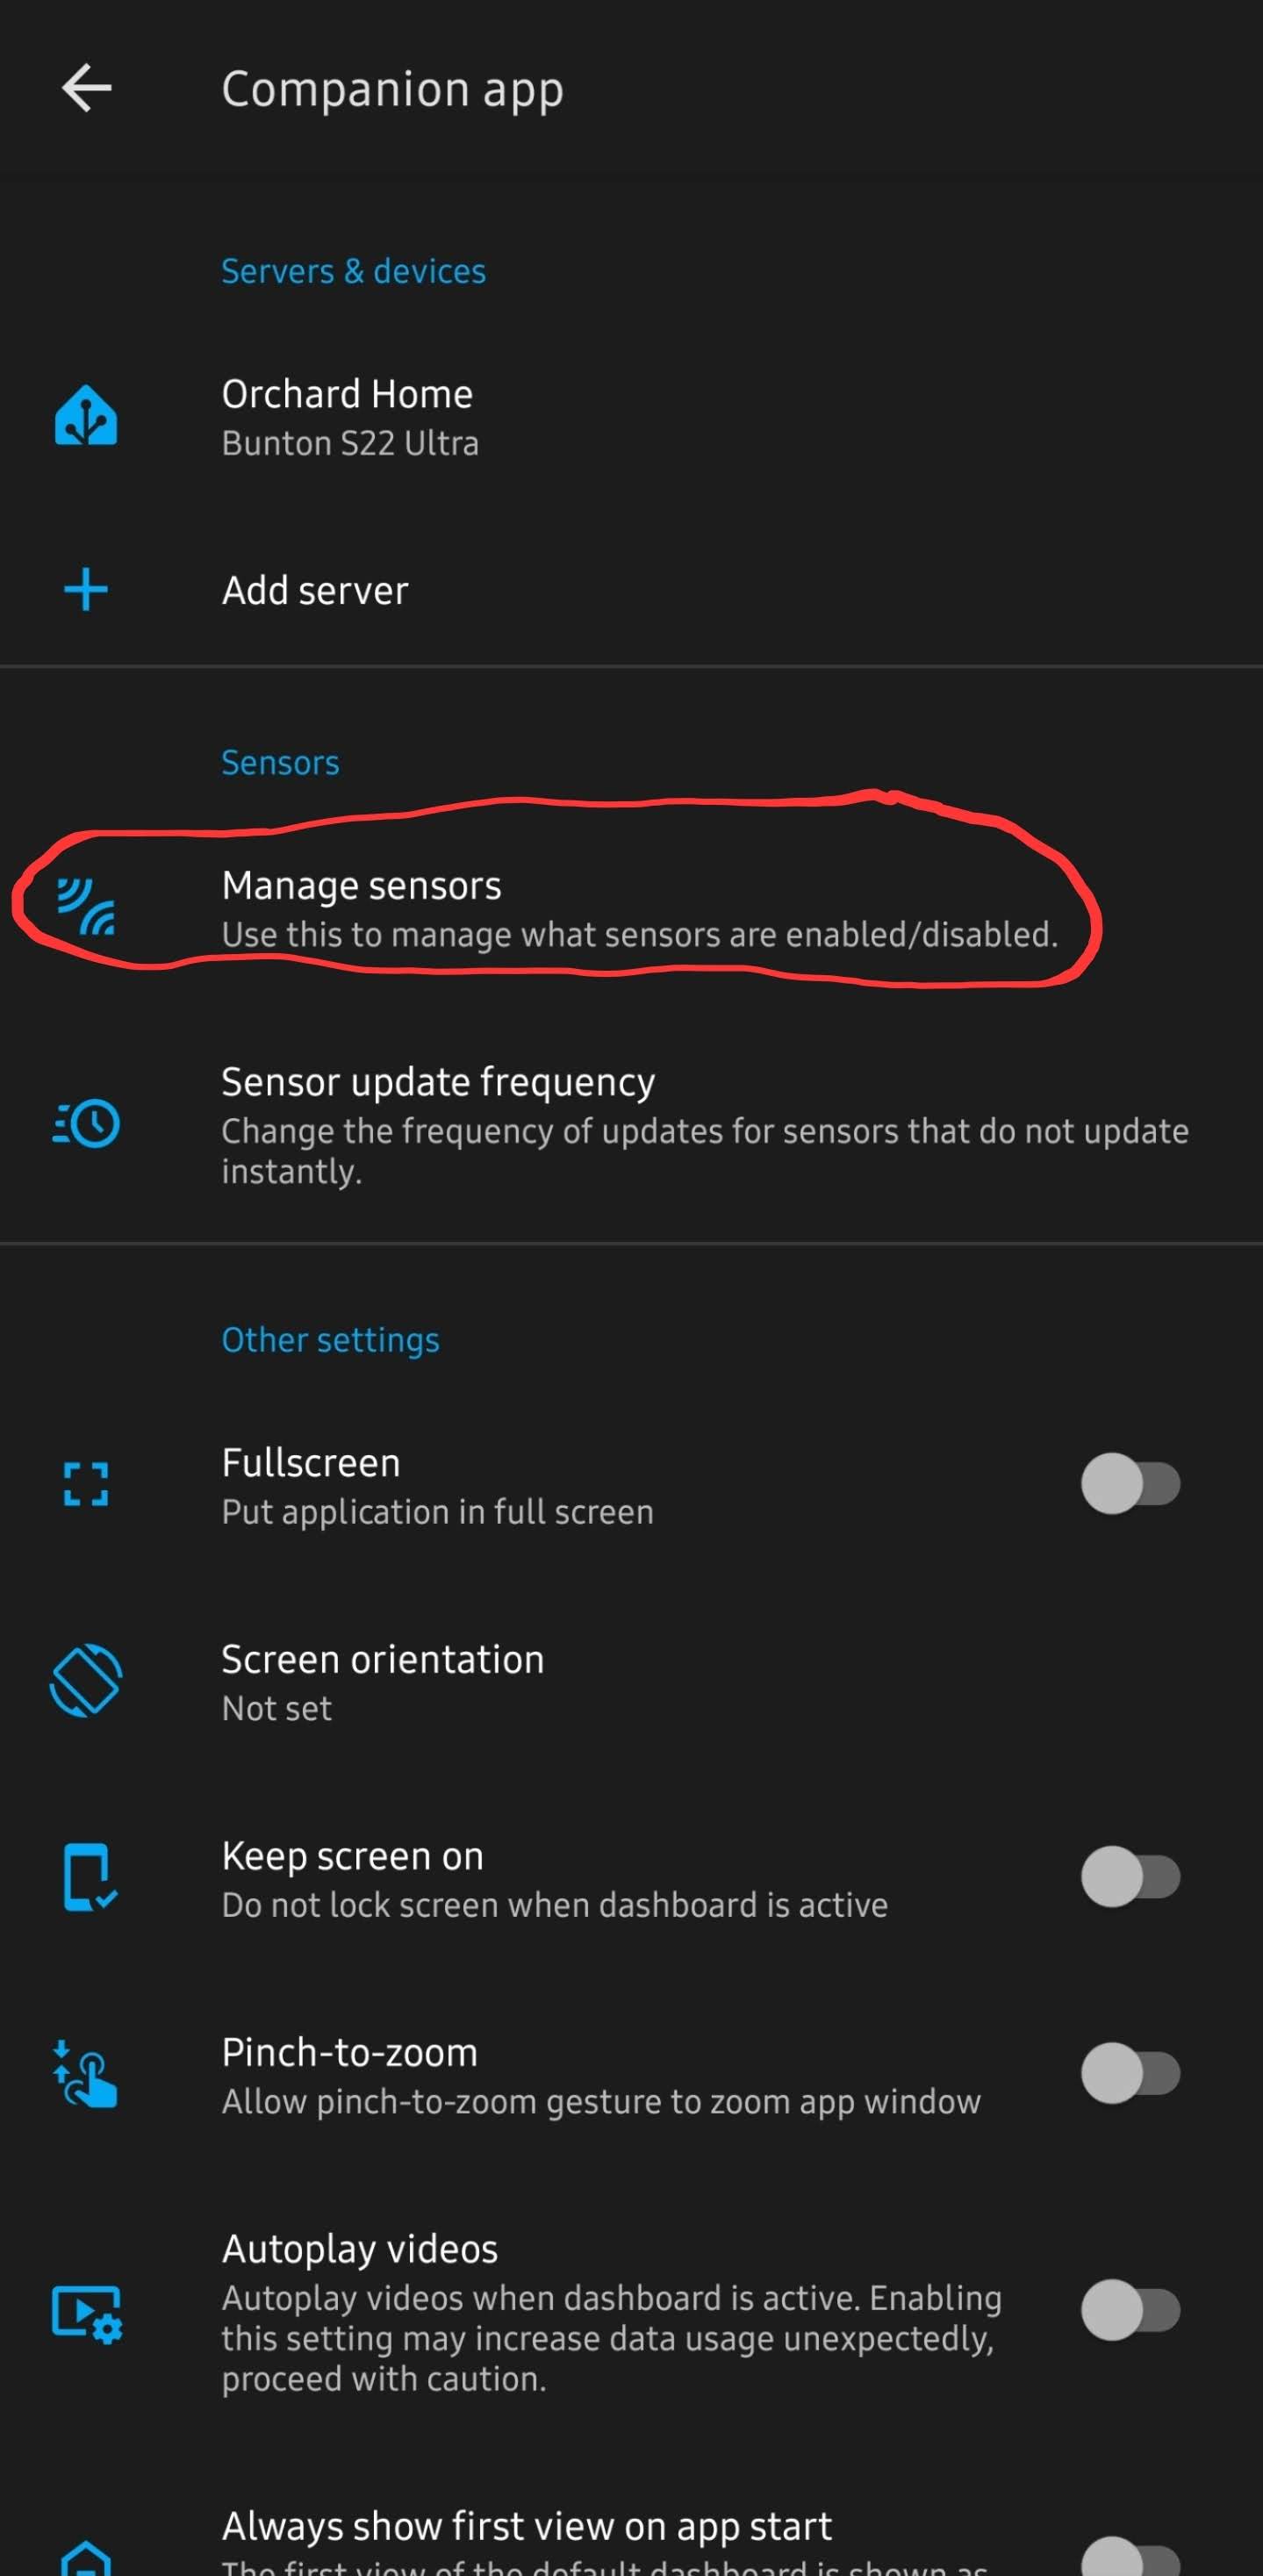
- Turn on the "BLE Transmitter"
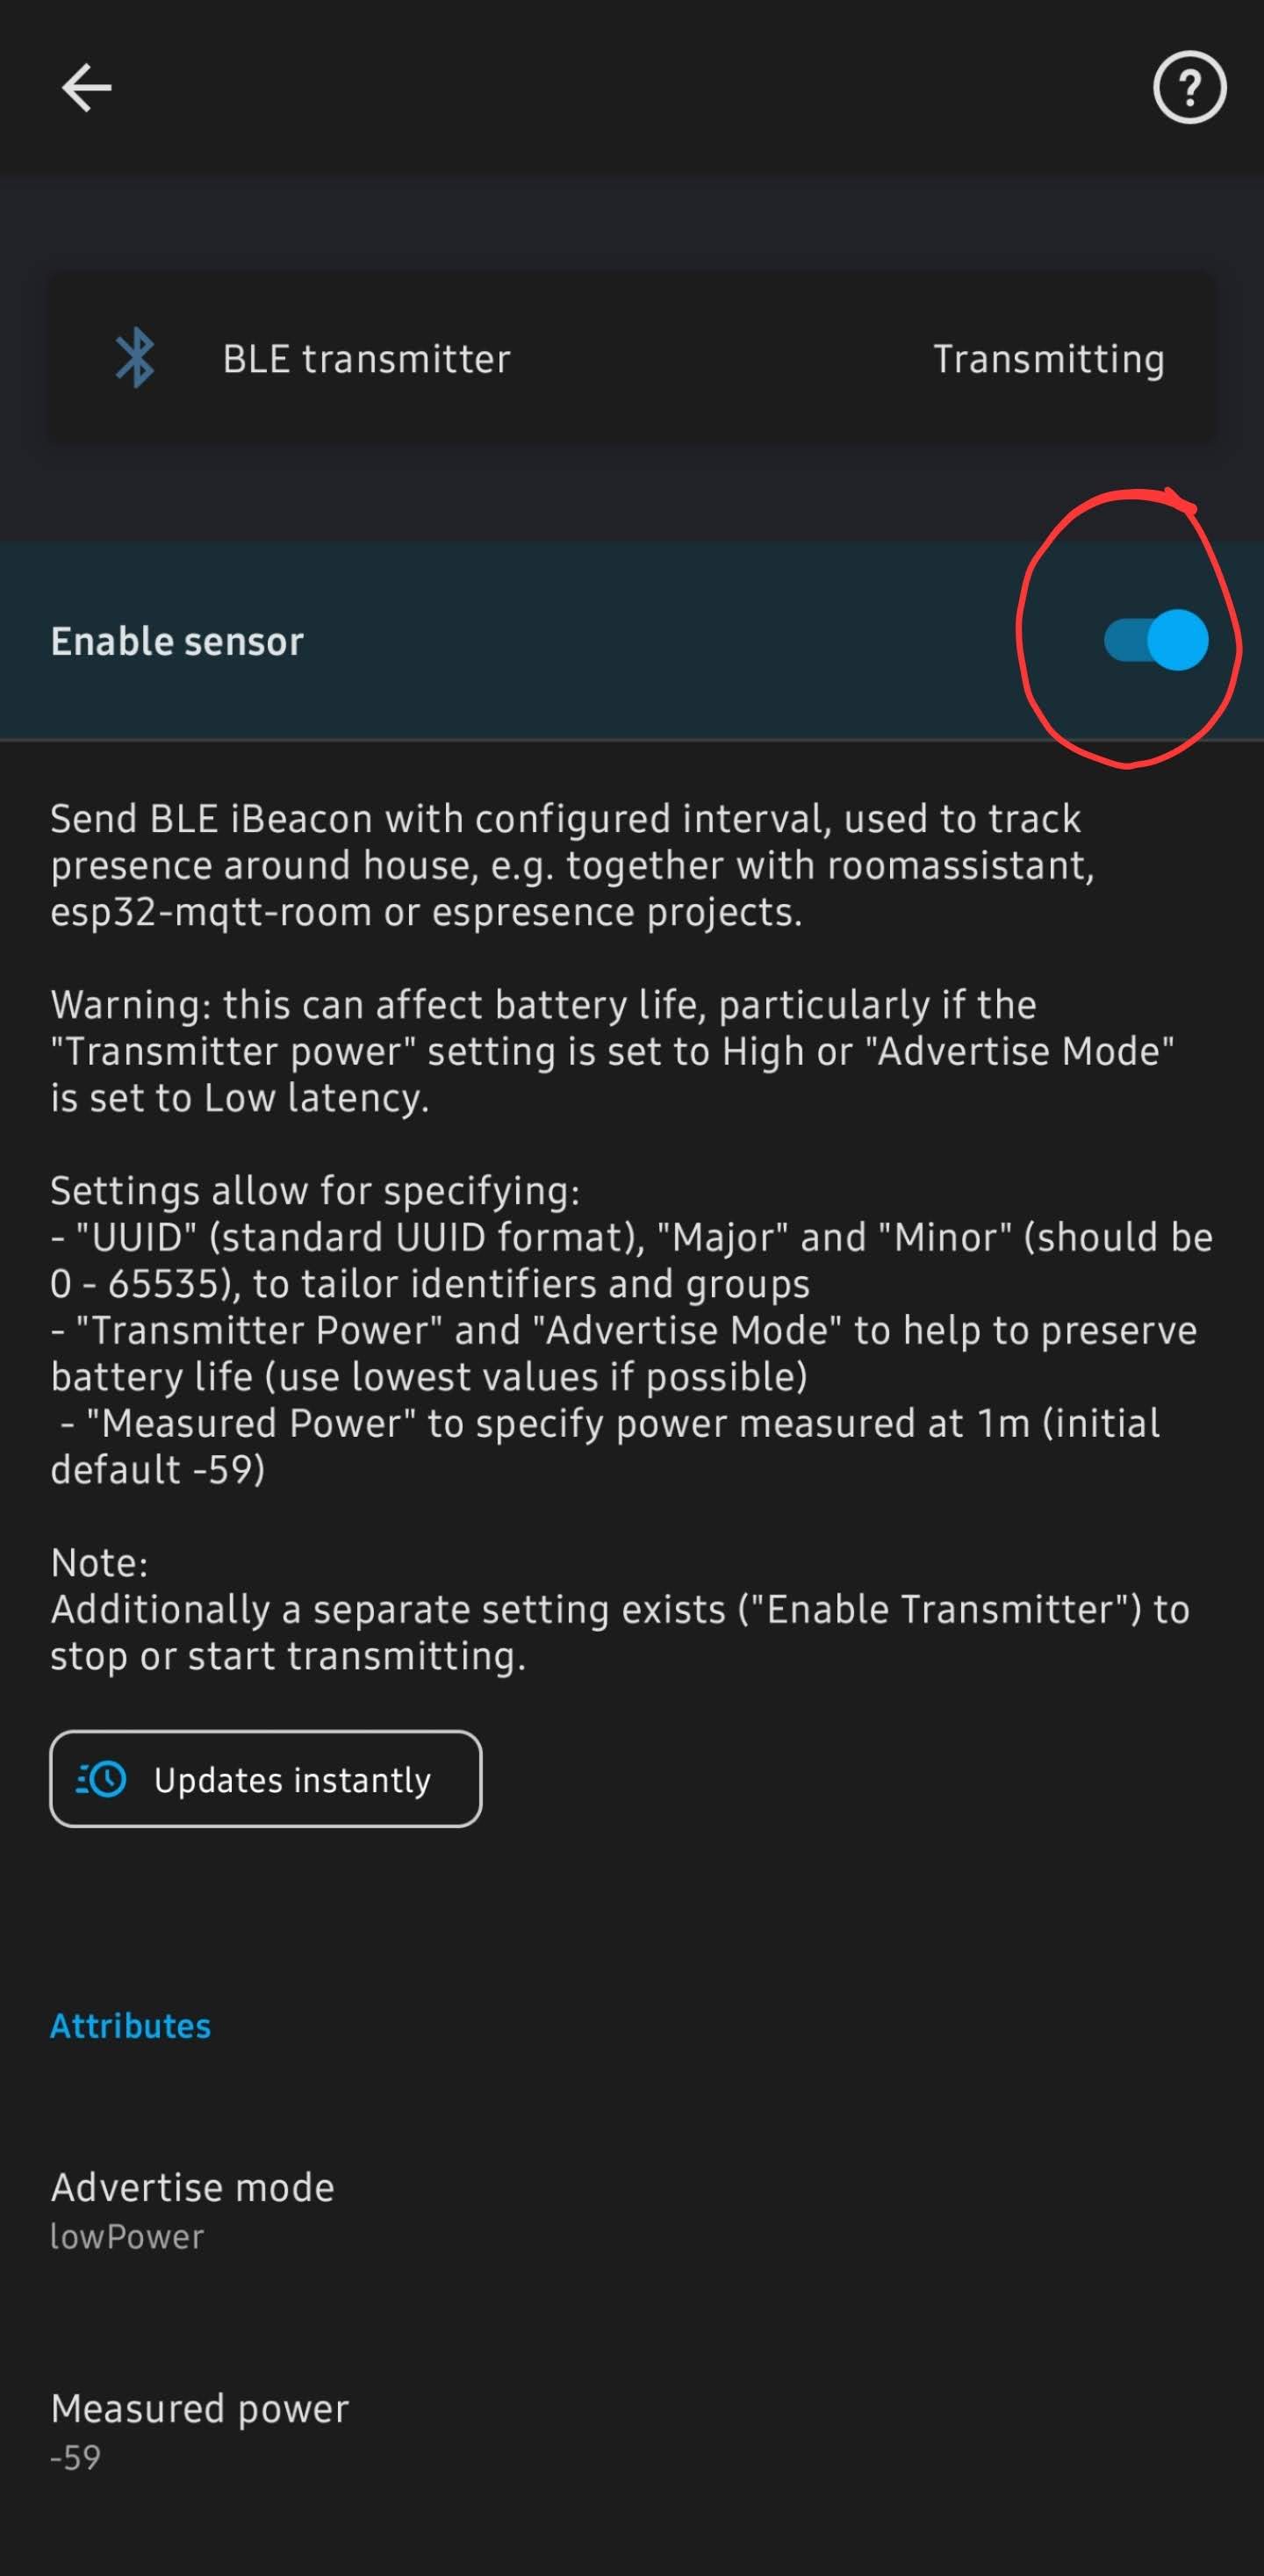
- After opening BLE transmitter and turning it on, then scroll down to get the iBeacon unique ID
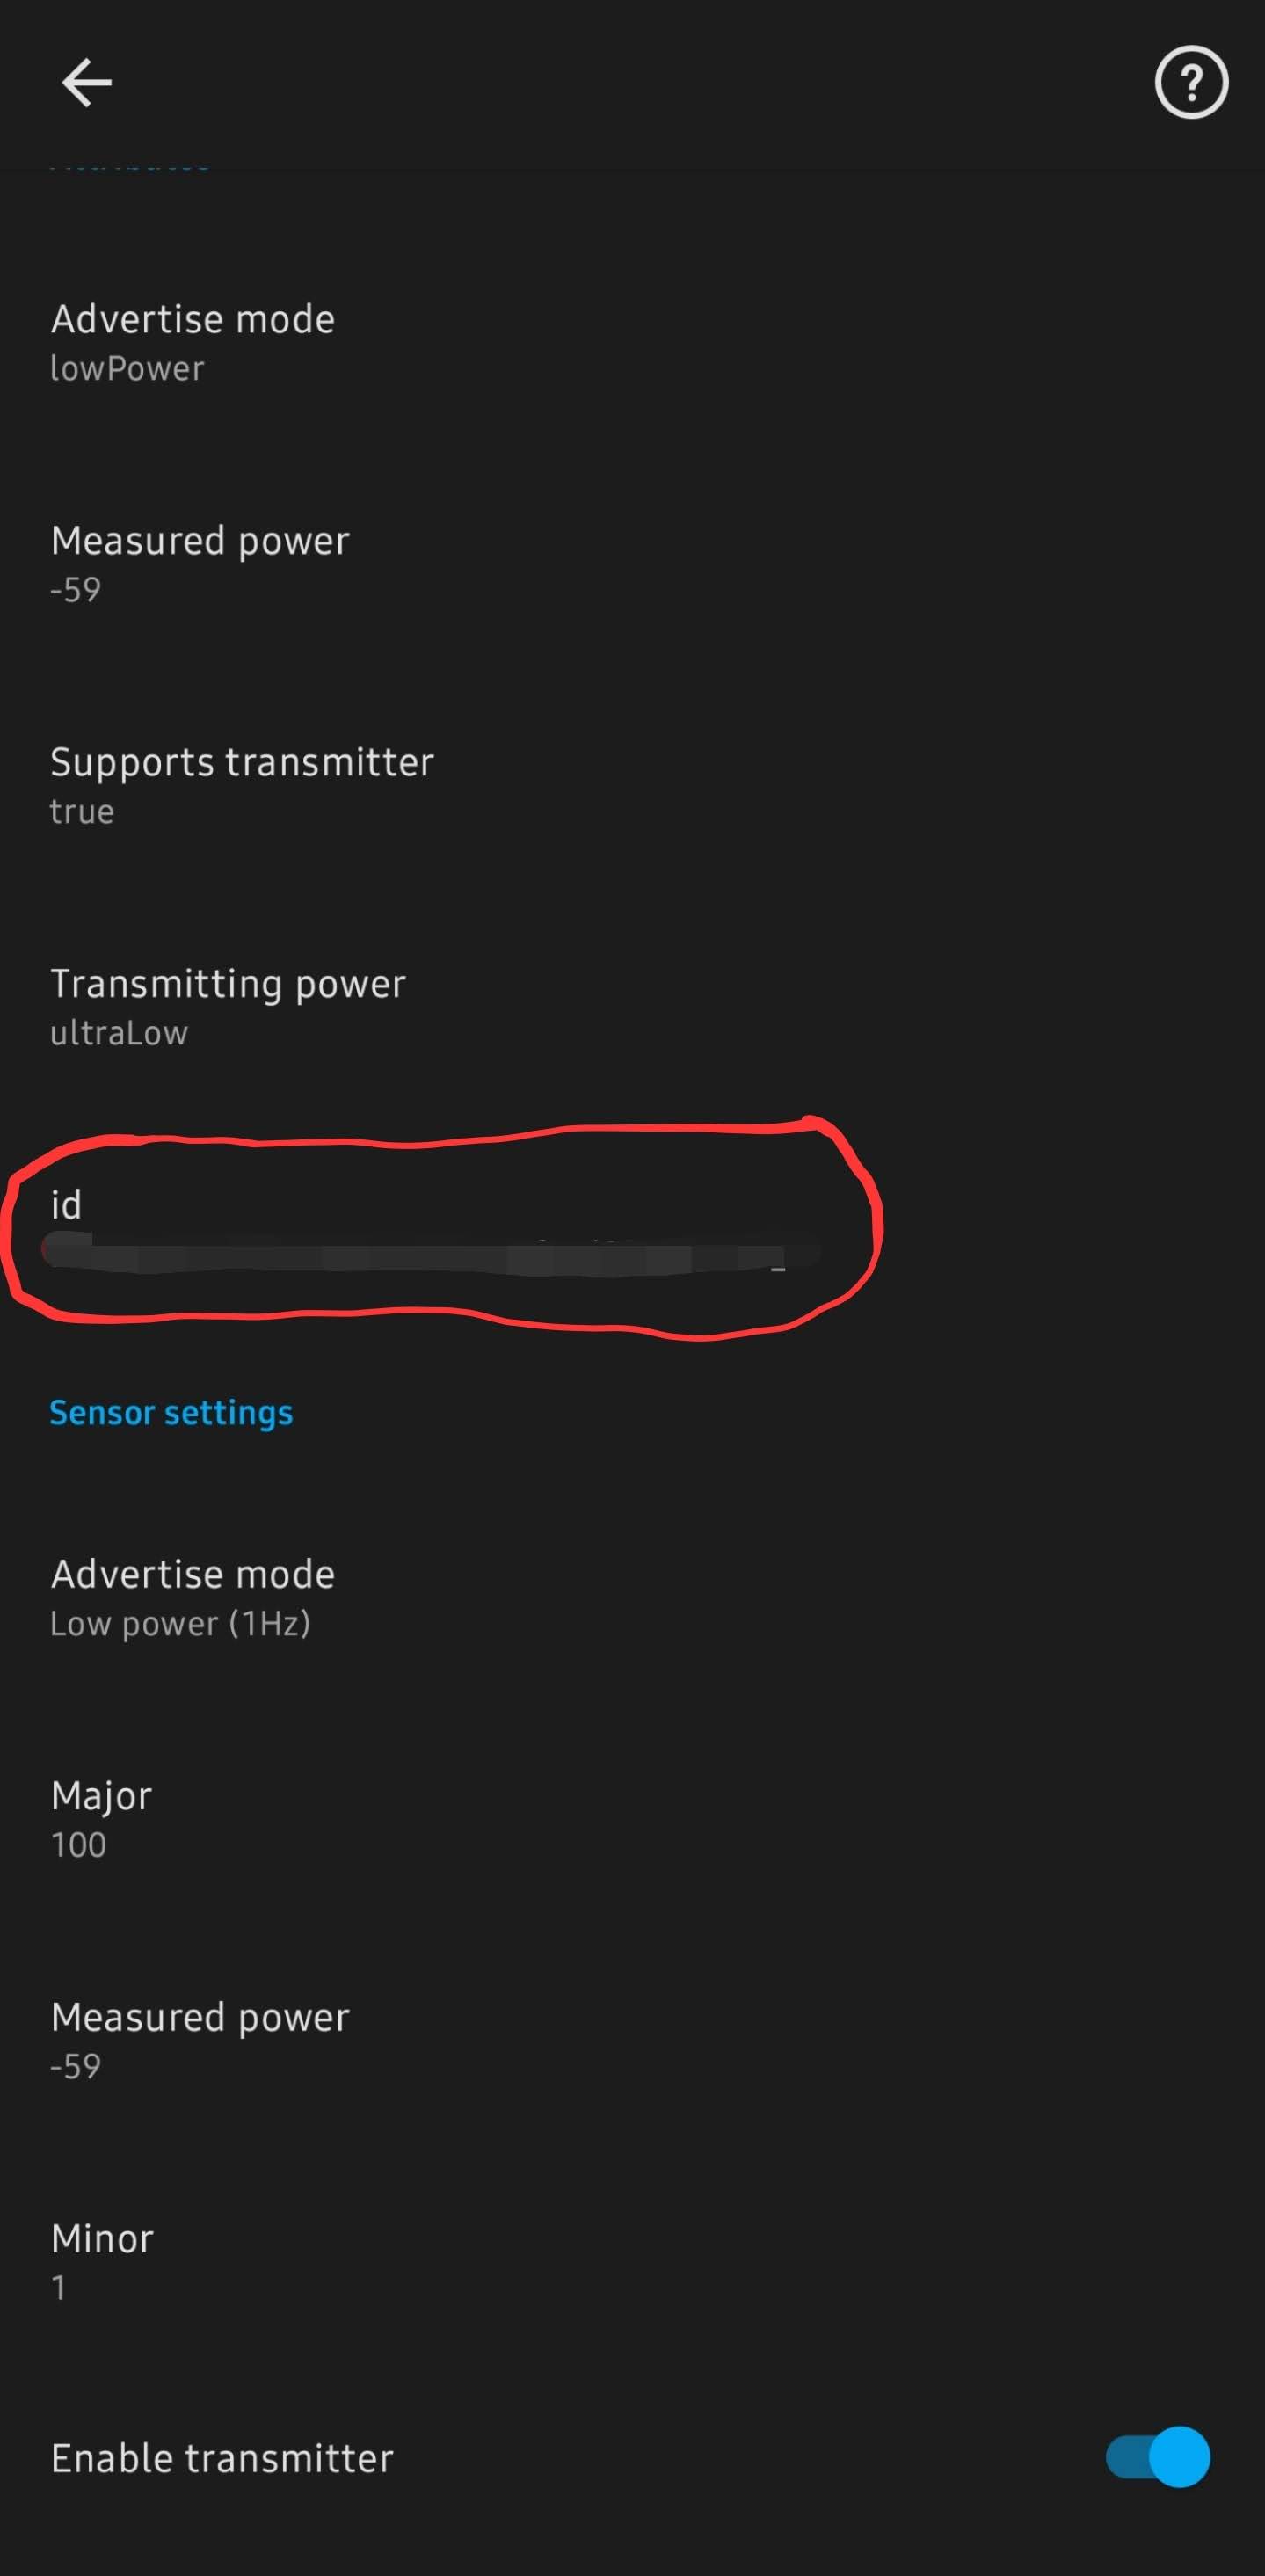
- Add it to the ESPHome yaml config for the MSR-1
- Be sure to add "power_save_mode: LIGHT" to the wifi section
# Example config.yaml wifi: ssid: !secret wifi_ssid password: !secret wifi_password power_save_mode: LIGHT esp32_ble_tracker: binary_sensor: - platform: ble_presence ibeacon_uuid: '77a6438d-ea95-4522-b46c-cb2b4412076f' ibeacon_major: 100 ibeacon_minor: 1 name: "Jane's Phone" - Should be all set!


Thanks to our Discord user albuquerquefx for the information below!
For those interested in using their MSR-1 as a Bluetooth proxy while also actively scanning for BLE devices, you'll need to add the following to your ESP32 YAML file (I'm using a 1.5-second scan interval with a 750ms window for sensing BLE beacons):
esp32_ble_tracker:
id: ${name}_ble_tracker
scan_parameters:
interval: 1500ms
window: 750ms
active: true
bluetooth_proxy:
active: true
Additionally, you need to include this entry in your existing Wi-Fi section:
power_save_mode: light
Once complete, after a few minutes within the presence of any iBeacon device within listening distance of your MSR-1, Home Assistant should announce the presence of an iBeacon Tracker integration on your settings page. While I didn't capture a screenshot of it, it's now installed and sensing things.
If you encounter a device with a blank name (e.g., anything Android), you'll need to click "Configure" and enter the UUID manually. This is because Home Assistant does not allow devices with empty names (interestingly, their own companion app permits forcing an Android to become an iBeacon but then doesn't require a name field).
For devices where you don't know the IRK, you may have to wait about 300 seconds for your iBeacon Tracker to process 10 different iterations of the same UUID but with the last four characters randomly changed. Once ten instances have appeared, the iBeacon Tracker integration should recognize they're all the same device and combine them into a single tracker element. Just be patient, though it can be a bit frustrating.
Renaming Apollo Devices
ESPHome Integration
1. Go to settings and select Devices & services

2. Select ESPHome

3. Select the three dots next to the device and select Rename

4. Rename the device and select OK

ESPHome Addon
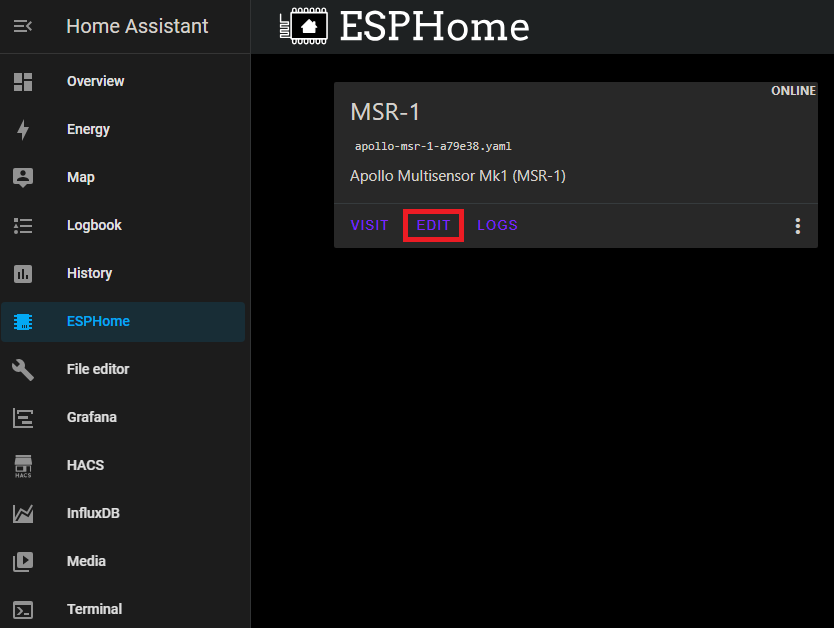
1. Select the ESPHome addon in the sidebar
2. Select Edit on the device you want to rename

3. Chane the friendly_name and save it

These new names can be used in automations.

Full Renaming
Thanks to Panzer from our Discord.
- Install the first MSR-1 using the standard method to get a default ESPHome configuration.
- Edit this configuration to update the "name" and "friendly name" as desired.
- SSH into the ESPHome directory and copy this configuration six times, then modify each copy with unique names, friendly names, and API keys. (Can also use VSCode/File Editor to copy the configuration from the ESPHome folder)
- Delete the initially defined sensor in ESPHome and devices (if added there), and possibly reboot.
- Now with six distinct configs, use the 'install' option in ESPHome, select "plug into this computer", and connect the MSR-1 to your computer.
- Download the generated "factory-image" from ESPHome on Home Assistant (HA) and flash it. This will install the sensors without MAC-based names.
- Repeat the process for the remaining sensors.
- Add the sensors to devices if they are discovered.
- Can now update the sensors wirelessly again.


Alternative Method
Thanks to lpbaud from our Discord.
Instead of changing the name as your document suggests, you can go to System > Devices and Services > Devices, then click the device you want to rename. Next, click the pencil icon in the upper right corner of the screen and rename the device there. Doing it this way, after you click "Update," it will ask if you want to change the entity ID, as shown in the picture above. If you click "Update" here, it will change all the entity IDs, like in the other picture above.
Here's another tip for using this naming scheme or a similar one in Node-RED: In the Entity State node dialog, if you click the empty box labeled "Entity," a small box will open beneath it displaying a list of all the available entity names, in no particular order. If you start typing in that box, it filters the list based on what you type. So, if my kitchen MSR is named msr-k and I want to trigger an event based on the value of radar target, I would type "-k target." The space between words acts as a wildcard, so the list is filtered by everything containing "-k" and "target," allowing you to select the one you need. Quite handy.
How To Change The Update Frequency Of Sensors/Force Update

3. Insert your code (The example below is for our AIR-1 SEN55 sensor)
sensor:
  - platform: sen5x
    id: !extend sen55
    update_interval: 5s
4. In the top right of the same screen Select Save and then Install
5. If it compiles correctly then you should see a green Success

6. When you see the sensor logs, you are finished and can select Stop

7. Now your sensor value should update!
Force Update
Follow the same steps above but use this code to force the sensor to update.
sensor:
- platform: sen5x
  id: !extend sen55
  nox:
    name: "SEN55 NOX"
    force_update: True
How To Add Temp And Humidity From SCD40
3. Insert your code (The example below is for our AIR-1 SEN55 sensor but this applies to MSR-1/2, MTR or any sensor with the CO2 module)
sensor:
  - platform: scd4x
    id: !extend scd40
    temperature:
      name: "SCD40 Temperature"
    humidity:
      name: "SCD40 Humidity"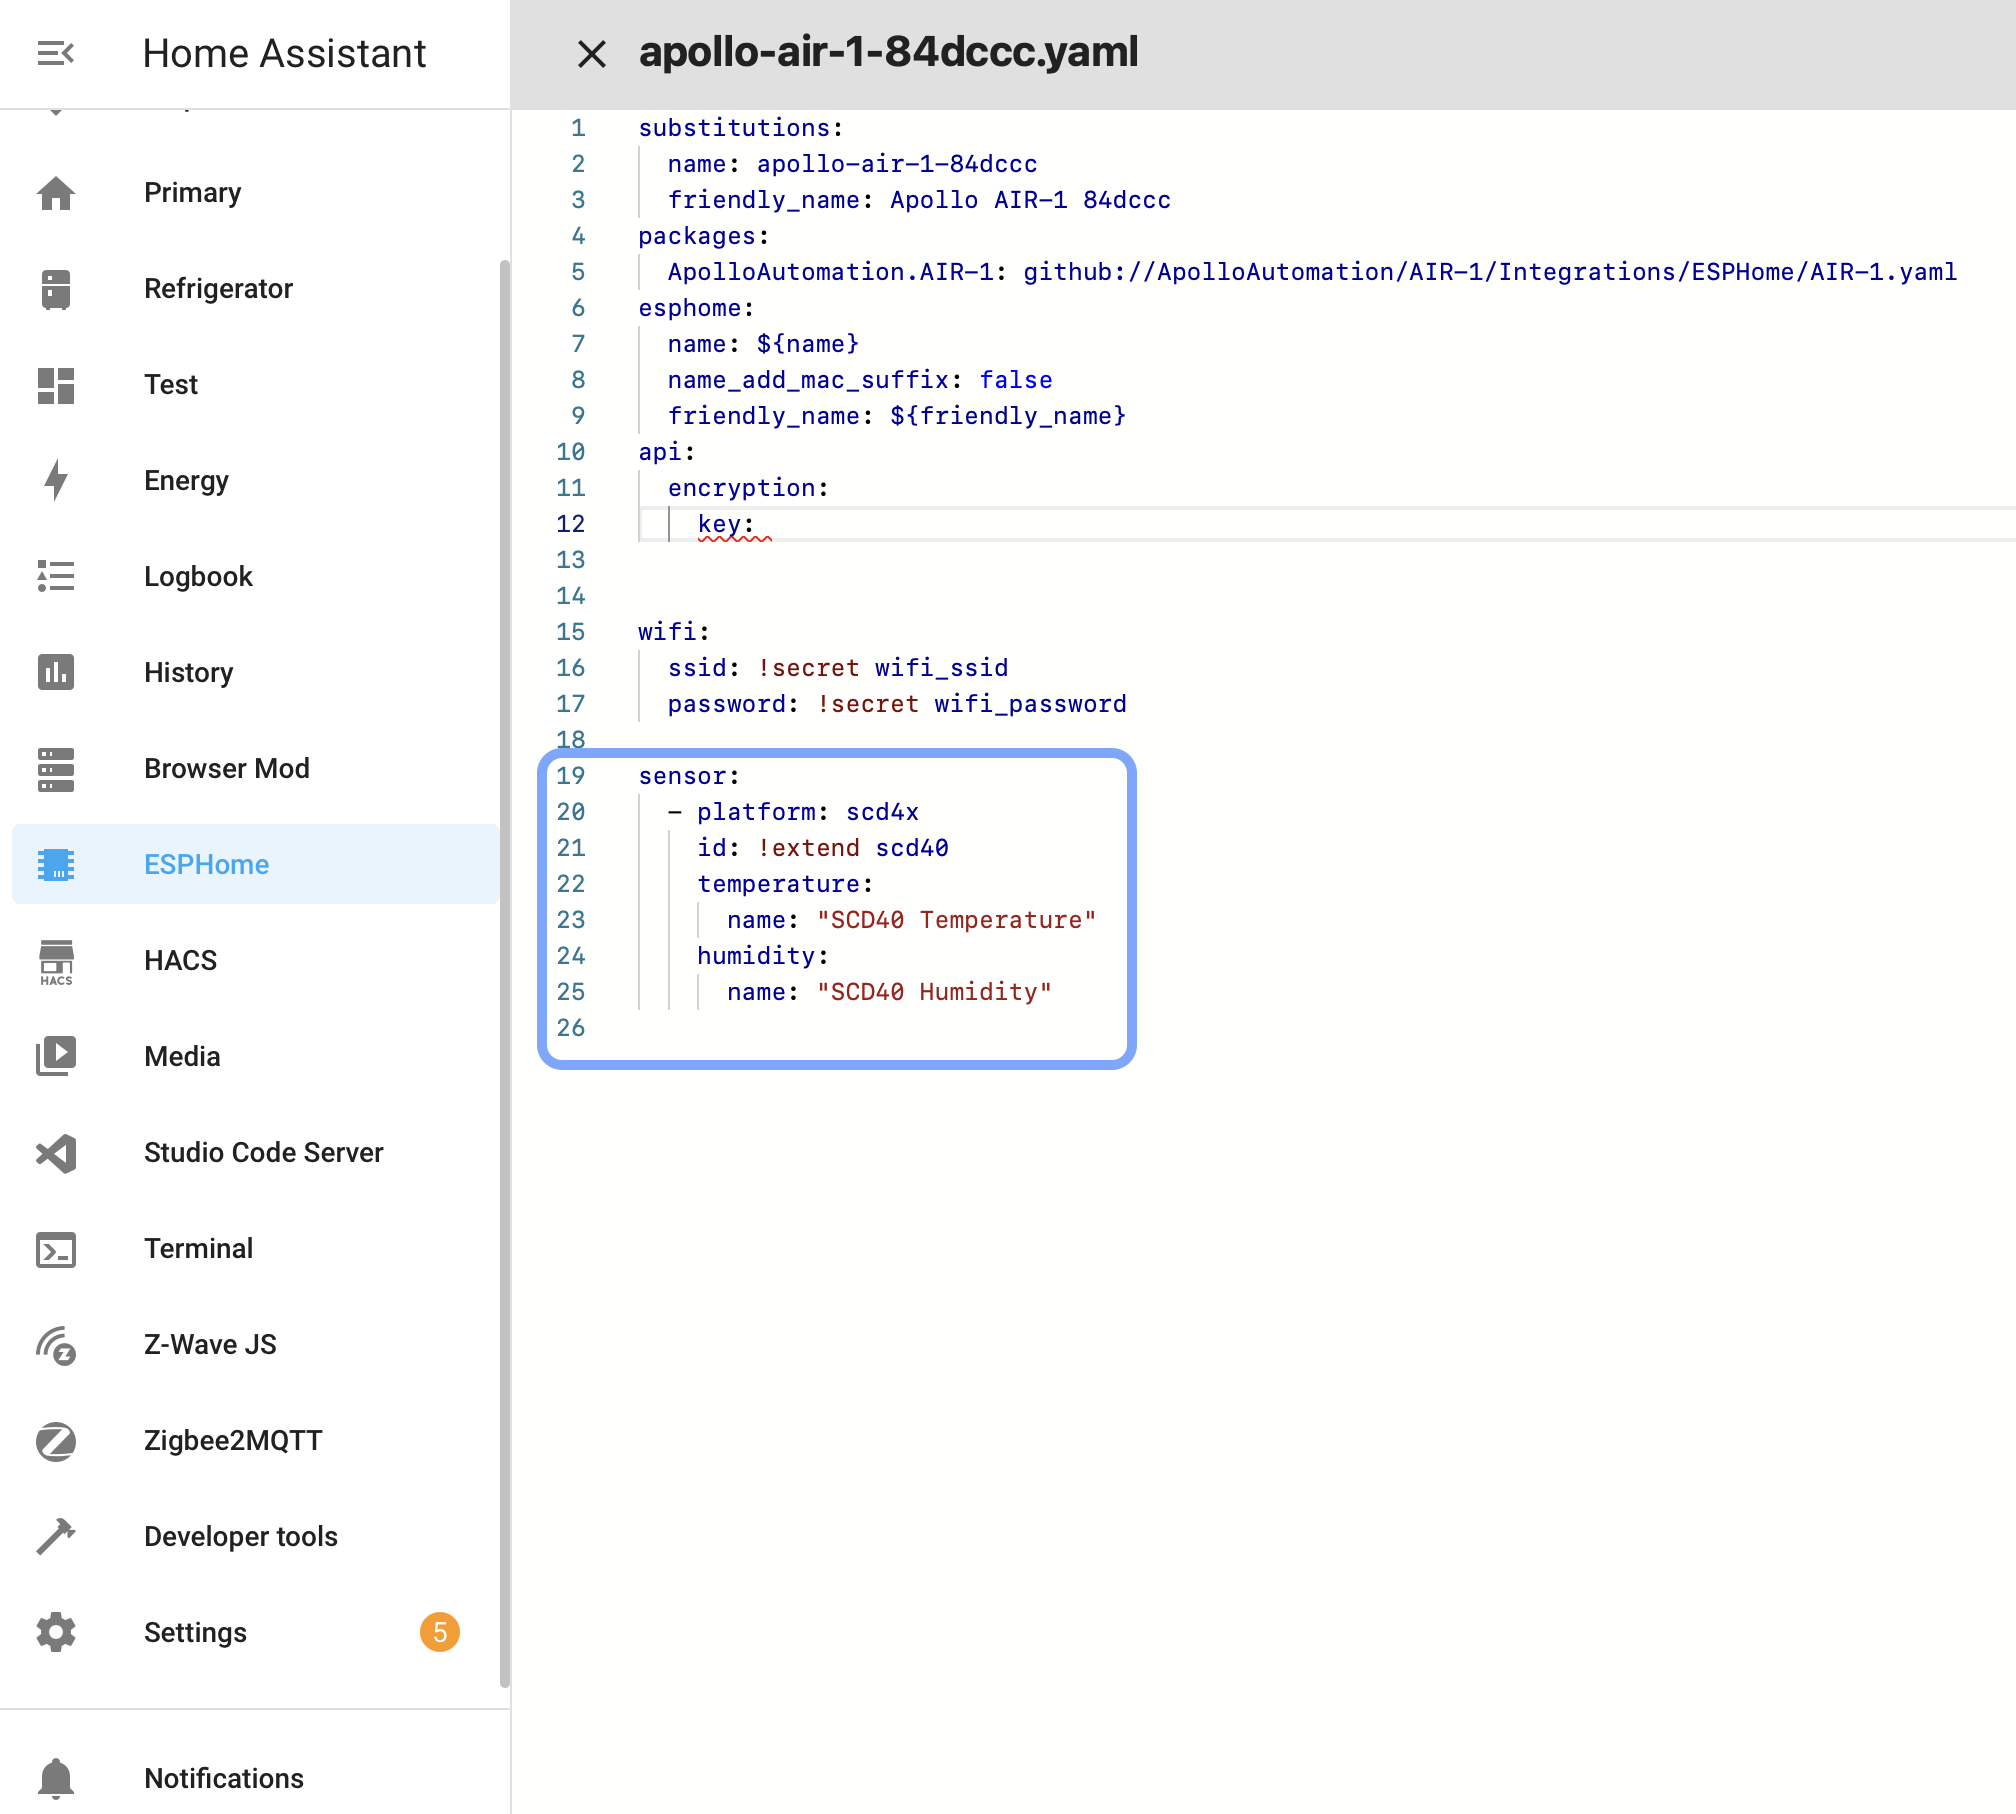
4. In the top right of the same screen Select Save and then Install
5. If it compiles correctly then you should see a green Success
6. When you see the sensor logs, you are finished and can select Stop
7. Now your sensor value should update!
Adjusting Wifi Power Save
The ESP chips produce a significant amount of energy constantly using wifi. Here is how to adjust the wifi power save mode
- In ESPHome's addon, click on "Edit" for the sensor you want to adjust
-
- Add the code to adjust the power
-
wifi: ssid: !secret wifi_ssid password: !secret wifi_password power_save_mode: HIGH -

-
- In the top right, click on "Save" then "Install"