Calibrating And Updating
Updating Firmware
Updating Through ESPHome Addon
- In HomeAssistant open the ESPHome addon
- Or click this to Open your Home Assistant instance and show the dashboard of the ESPHome add-on.
- Make sure you are running the latest version of ESPHome
- On older hardware, it will not auto-update so you will have to uninstall and reinstall ESPHome
- Find the sensor you want to update and click the three dots in the bottom right

5. Select “Validate” from the list

6. Once the validation completes, click “Install” in the bottom right

7. Complete!
CO2 Calibration
1. Take your sensor outside (for a walk :D) and plug it in. Make sure it is connected to Home Assistant and let it sit powered on for 3-5 minutes outside before starting the calibration.


3. Select Devices & Services

4. Select ESPHome

5. Find your sensor and click on the blue “1 device” link

6. Press the Calibrate SCD40 button and you are all set!
If you do not see this button, either update your firmware or refer to this older revision
It can take a few times clicking the calibrate for it to equalize correctly. If you don't see the SCD40 reporting 400-500 ppm then click it again.

7. Now your CO2 sensor should be calibrated! Be sure to setup some nice cards on your dashboard so you can monitor the CO2 levels. My bedroom's CO2 levels got dangerously high and I had to run my HVAC more frequently at night to circulate the air. See examples of cards and data below.
Example Home Assistant Card

Dangerous CO2 levels in bedroom. Steep decline in level due to opening door, window and running fan.

Wisconsin Department of Health CO2 Level Chart

CO2 levels staying below 1500 ppm after changing HVAC fan schedule to circulate air more frequently. Need to increase air exchange to get below 1000 ppm for a safer environment.

CO2 Calibration - The Quick method - Desktop Only not mobile
This article will guide you through a simple calibration of your CO2 sensor for any Apollo Automation device!
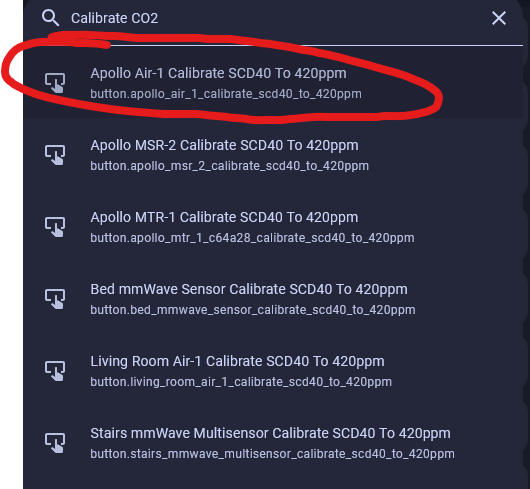
- Go to your home assistant dashboard and hit the letter "e" - It will pop up with an entity filter and here we will type in "Calibrate CO2" and select the correct device.
*HINT* If you cannot get this menu to pop-up, click somewhere on the home assistant dashboard then press your "e" key *HINT*
- DO NOT RUSH THIS Go Plug your sensor in outside and let it sit for 5 minutes or more to get normalized readings DO NOT RUSH THIS
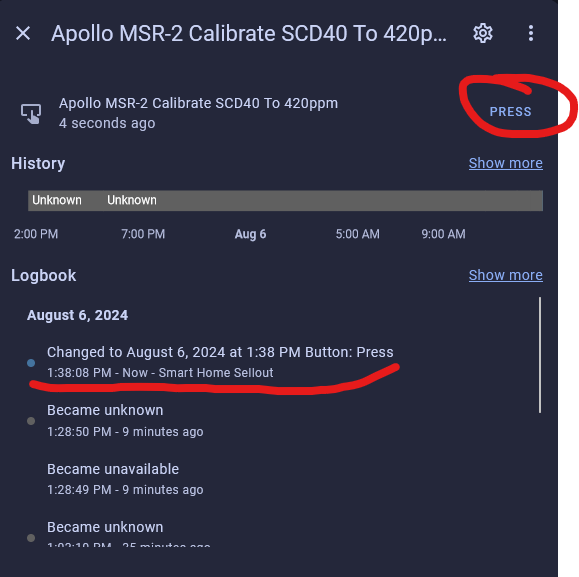
- Click on the button that says "PRESS" and then you are done.
4. Go get your sensor from outside and plug your sensor in wherever you want it!